A kitchen backsplash may not take up much square footage, but it can have an outsized impact on how the whole room looks and works. Sitting right in the eyeline, between countertops and cabinetry, it can sharpen up simple kitchen designs, calm down busier ones, or provide the detail that pulls everything together. It also happens to occupy one of the messiest stretches of wall in the house, dealing daily with water, grease, steam, food splatters, and vigorous sauce stirring.
That combination of high visibility and hard use is what makes choosing a kitchen backsplash trickier than simply falling for the perfect tile. Material and finish determine how well it stands up to life, while size, color, pattern, and grout can completely alter its visual impact. How it meets the rest of the kitchen matters just as much.
‘Even a high-end backsplash can look bad if it hasn’t been properly planned around windows, open shelves, cabinet edges or range hoods. There’s nothing more annoying than walking into your kitchen every morning and seeing backsplash that sticks out or overlaps awkwardly – what an eyesore!’ says Nancy Vu, Co-founder of M&S Construction Group.
This guide is designed to take some of the guesswork out of it. We’ll work through the decisions in logical order, from choosing the right material and working out how much wall to cover to getting the color, layout and finishing details right. We’ll also flag the practical issues worth knowing before you buy, so that by the time installation starts, the difficult decisions have already been made – and your new backsplash looks as dreamy IRL as it did on paper.
1. Start with How Your Kitchen Works
Before looking at stone slabs or tile samples, consider what happens against the walls of your kitchen. A backsplash behind a sink that sees constant washing-up has a different job from one on a wall occupied mainly by a coffee station. Likewise, the surface immediately behind a frequently used range has to cope with grease, food splashes, and heat in a way that an empty stretch above a side counter may not.
Identify the Hardest-Working Areas
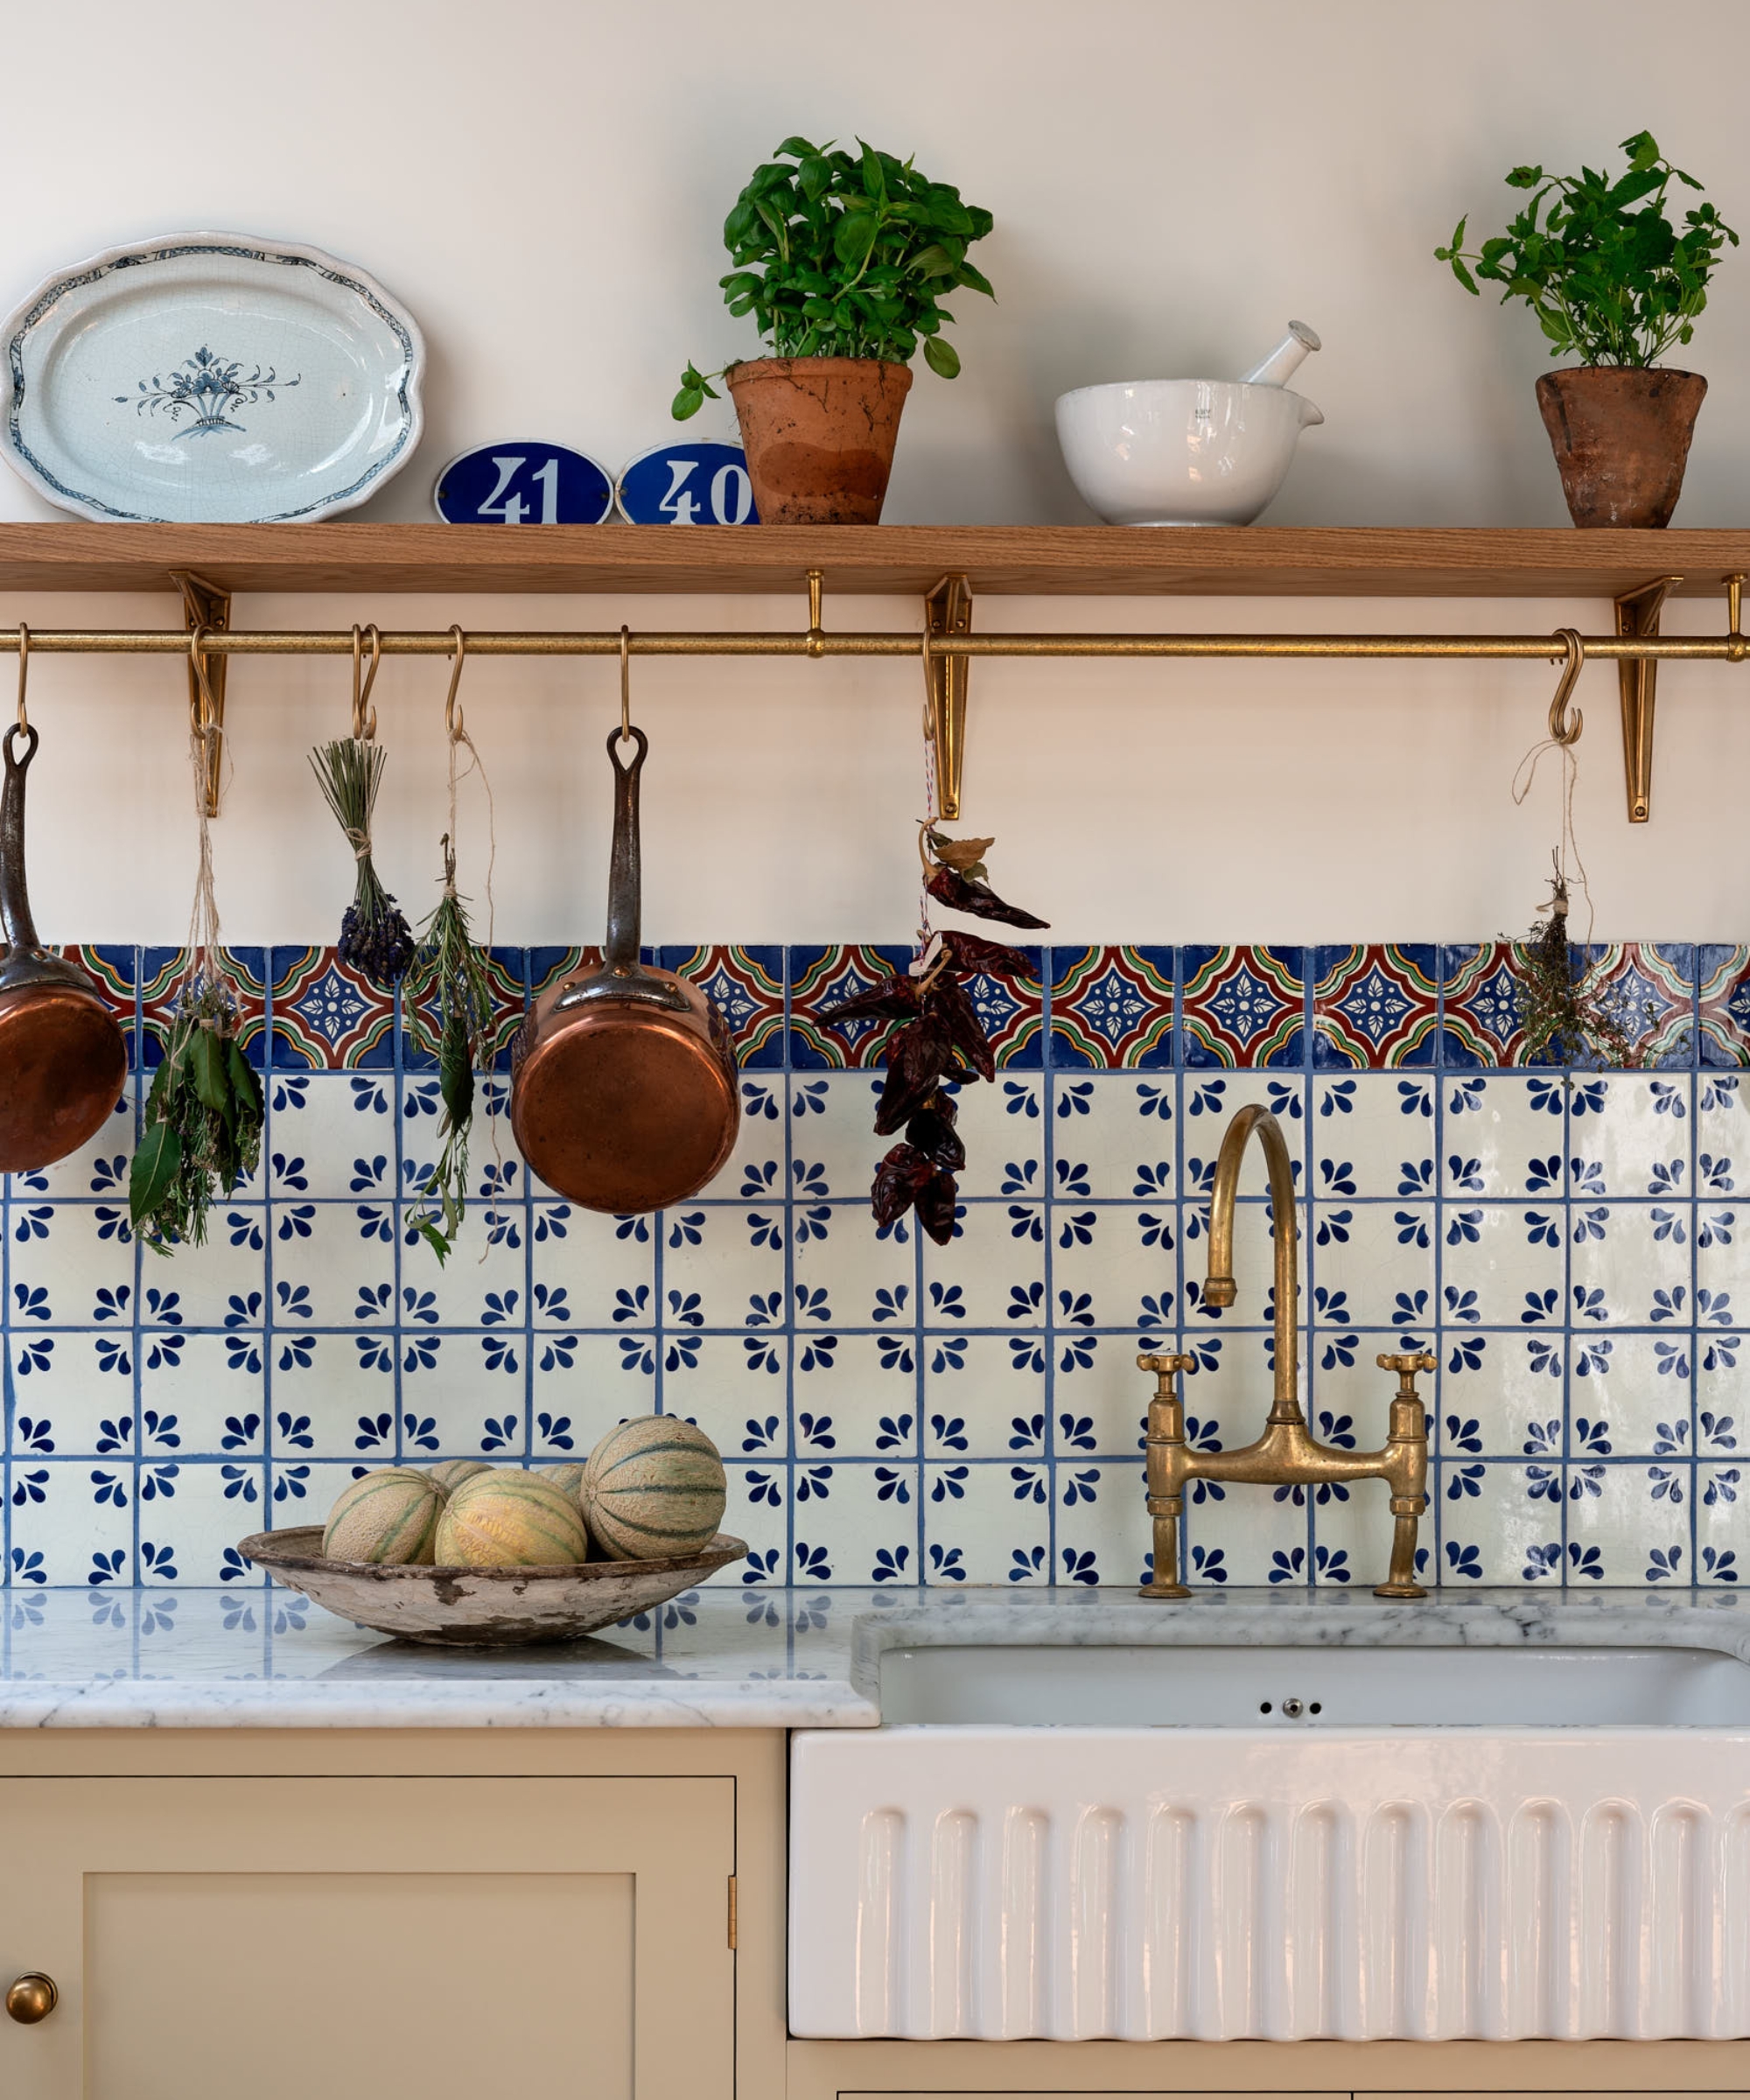
Map the sink, range, or cooktop and the principal food-preparation area first. These are generally the places where ease of cleaning and appropriate material performance should take precedence over decorative considerations.
How you cook also makes a difference, especially if you’re into high-heat searing and spicy sauces, and generally use all the stove burners at once. A family kitchen may also benefit from surfaces that tolerate frequent wiping and don't show up every water mark or splash. In a kitchen used more for entertaining, or just very careful chefs, you may be willing to trade a little more maintenance for a delicate or characterful finish.
Design expertise in your inbox – from inspiring decorating ideas and beautiful celebrity homes to practical gardening advice and shopping round-ups.
‘The first thing I identify is which parts of the backsplash will work hardest. The surface directly behind a busy range or sink may need to meet quite different practical requirements from a quieter section of wall,’ says Swati Goorha, Founder and Principal Designer at Swati Goorha Designs. ‘In those high-use areas, I prioritize materials that are durable easy to clean and resistant to moisture and everyday splashes while still considering how the material works with the overall kitchen design.’
Decide How Much Maintenance Feels Realistic
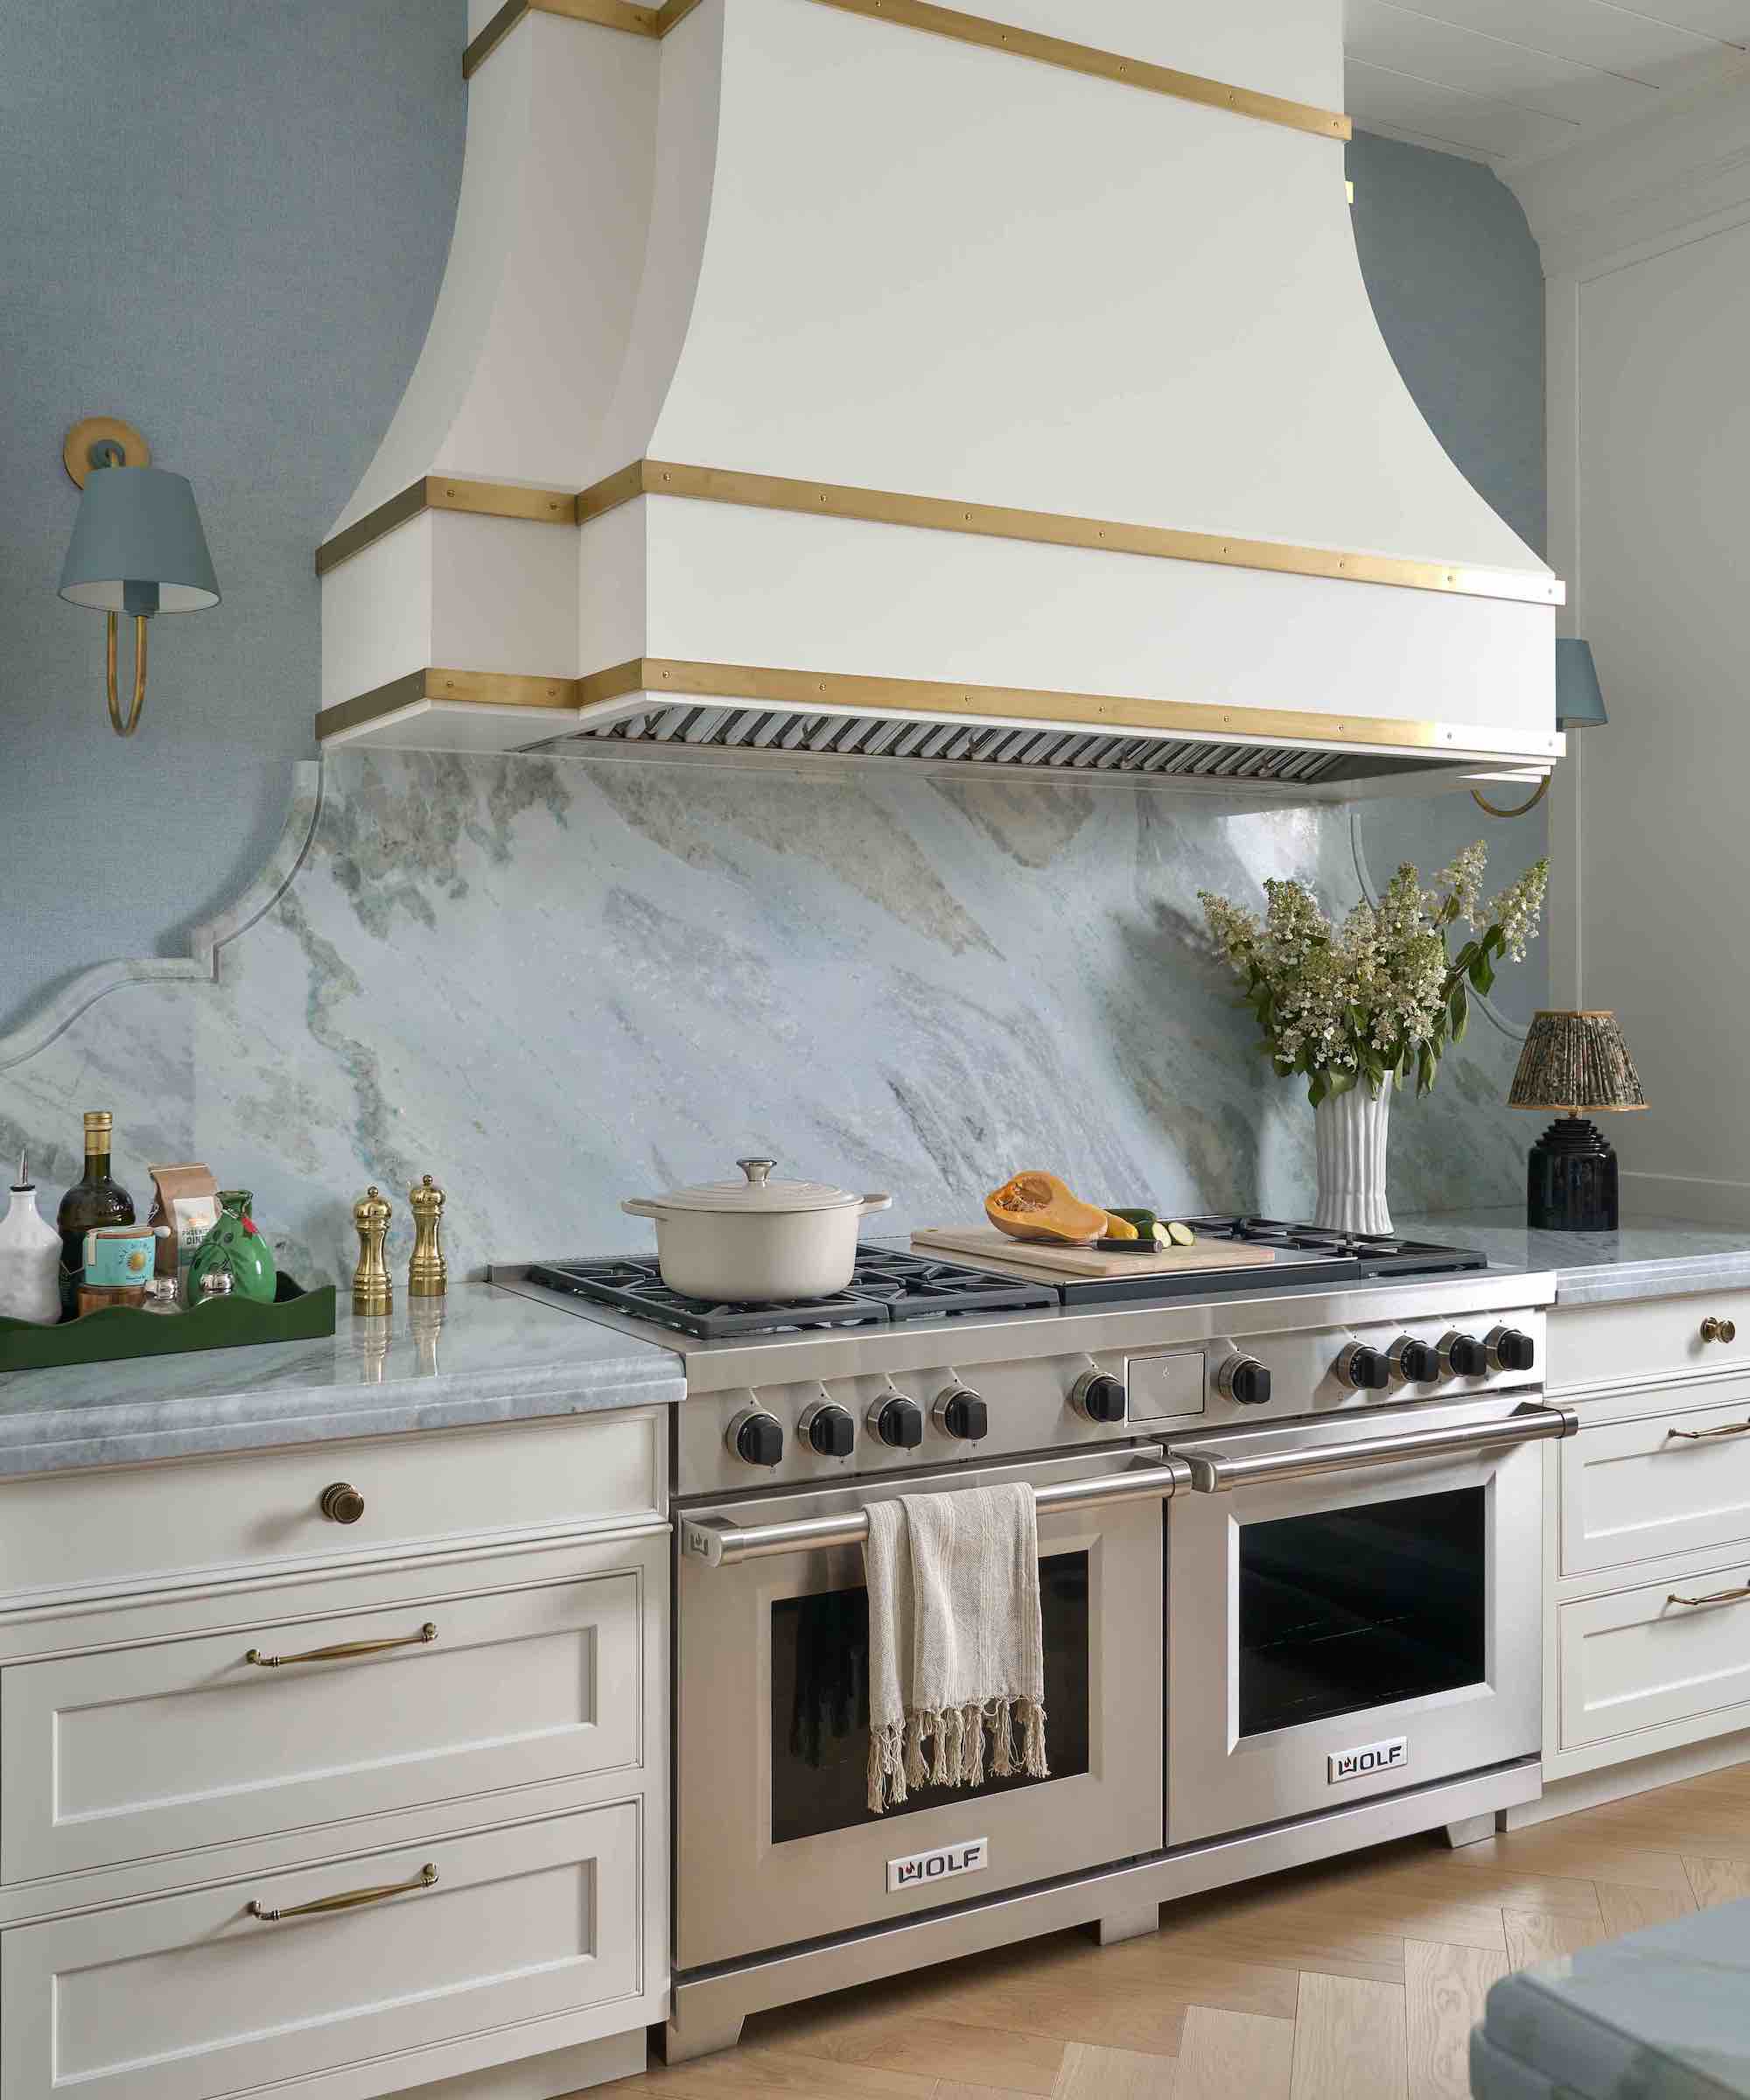
This is worth answering before falling for a particular material or backsplash trend. Would occasional resealing bother you (and would you reliably do it)? Are you happy to wipe polished metal frequently? Will smudgy grout joints be something you can happily ignore or something you immediately want to attack with a toothbrush?
Natural stone can be entirely practical in a kitchen, for example, but some stones and finishes require more considered care than glazed porcelain. Stainless steel is famously functional, but fingerprints and fine scratches are inevitable, and they’re not always pretty. Handmade tile may disguise the odd splash beautifully, but its irregularities make it a very different proposition cleaning-wise from a completely smooth slab. There is no universally 'best' backsplash material; you just need to ascertain which backsplash will work best for your household.
Consider the Rest of the Room
An open-plan kitchen places the backsplash in view from living and dining spaces, so its visual presence may deserve more consideration than in an enclosed kitchen where it is only seen close up. Think about the wider sightlines, too: flooring, furniture, lighting, and wall colors will all sit in the same field of view, and a backsplash that looks subtle at arm’s length can feel much busier from across the room.
Scale matters for the same reason. A backsplash covering one modest wall can afford to be more dynamic than a material wrapping several walls or running to the ceiling. If the kitchen already has a strong countertop, statement cabinetry, or patterned flooring, a quieter backsplash may give the eye somewhere to rest; in a simpler scheme, it can take on more of the decorative work.
2. Choose Your Backsplash Material
Backsplash material is probably the most consequential decision because it influences not only appearance but also joints, cleaning, heat tolerance, installation, and cost. A useful way to compare options is to think beyond whether a material is 'durable' and ask it is durable. A surface may cope brilliantly with water but need greater consideration around heat, acidic cooking ingredients, or abrasive cleaning products.
|
Heat/splash suitability |
||
|
Ceramic tile |
Very versatile; confirm product suitability |
|
|
Porcelain tile |
Very low |
Excellent general kitchen performance |
|
Natural stone |
Good, but care varies greatly by stone |
|
|
Engineered quartz |
Good splash surface; heat guidance must be checked |
|
|
Sintered/ultra-compact surface |
Very low |
Particularly useful for demanding areas |
|
Easy-clean surface; specification and installation matter |
||
|
Stainless steel |
Excellent around cooking areas |
|
|
Other metals |
Depends heavily on metal and finish |
|
|
Porous/uneven surfaces need consideration |
||
|
Product and appliance clearances are critical |
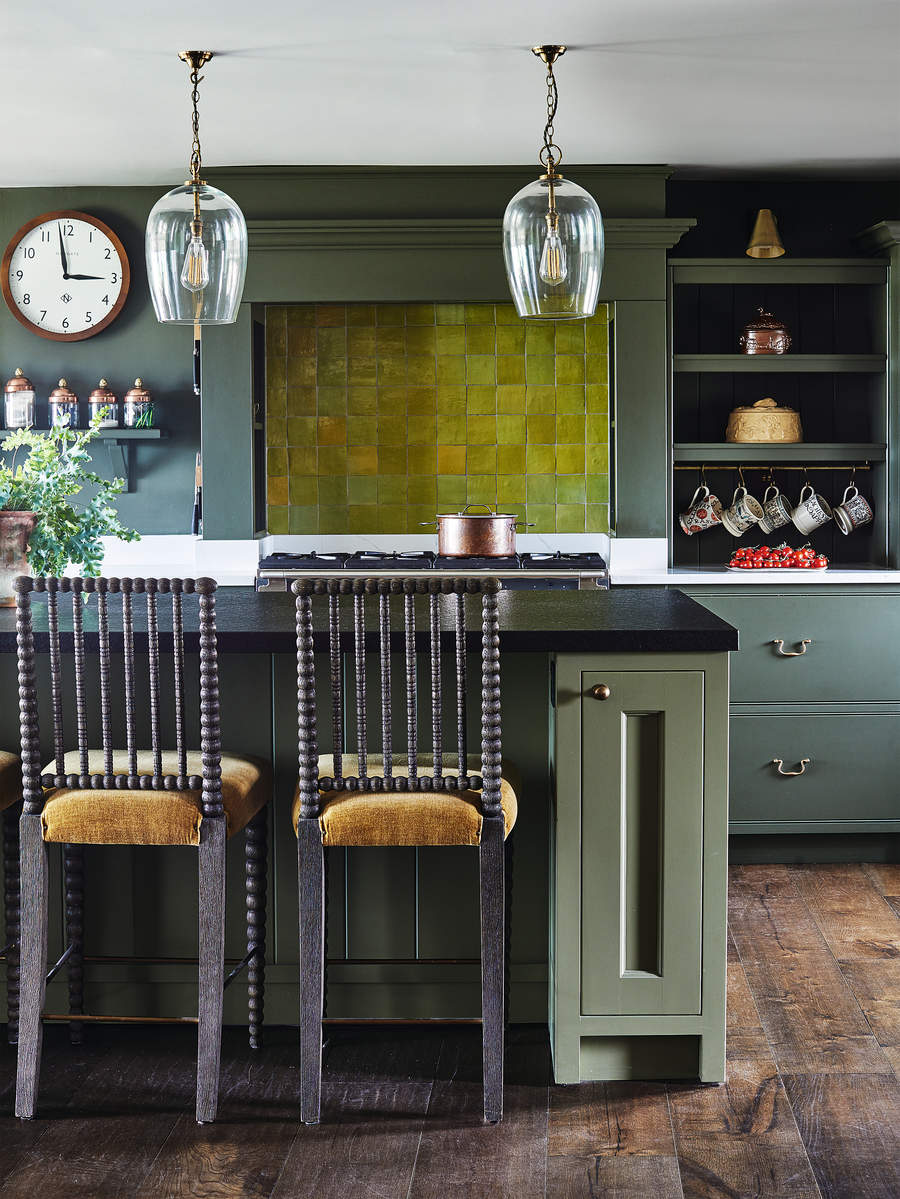
Ceramic tile remains one of the easiest backsplash materials to specify because it is available in an enormous range of sizes, colors, glazes, and prices. Glazed ceramic is generally easy to wipe clean and performs well in normal splash areas. Individual tiles can also be replaced if one becomes damaged, assuming you have retained spares.
Ceramic is generally easier for an installer to cut than porcelain, which can make elaborate layouts and numerous outlet cuts less laborious. Always check the manufacturer's intended application, bearing in mind that 'ceramic' describes a large family of products rather than one identical performance level.
The grout-factor is the main downside of tiling. Small formats can create a large number of grout joints, and those joints are going to get grubby in time, even if you are careful to seal them. You can improve matters by choosing a colored grout – or at least avoiding pristine white – and be prepared to scrub with a specialist grout cleaner should things get really dire.
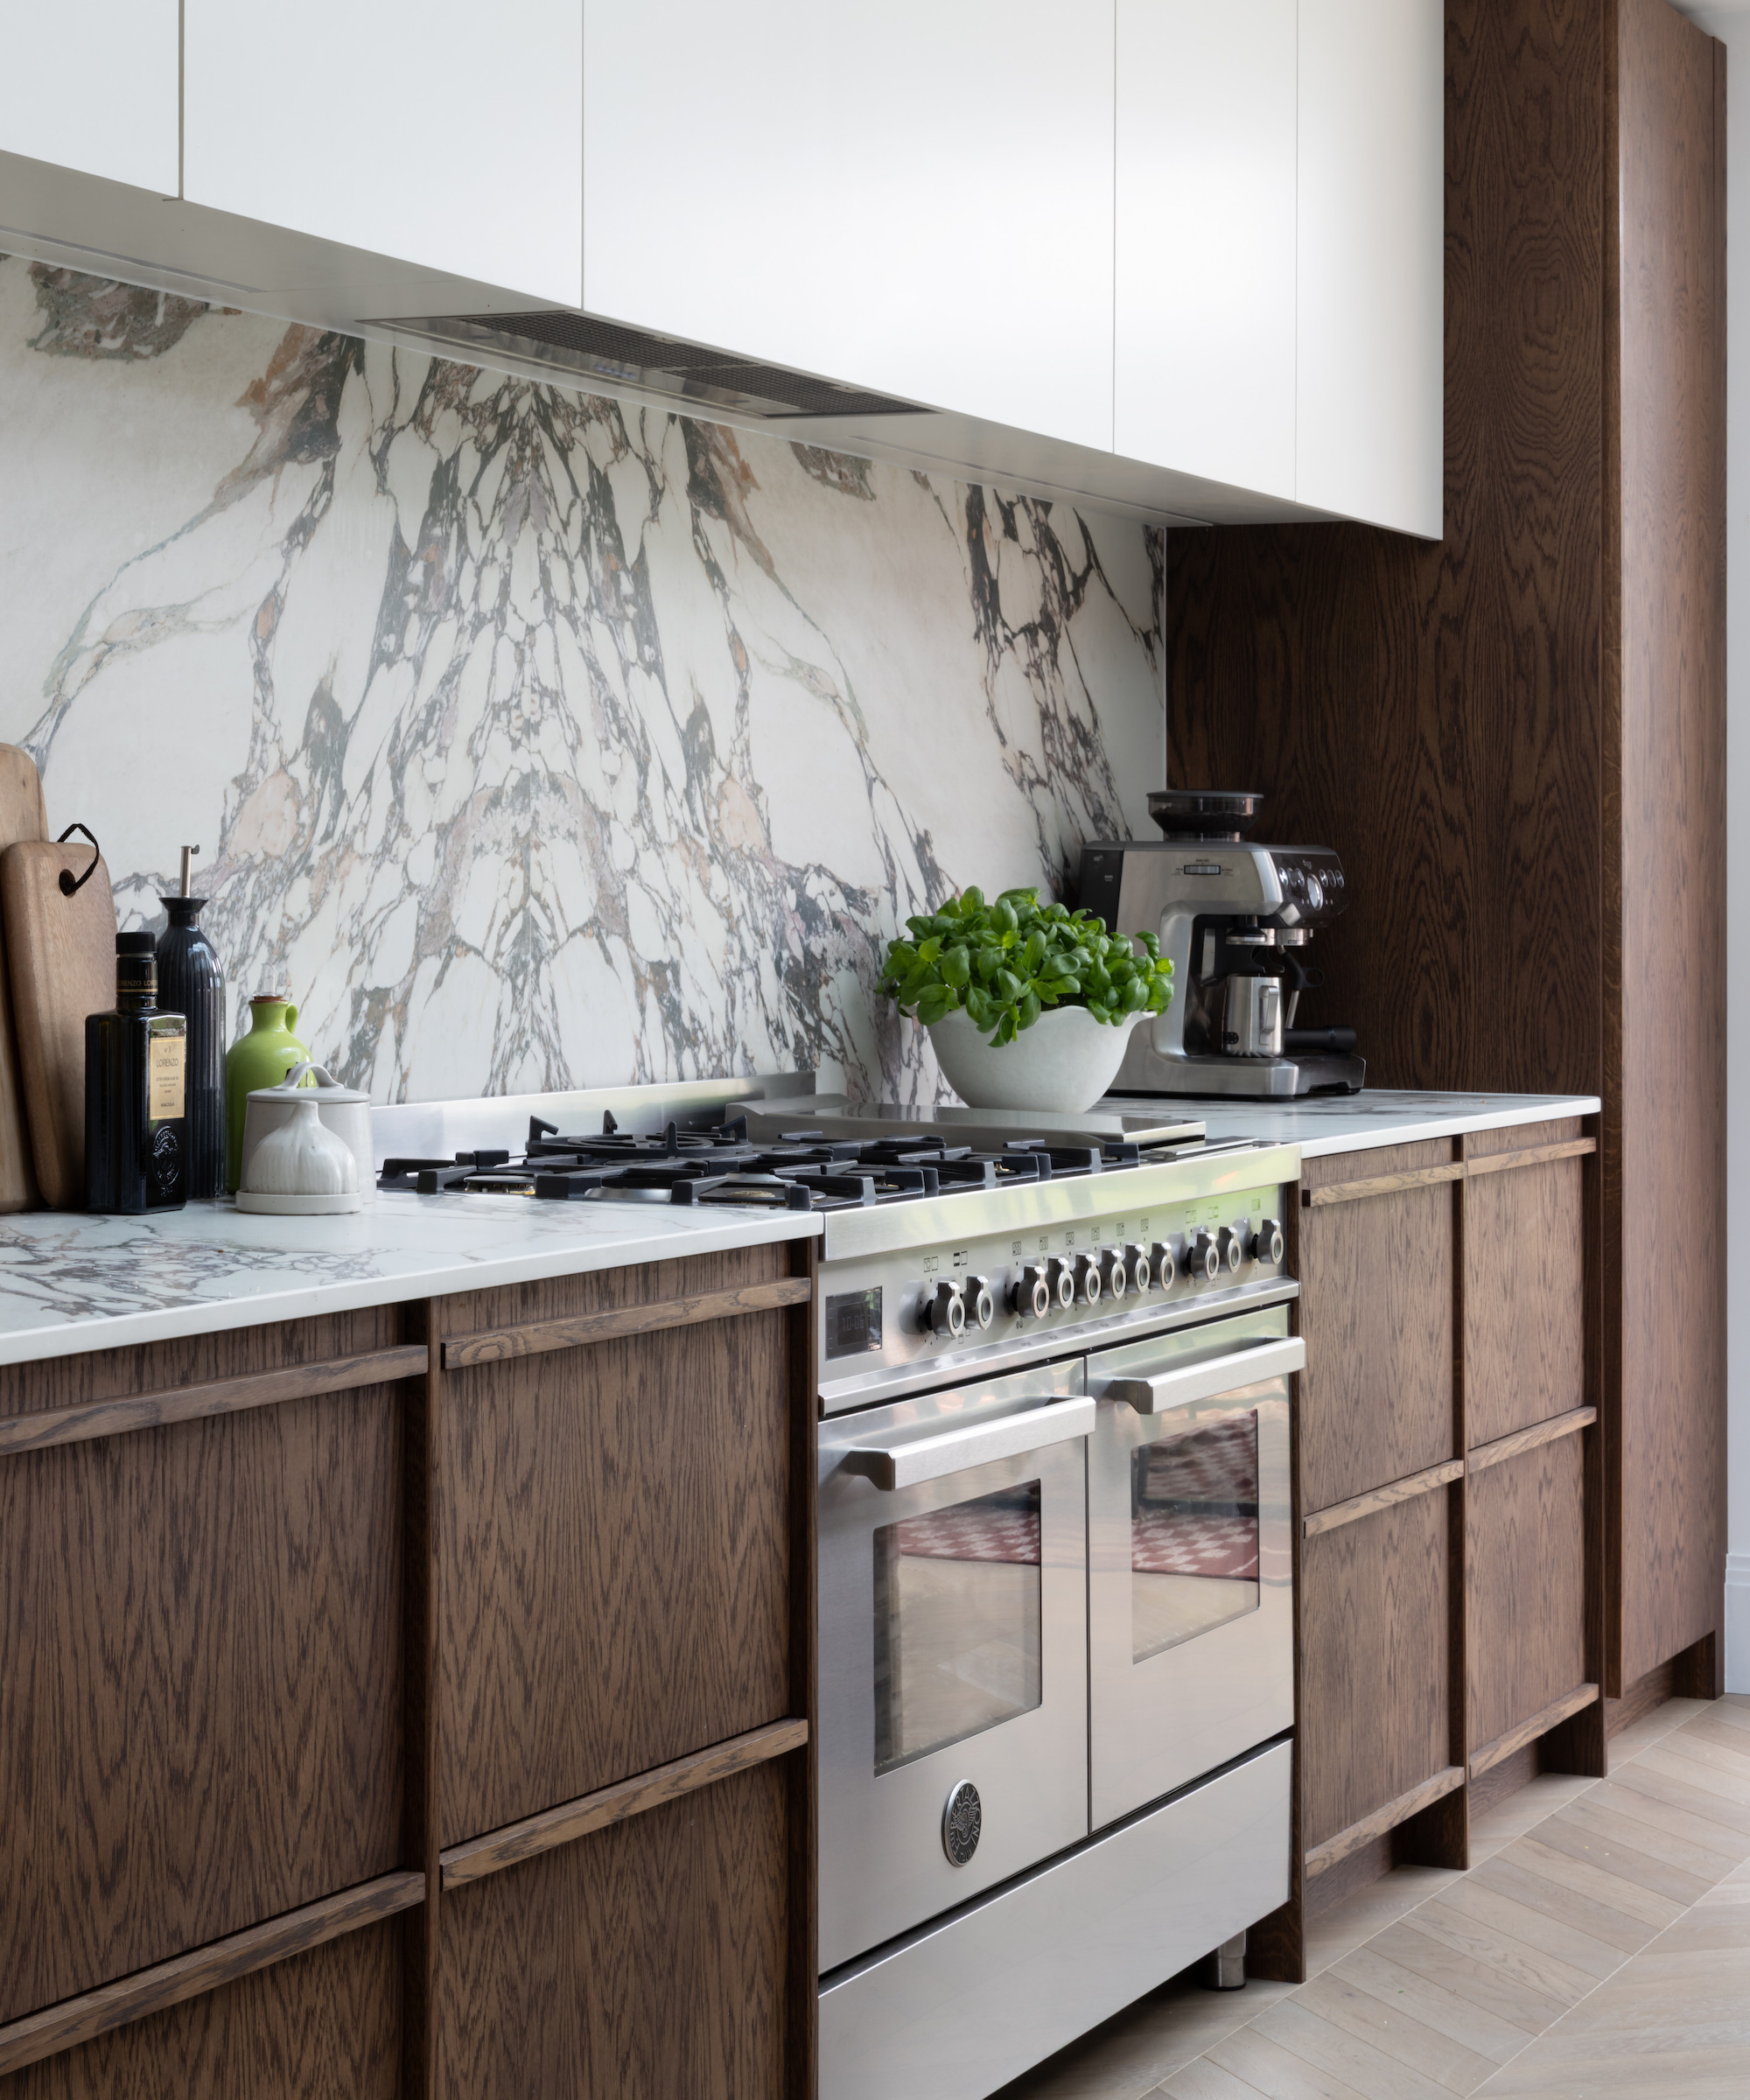
Porcelain is technically a type of ceramic tile, but it is denser and defined in US standards by water absorption of 0.5% or less. That very low absorption makes it an appealing backsplash option, particularly where easy cleaning and resistance to moisture are priorities. Modern porcelain tile is available in XL slabs that are impressively thin, which helps with installation and minimizing those pesky grout lines.
Porcelain can also convincingly replicate marble, limestone, concrete, metal and other surfaces, making it useful if you want the appearance of a more maintenance-sensitive material without pandering to specialist care requirements. The trade-off arrives at installation: dense porcelain is generally harder to cut than ordinary ceramic tile, which matters if the backsplash contains several outlets, windows or complicated edges. But, with the right tools, it’s perfectly doable.
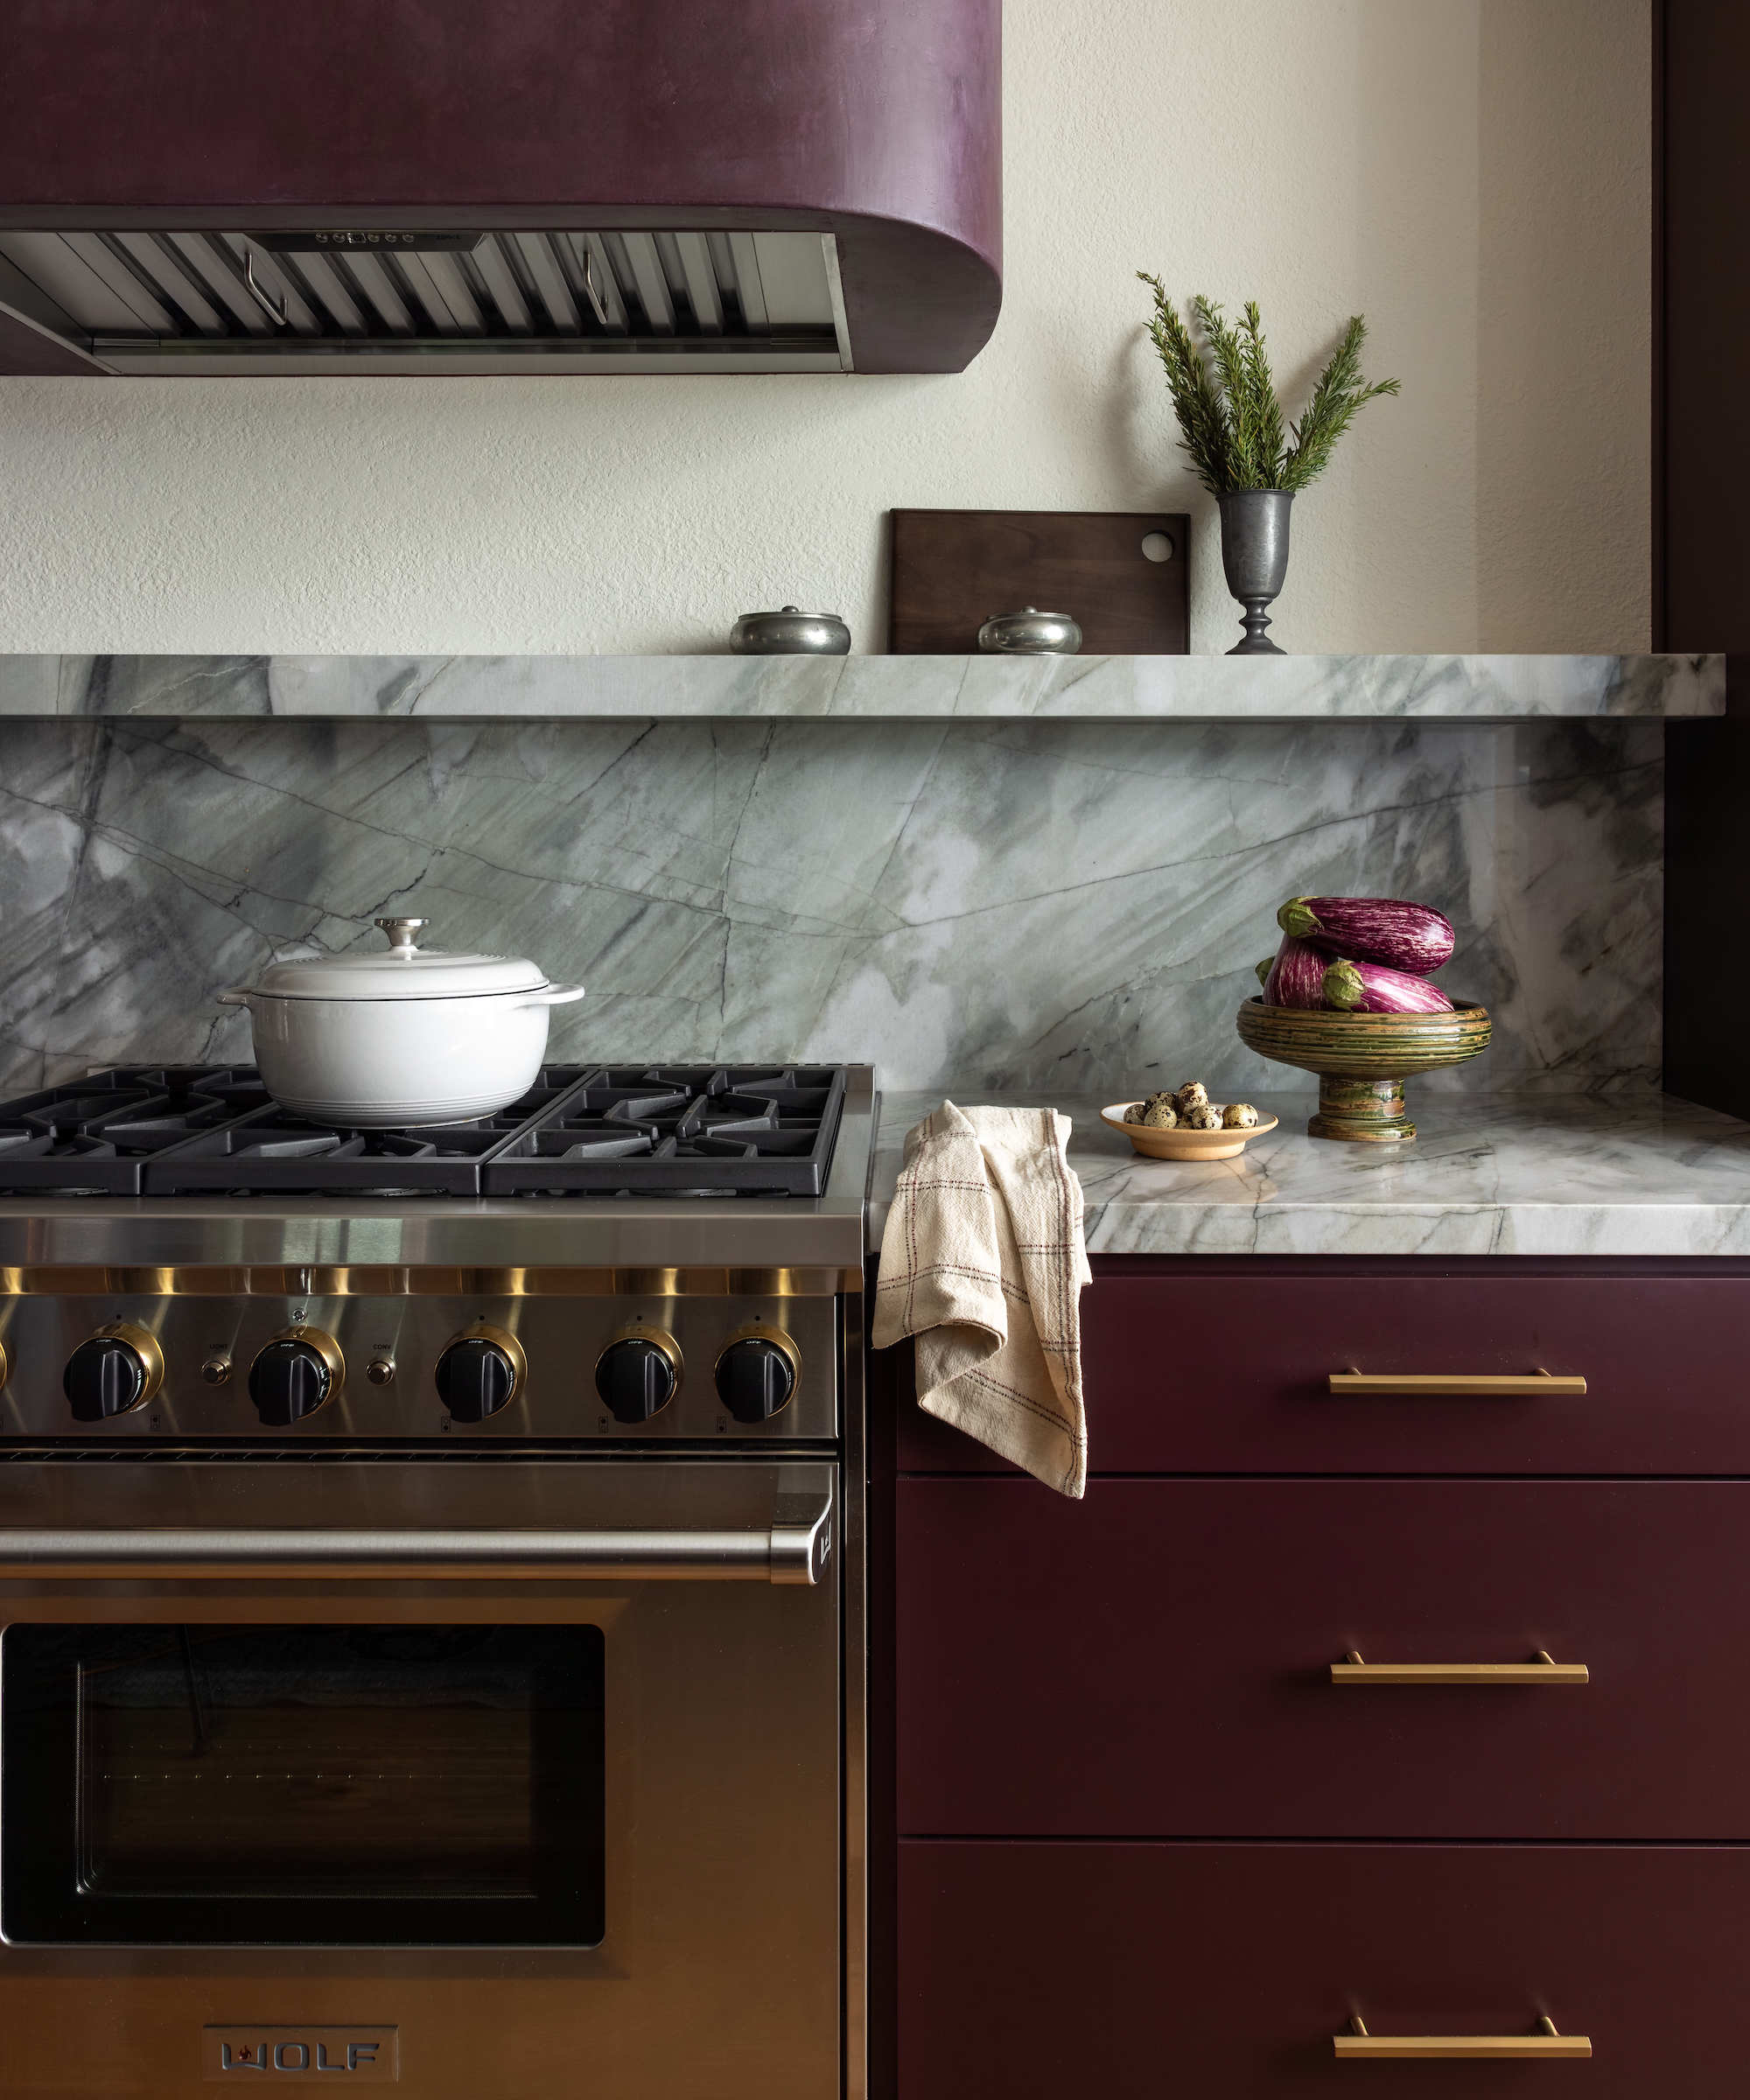
Marble, limestone, travertine, granite, quartzite, onyx, and other natural stones can create a backsplash with a depth and variation that manufactured surfaces struggle to duplicate. They do not, however, all behave in the same way.
Calcareous stones such as marble and limestone can be etched by acids. The Natural Stone Institute specifically cautions that lemon, vinegar, and other acidic cleaners may dull or etch these materials. Most natural stones require an impregnating sealer, which increases stain resistance but does not make the stone stain-proof. This is particularly relevant in a kitchen, where tomato, citrus, vinegar, wine and oil are frequently splashed.
‘Homeowners need to understand that some natural stones are more work than others. Marble and limestone are softer and require more care but are totally worth it,’ says Harmony Weihs, Designer and Owner of Design Harmony. ‘Quartzite is a natural stone I love using as it’s very durable and beautiful and requires minimal to no care. Although nothing is guaranteed “timeless”, if you want a more classic look, it’s worth sticking with neutrals and subtler veining.’
A polished slab will also behave differently visually and practically from tumbled tile or heavily textured stone. ‘Finish makes a huge difference, especially when choosing darker stone; the darker the stone, the more dramatic the sheen is, especially when polished. In most cases I prefer a honed stone over polished as it’s more casual,’ adds Harmony. Ask your stone supplier about the specific stone, finish, and proposed location, rather than relying on generic advice for 'natural stone'.
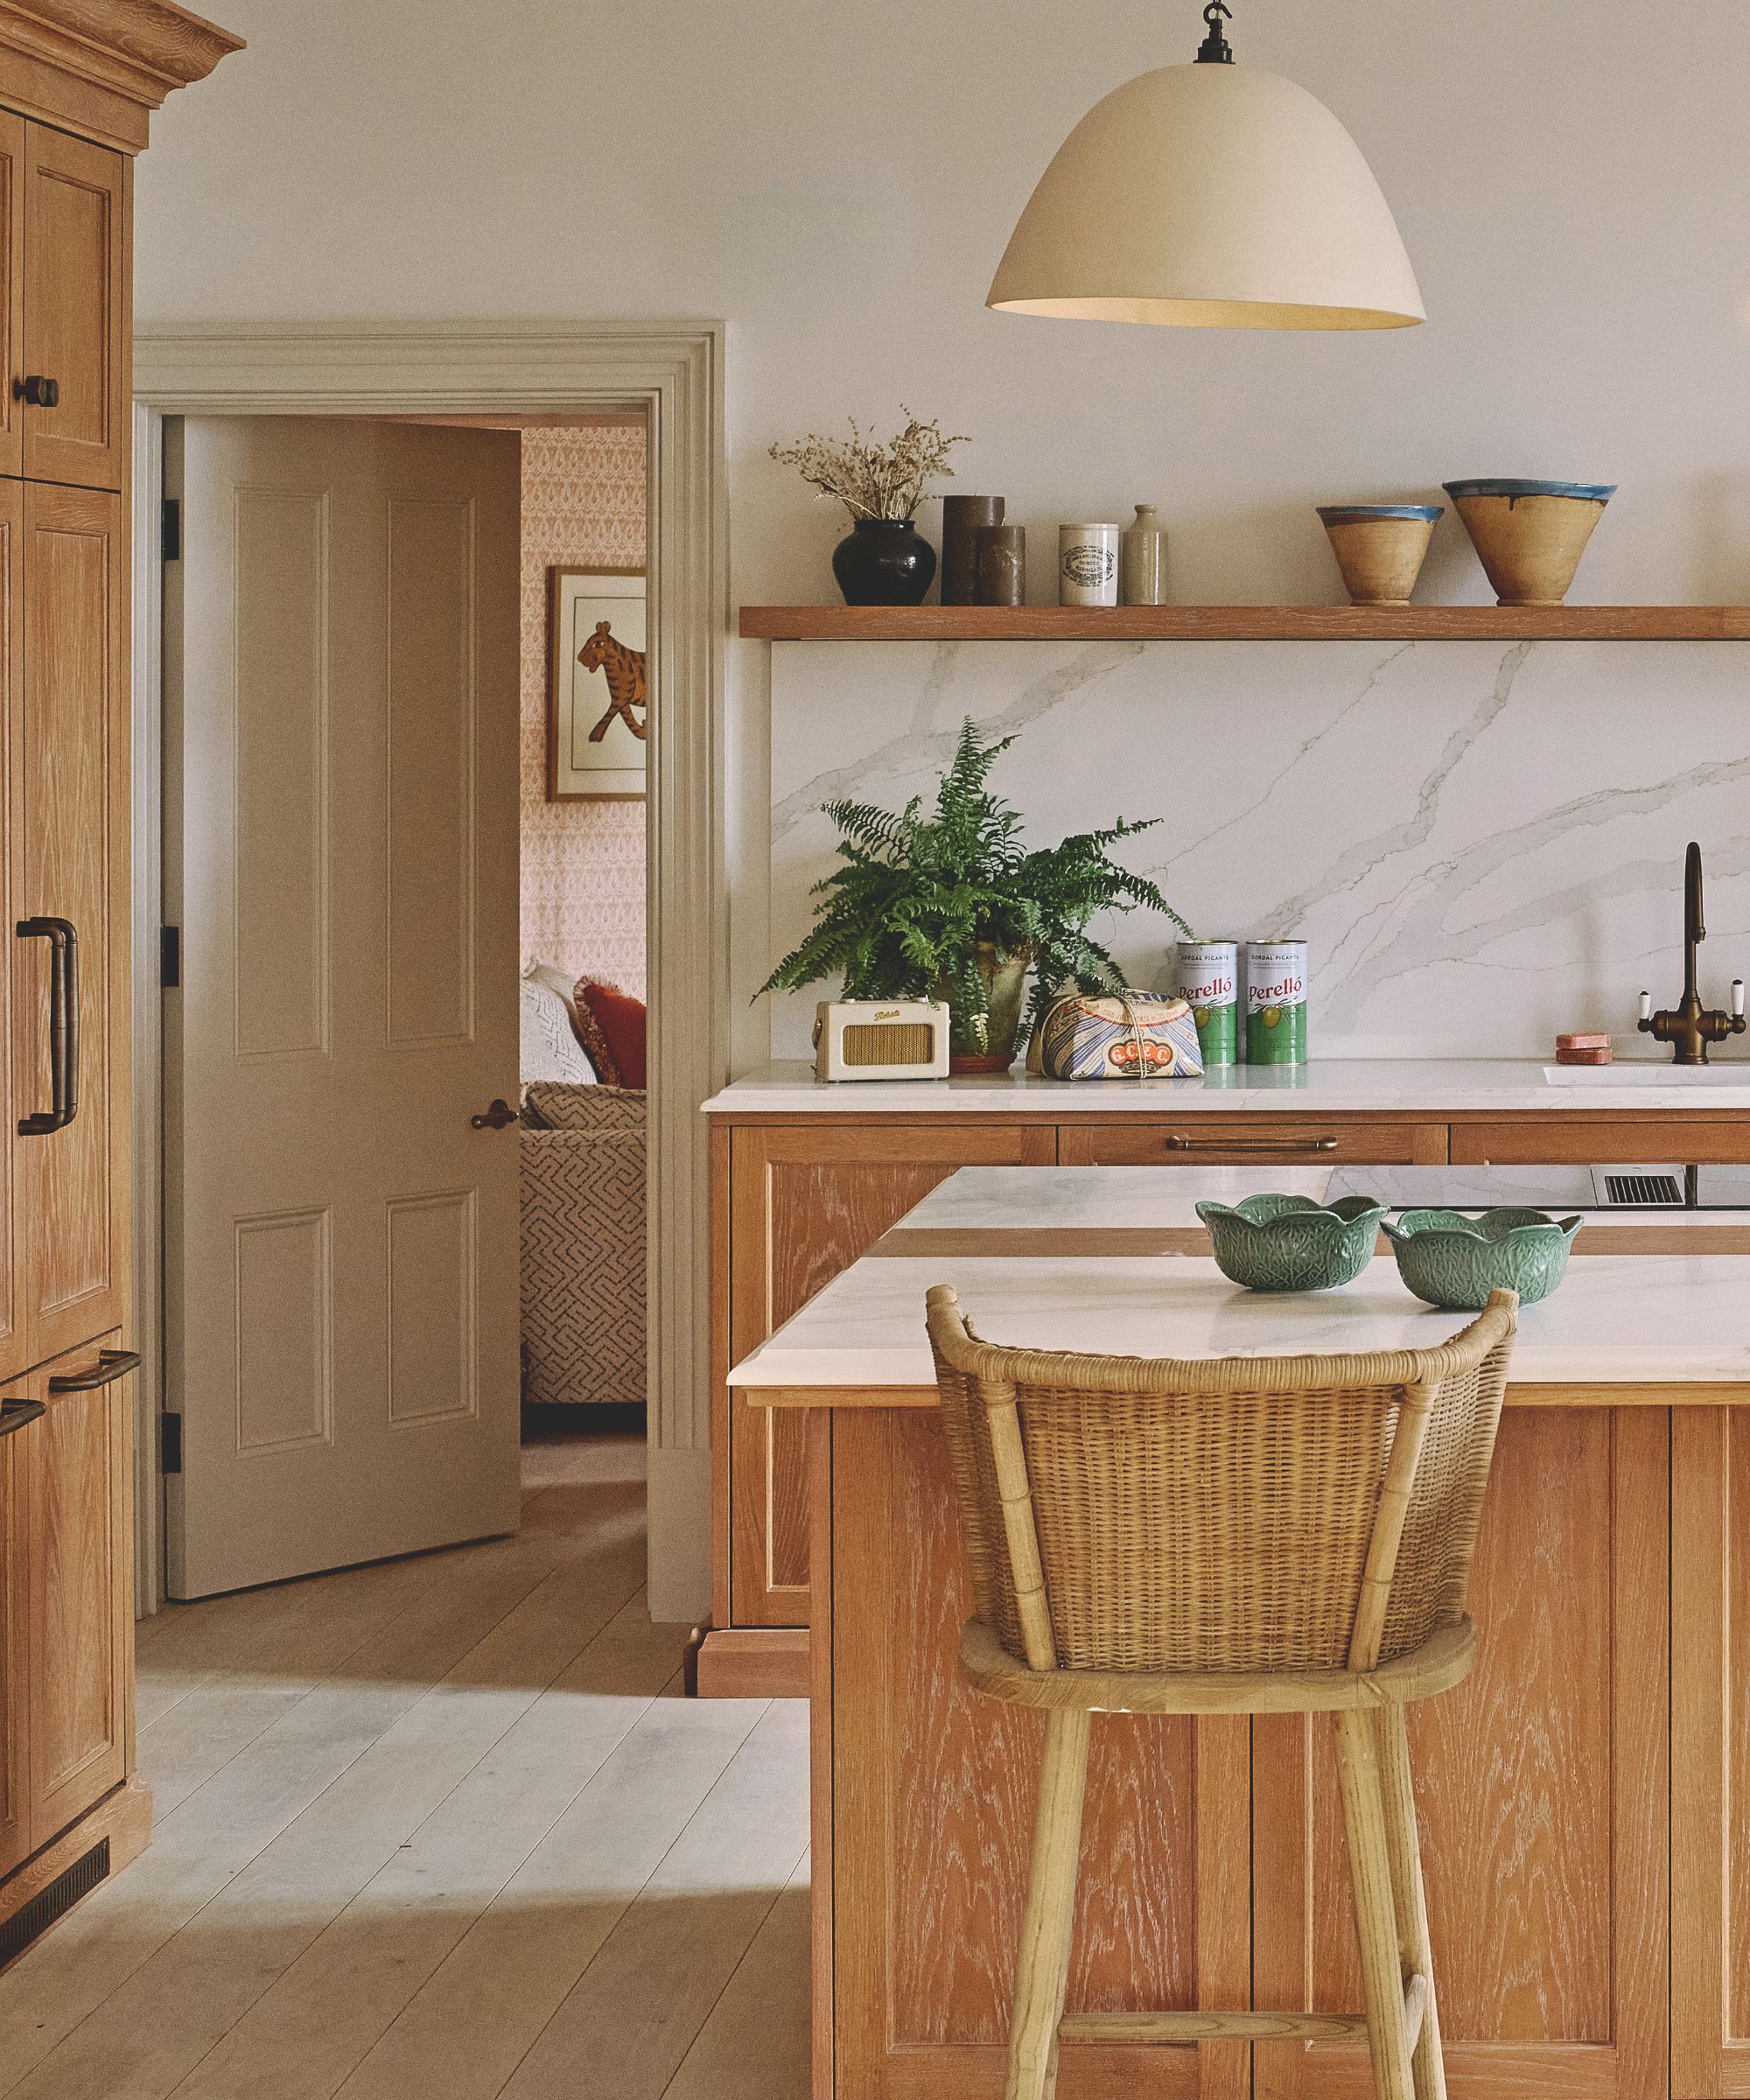
Engineered quartz is fairly non-porous, easy to clean, and requires no sealing, making it a practical choice around both sinks and cooking areas. It’s not quite as stainproof as porcelain, but spills such as oil or curry paste will only leave a mark if they are left to fester. Good quality engineered quartz is suitable for use behind most cooktops and ranges, but always check the guidance for the surface you are specifying, as heat resistance can vary between brands, particularly with gas burners.
Sintered and Ultra-Compact Surfaces

Products in this broad category use mineral-based materials manufactured under high pressure and/or heat to create dense, low-porosity slabs. Like engineered quartz, their particular formulations vary, so use manufacturer data rather than assuming all sintered products have identical performance.
Dekton, for instance, is marketed for wall cladding and is highly resistant to stains, scratches, and heat, although its manufacturer still provides specific guidance concerning direct flames and installation around intense heat sources. As it’s available in XL slabs, the material can be a very practical way to continue a kitchen countertop vertically while reducing the number of joints.
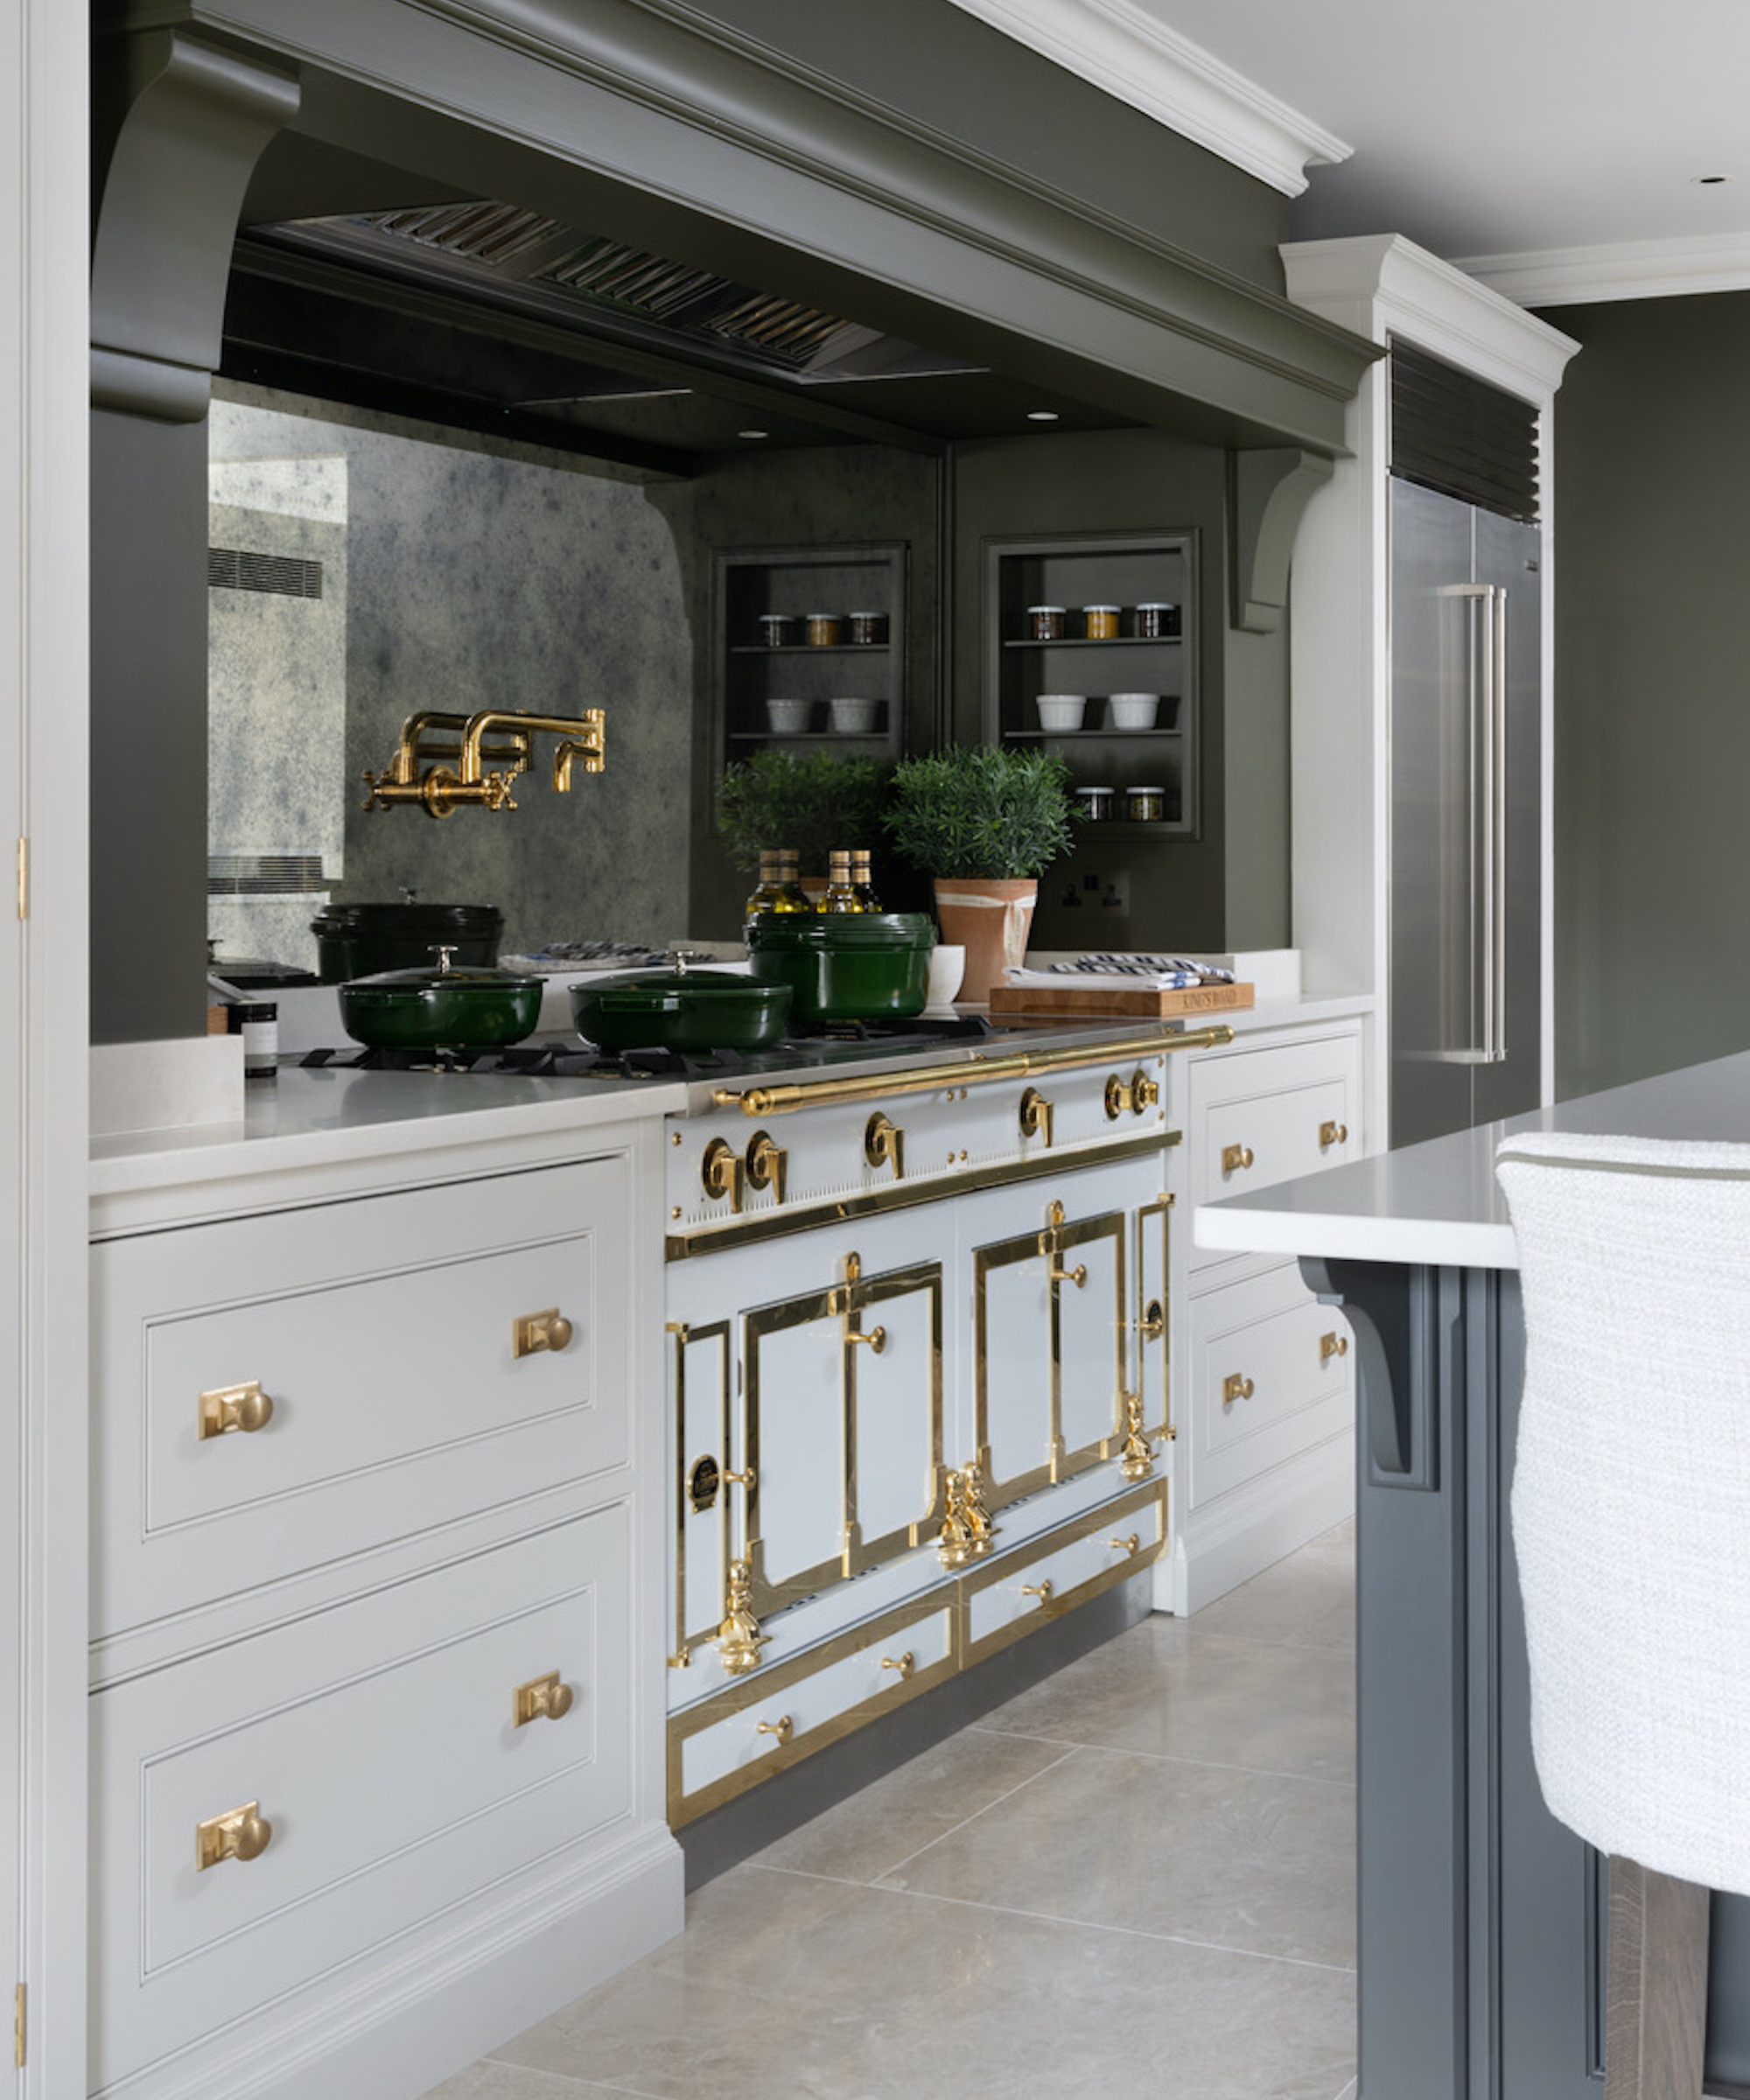
Glass splashbacks are made from sheets of toughened or tempered glass. It can be painted in virtually any color, printed with a pattern, silvered or mirrored, given an antiqued finish, or kept clear to simply protect painted walls from splashes. Low-iron glass is particularly useful over wallpaper because it has less of the greenish tint found in standard clear glass.
As well as being easy to clean, glass has very few joints and no grout lines, which makes it a good choice for a sleek, low-maintenance finish. For safety, always use toughened glass around cooking areas and check any heat-clearance guidance for the product and appliance you are using. Accurate templating matters too, as holes and cut-outs for outlets, switches, or corners have to be made before the glass is toughened. With clear or translucent glass, the wall and fixings behind it also need to be neat, as they may show through.
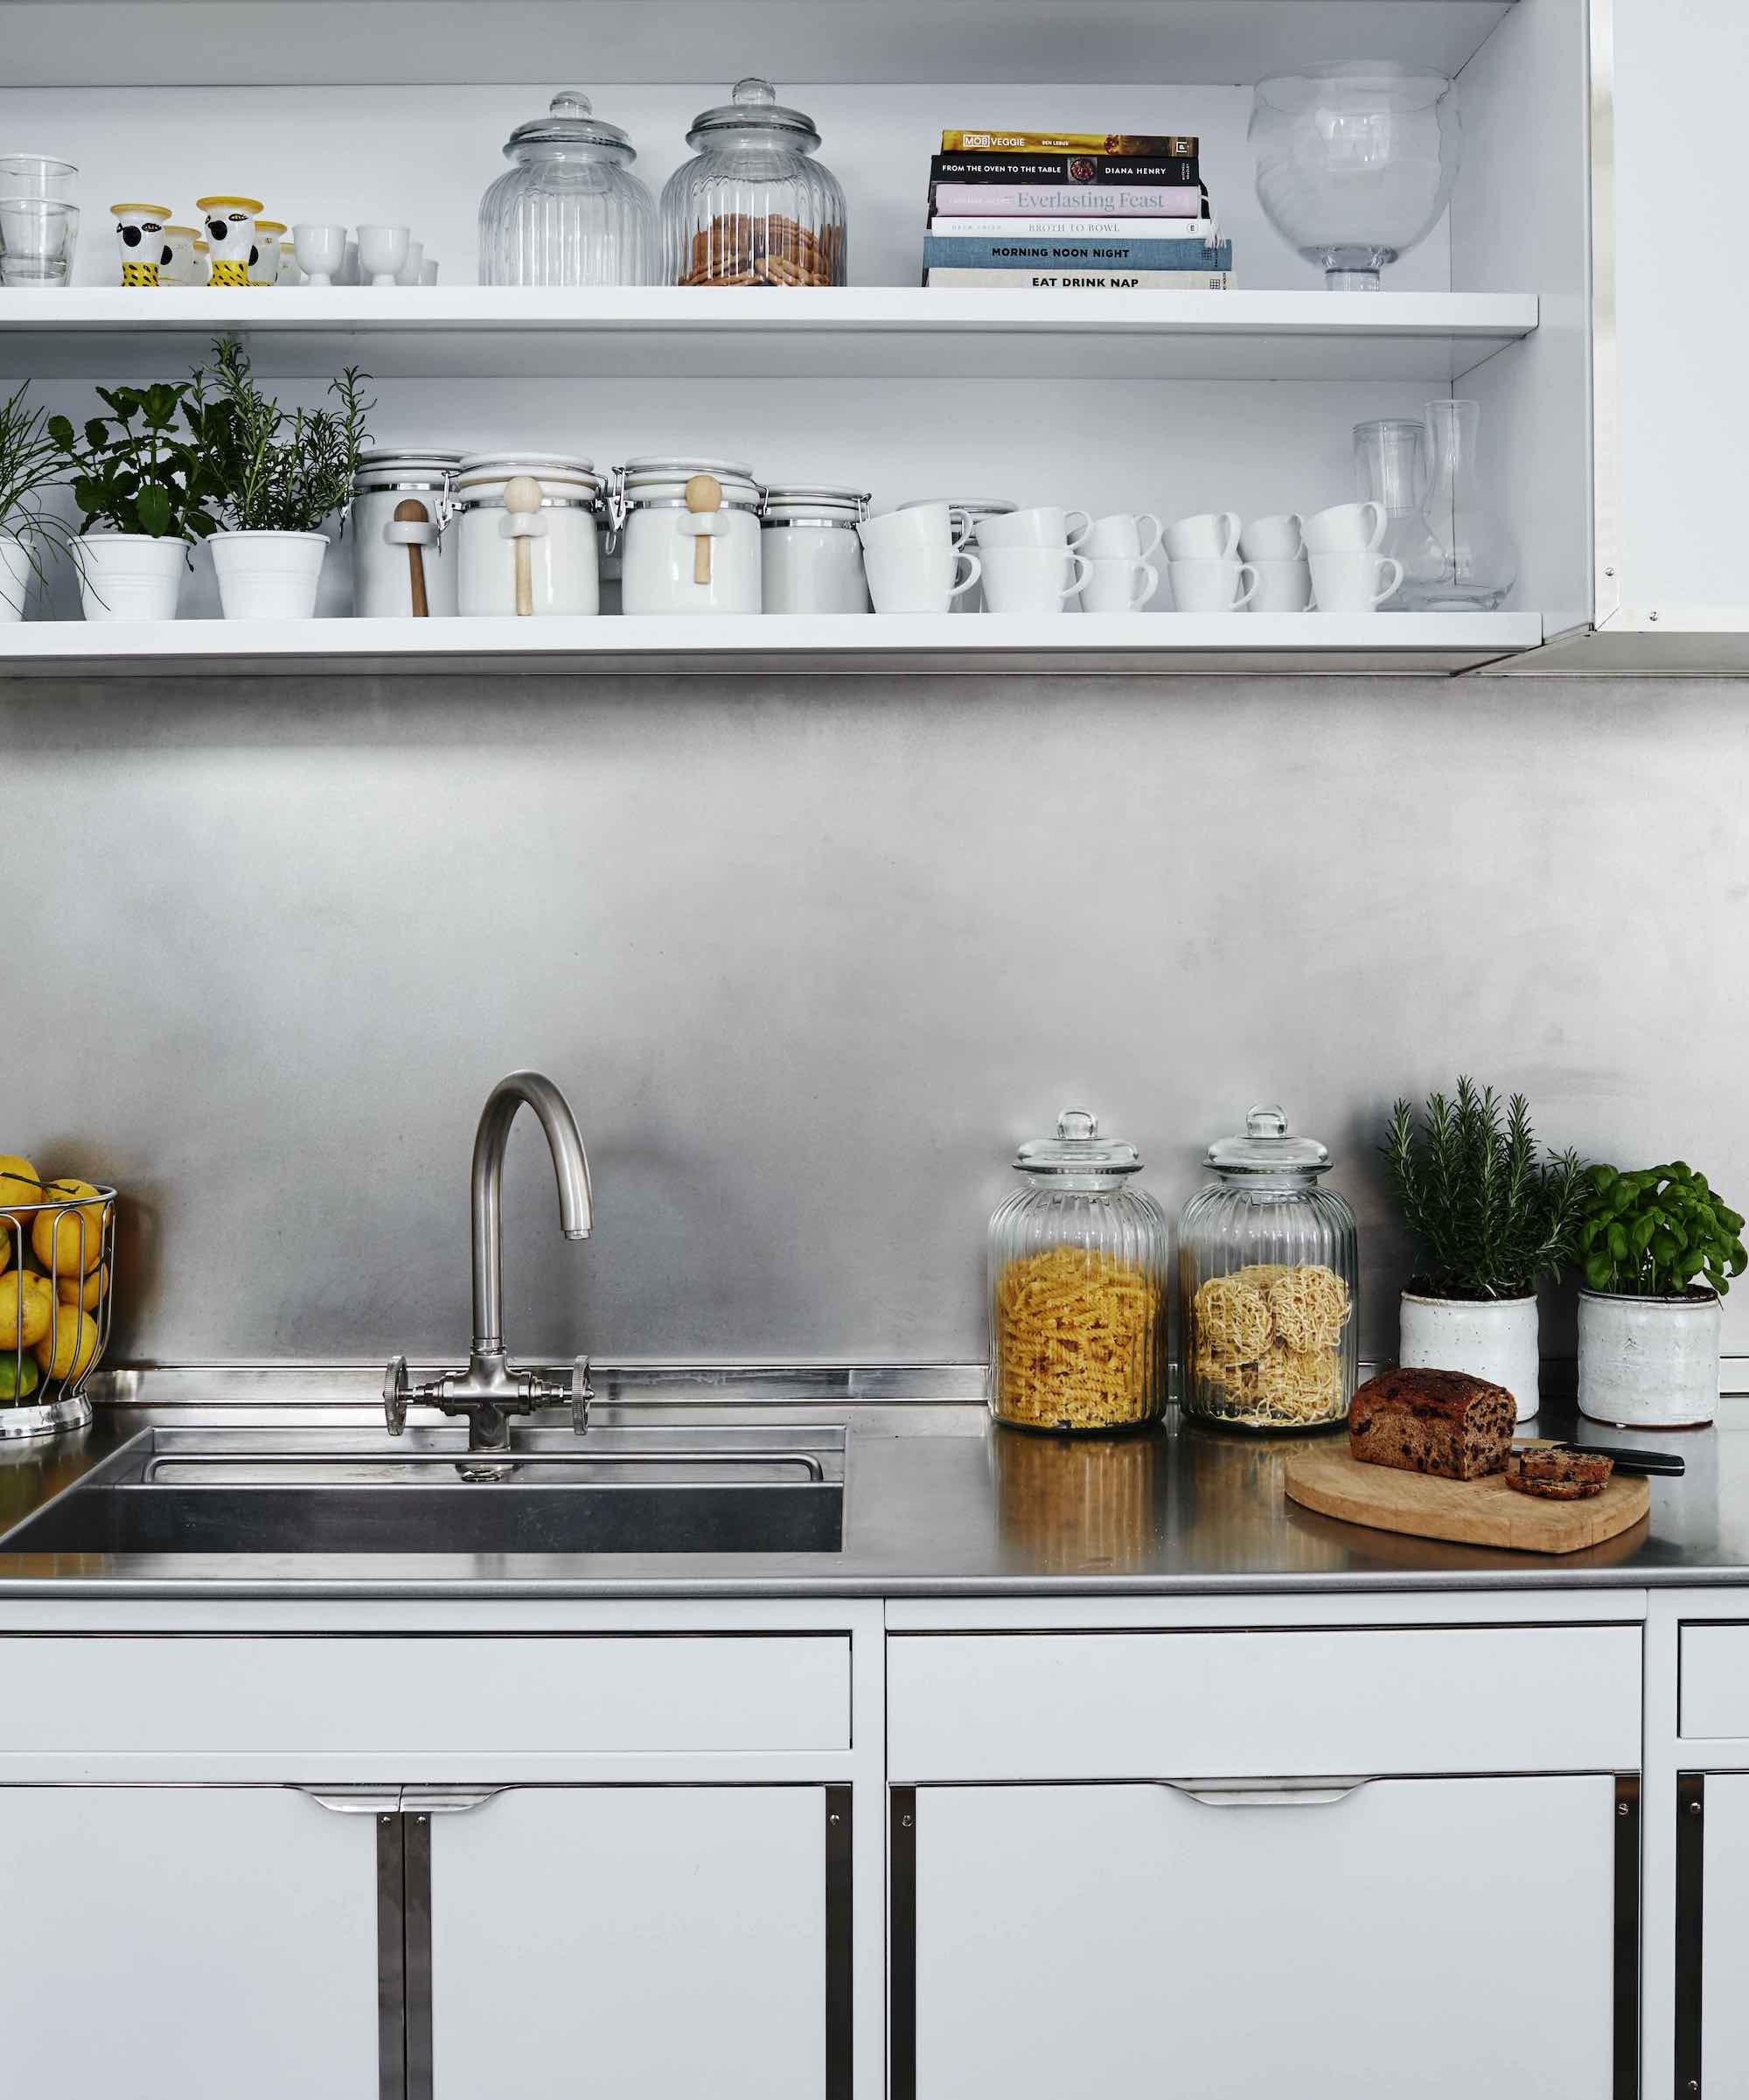
Stainless steel is particularly at home around stove tops and ranges because it is nonporous, heat tolerant, and able to cope with plenty of splashes and spills, which explains its long association with professional kitchens. A steel sheet can be fabricated around outlets and other fittings with relatively few joints. On larger areas, sections can also be welded together and the seams ground and refinished for a hygienic, seamless appearance.
The downside is keeping steel looking pristine. Fingerprints, water marks, and greasy smears show readily, especially on highly polished steel, while brushed finishes are generally more forgiving. A tiny amount of stainless-steel conditioning or mineral oil buffed over the clean surface can help reduce fingerprints and restore shine.
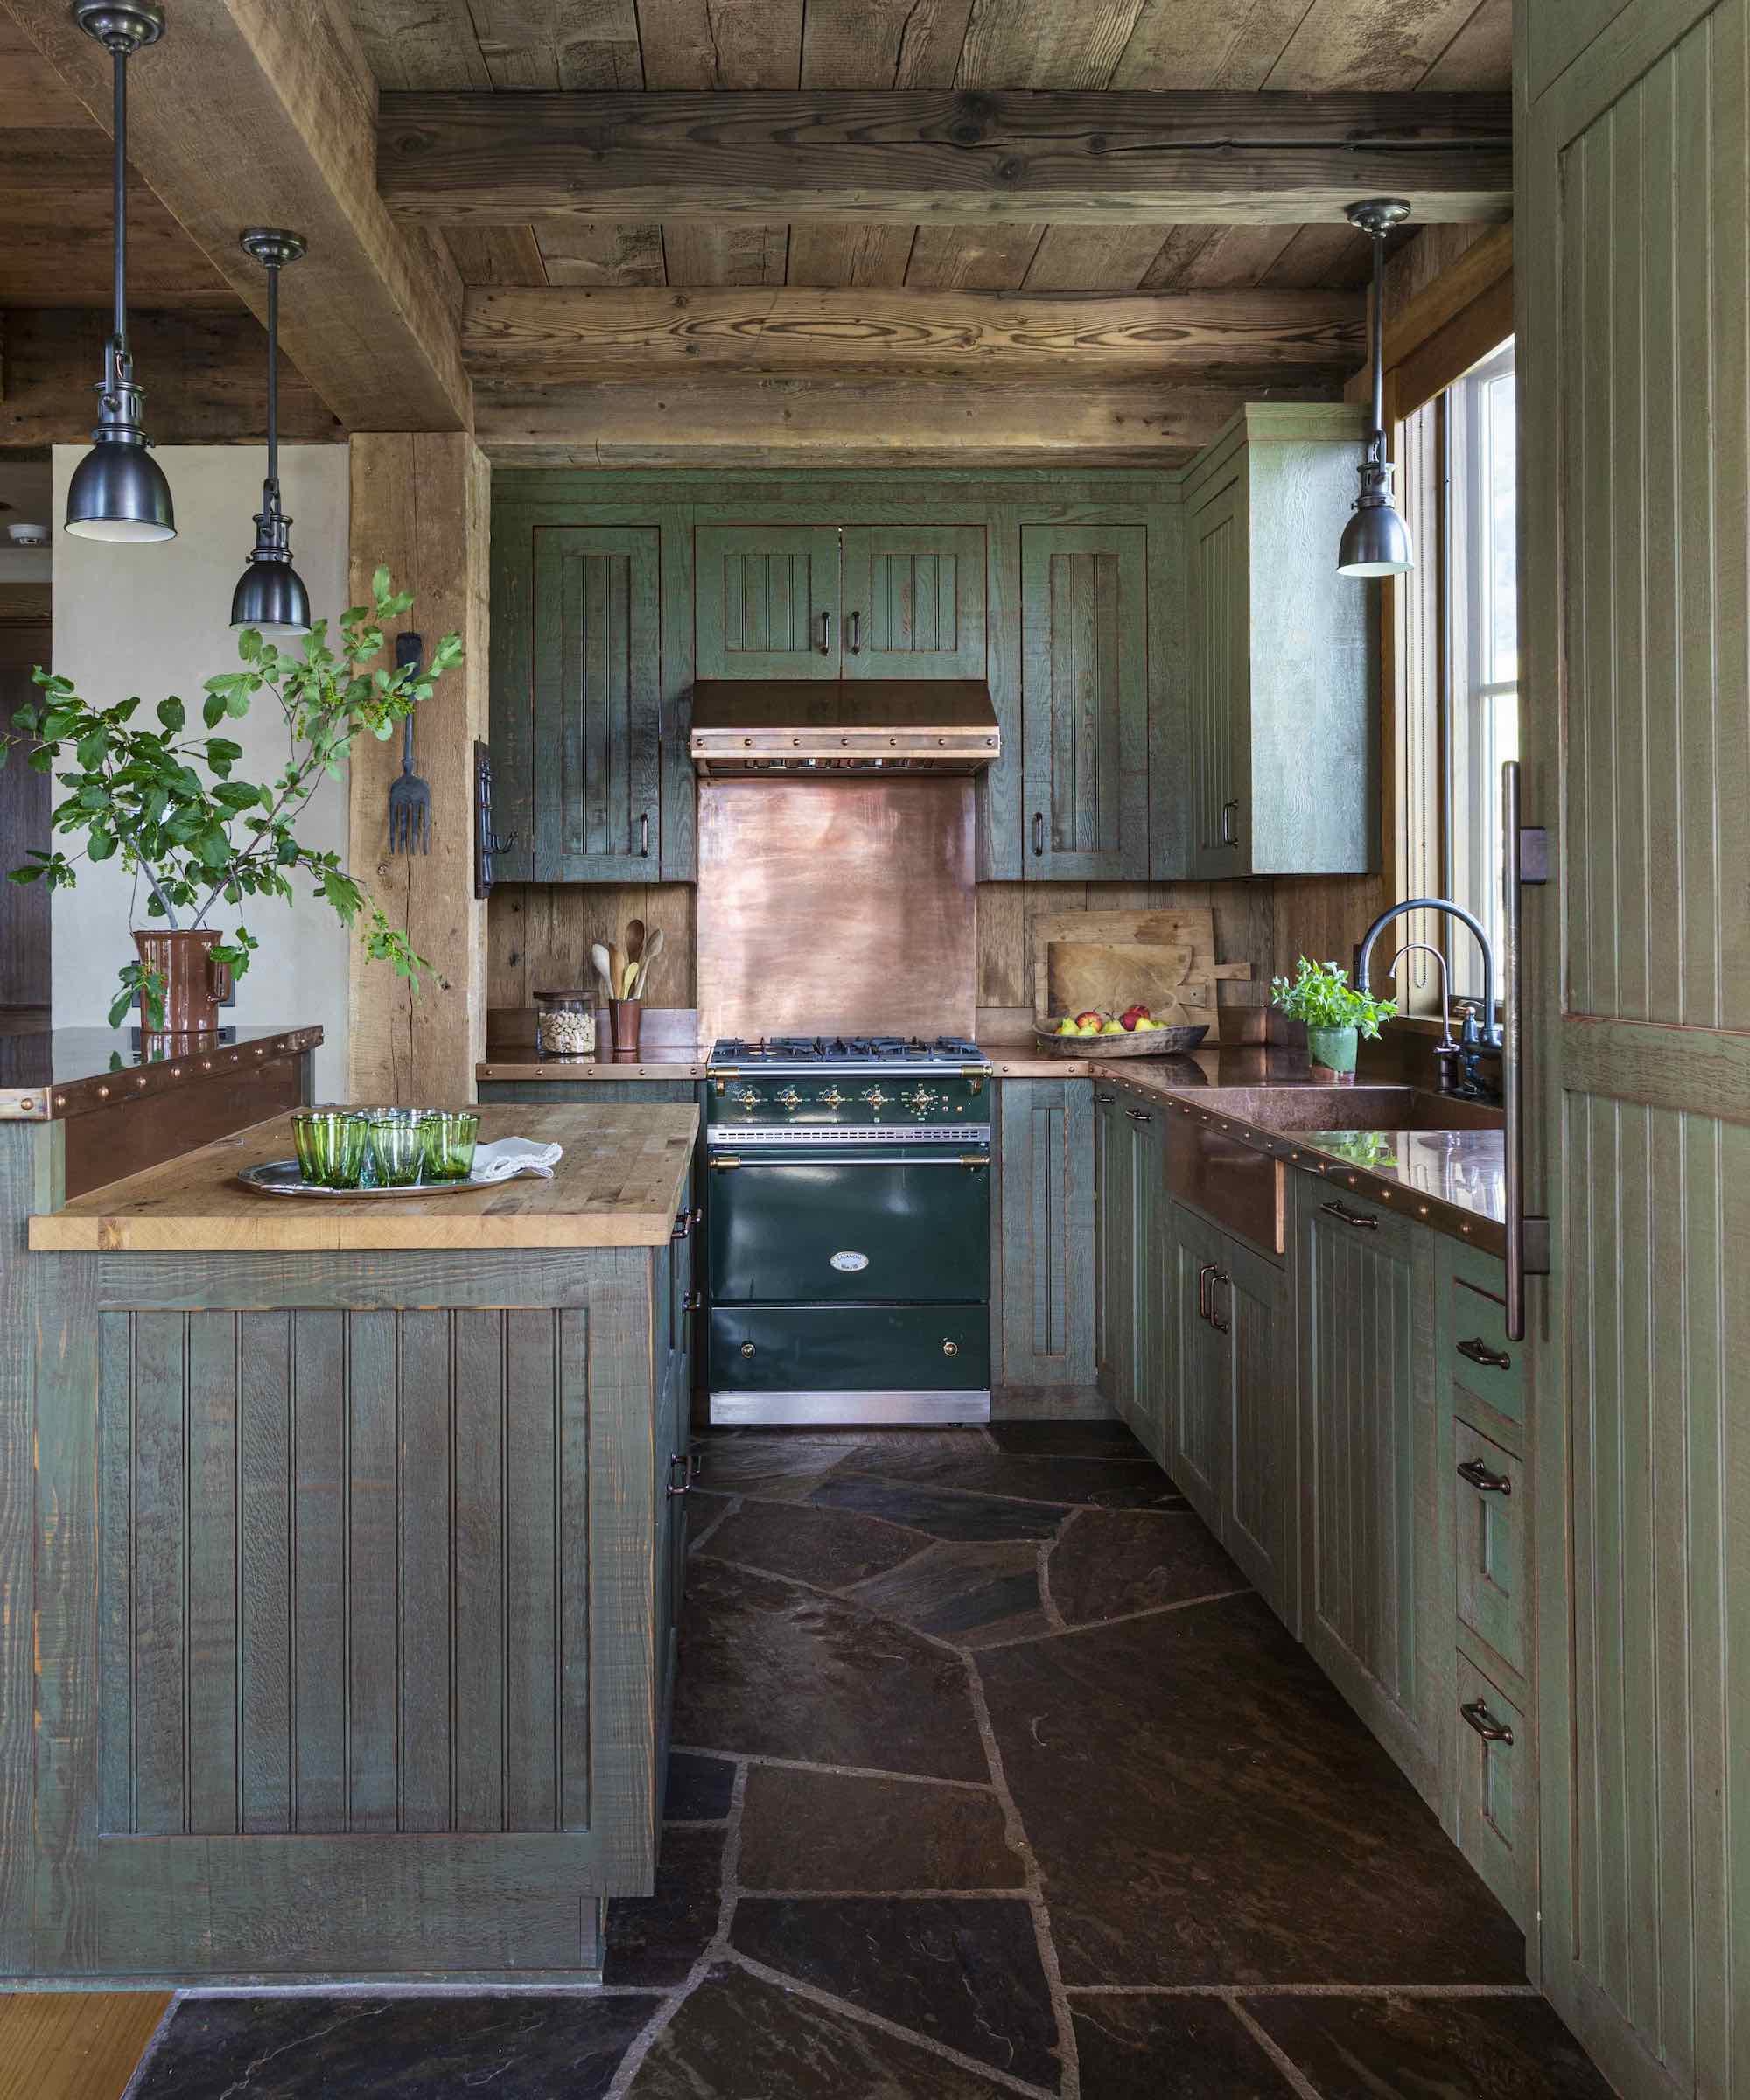
Copper, brass, zinc and bronze sheets can bring warmth and depth, but their appearance rarely remains completely static. Often called ‘living finishes’, they naturally oxidize or develop a patina; acids, salts and cleaning chemicals can affect that process. Protective coatings may preserve a particular finish but introduce their own care requirements. Ask whether the sample represents how the metal looks new or after use, and whether a lacquer or other treatment is responsible for that appearance.
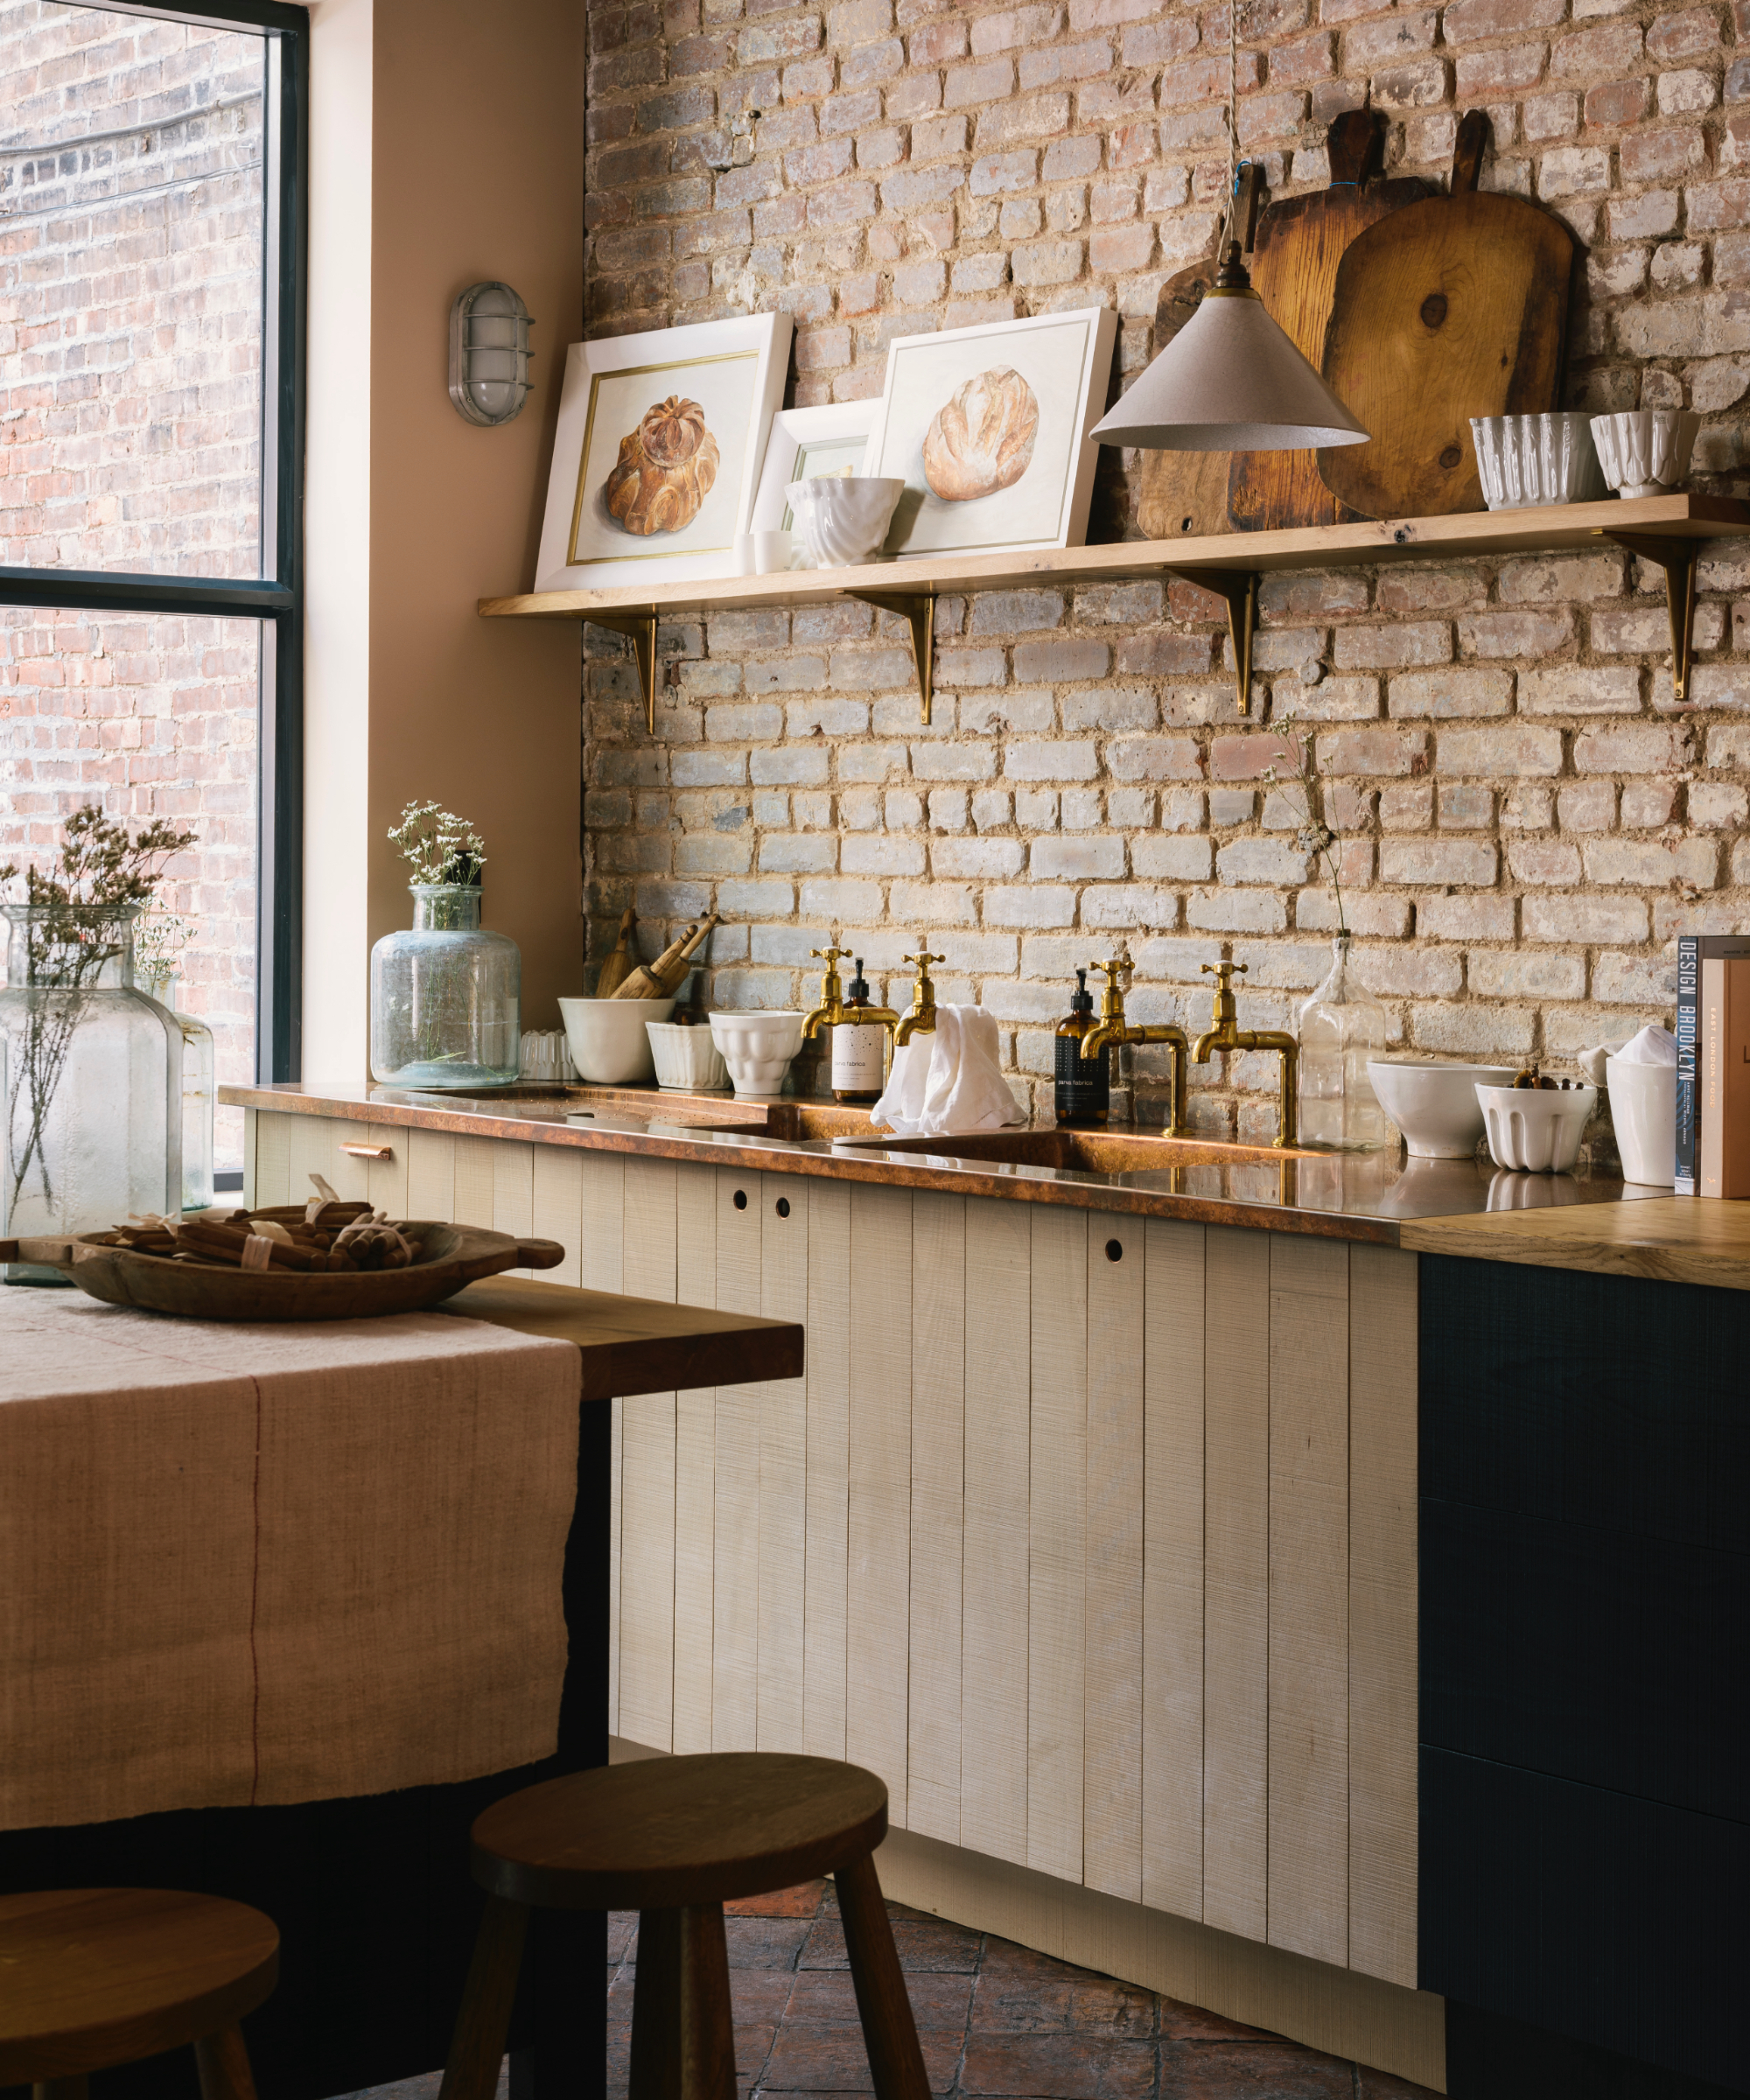
Original exposed brick can give a kitchen enormous character, but an attractive old wall and a practical cooking backsplash are not automatically the same thing. Brick and mortar are relatively porous, and deep joints and rough surfaces provide plenty of places for grease and food to settle. Sealing may improve cleanability but can alter the color or sheen, so test the finish first. Brick-look porcelain or brick slips offer a similar visual rhythm with much simpler maintenance if the practical demands of the location are high.
Wood and Wood-Look Surfaces
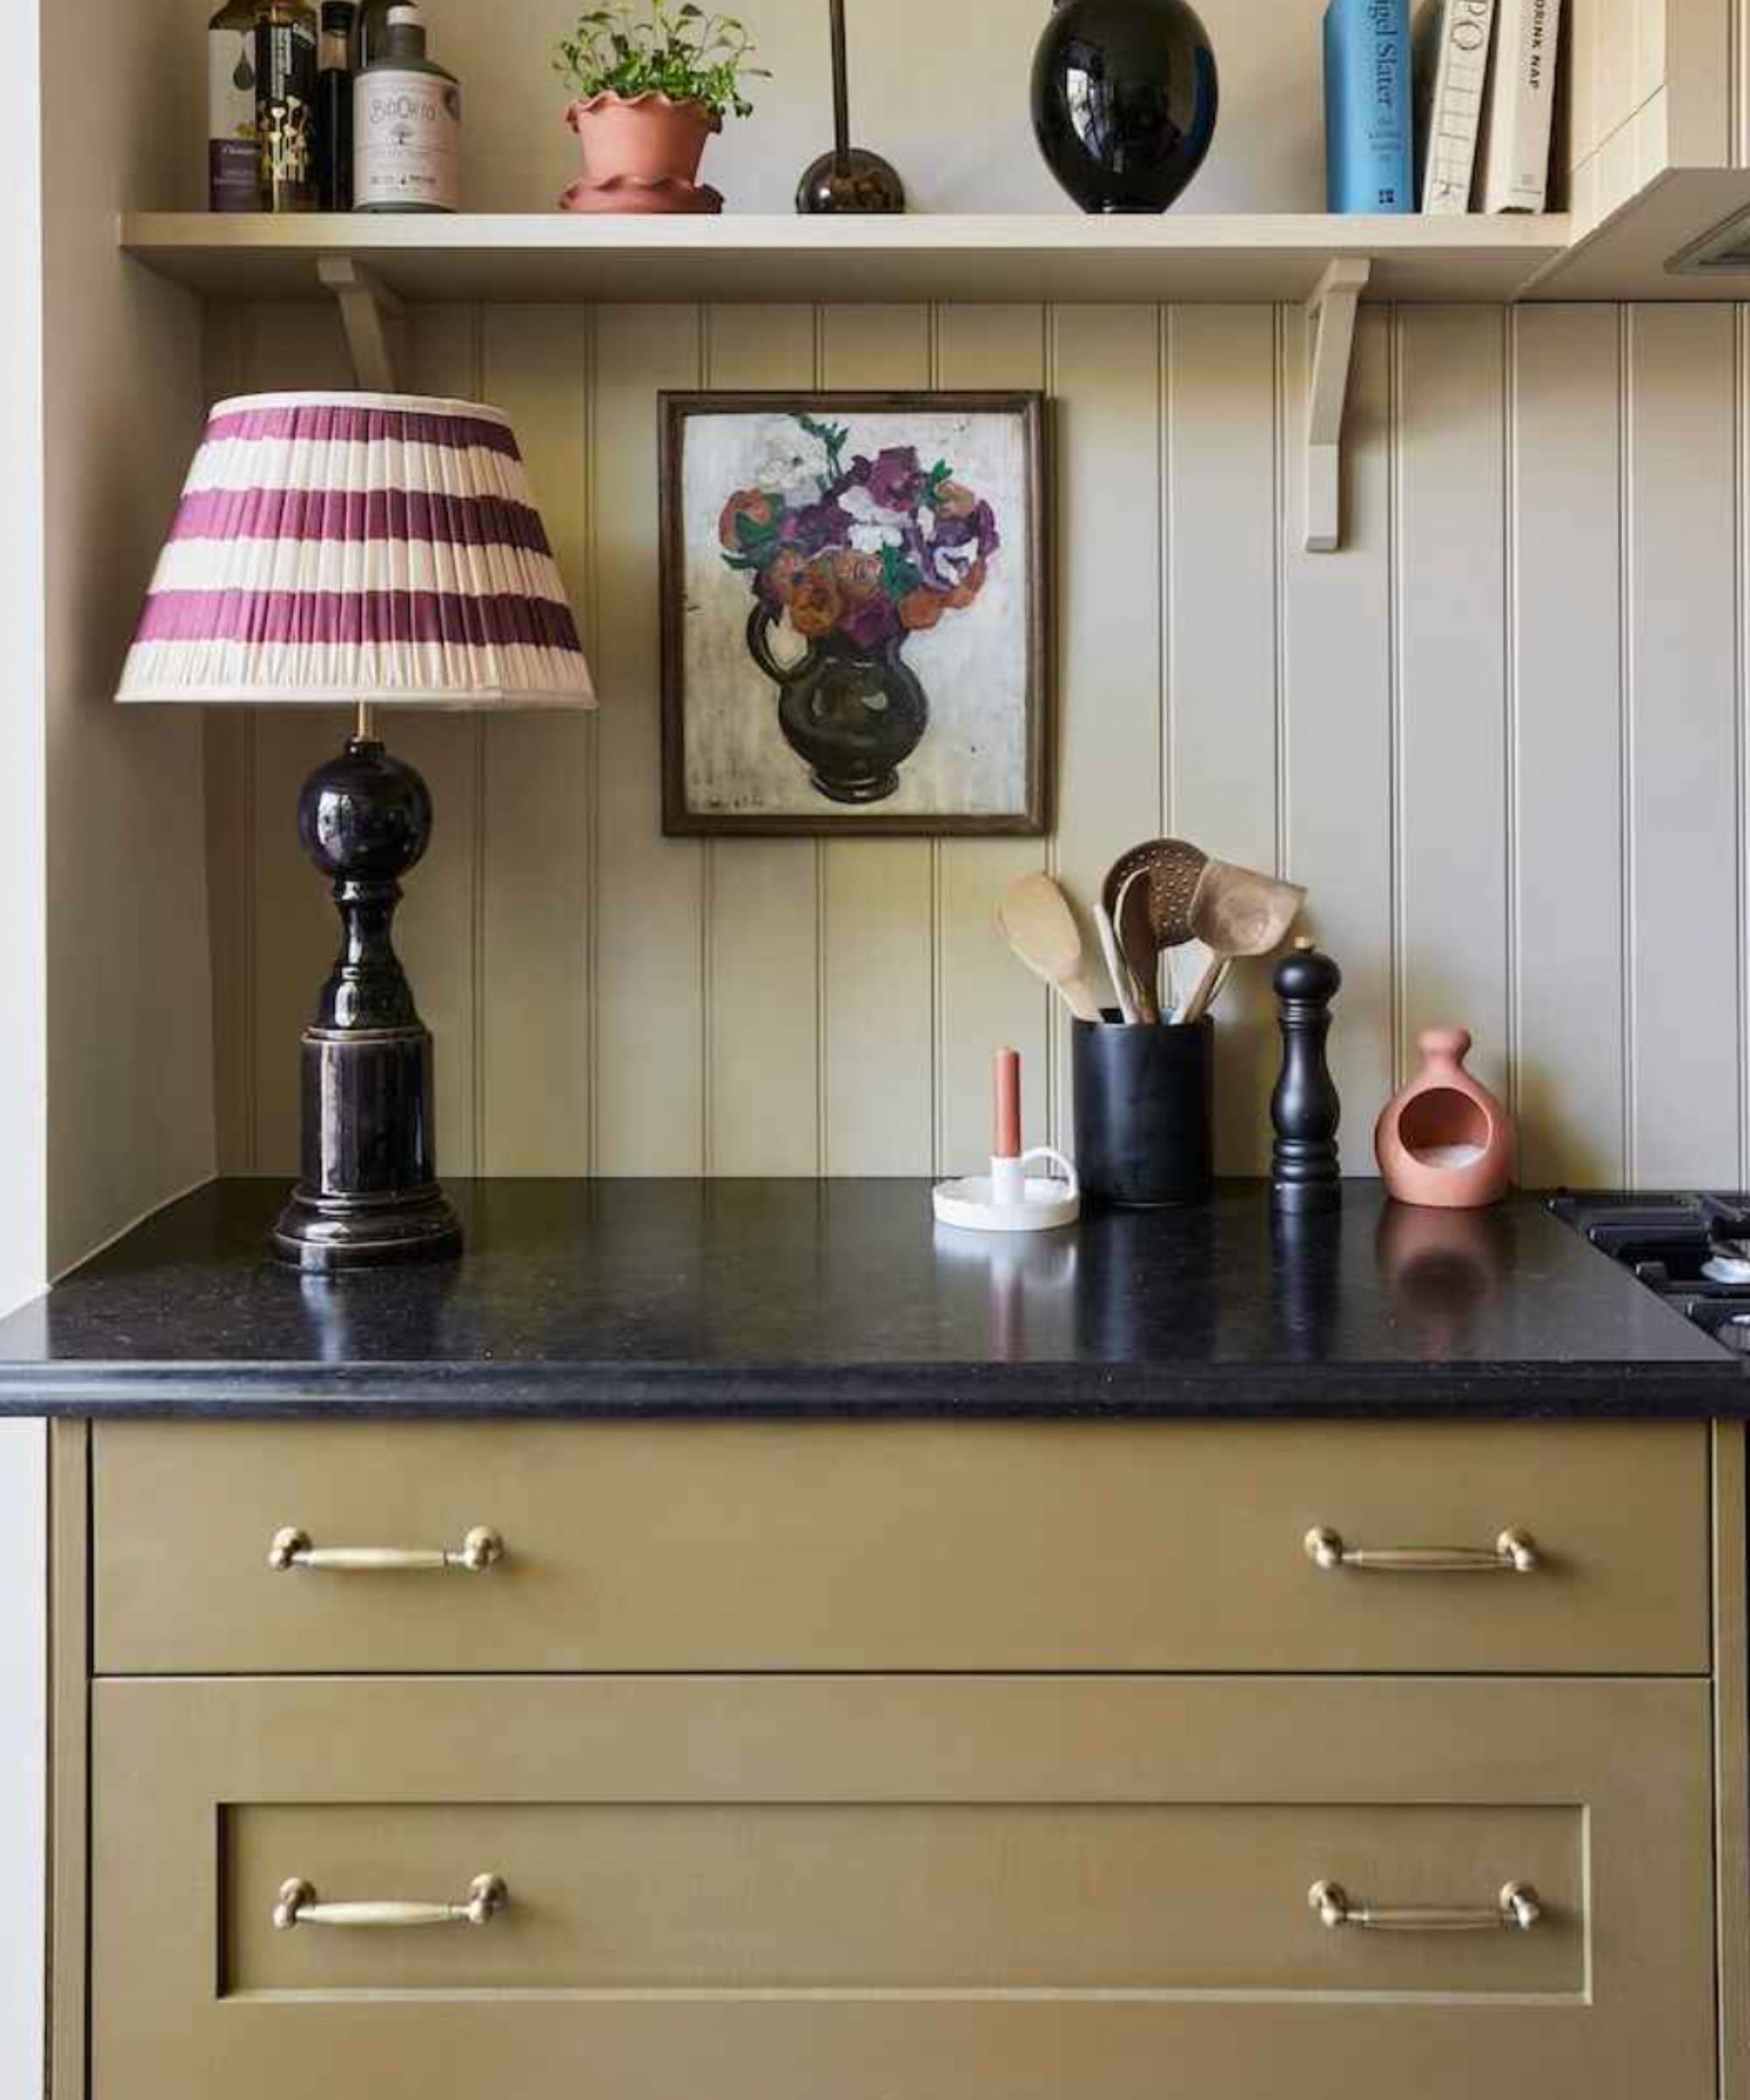
With the exception of a paneled kitchen backsplash finished in scrubbable paint, timber isn’t a good backsplash choice, particularly close to a range, where heat, moisture and grease can make it impractical. But if you want the warmth of timber in those hot/wet zones, wood-effect sintered stone or large-format porcelain can give you a similar look in a surface that is far better suited to a backsplash. The latest designs reproduce grain and knots surprisingly convincingly, while offering the heat, moisture and stain resistance you’d expect from a hard surface. Large slabs also mean fewer joints, so the effect can feel more like timber panelling than tiled wood-look strips.
Whichever material you choose, these three questions can help rule out the wrong option fast:
1) Can it tolerate the proposed heat and moisture?
2) How is it cleaned?
3) Who can install it – you/your builder or a specialist?
3. How Much Backsplash Do You Need?
Once the material is broadly decided, establish how much wall you actually want it to cover. Where and how you end a backsplash isn't merely an aesthetic choice. More coverage means more material, more labor, and potentially more complicated cuts, but it can also create more protected, and thus lower maintenance, walls.
‘The backsplash stopping point should be considered as part of the kitchen elevation rather than left until installation,’ says Swati Goorha. ‘Windows, range hoods, cabinets and open shelves can all provide natural alignment points. Choosing one of those architectural lines avoids awkward areas where the backsplash seems to randomly stop.’
A Low Backsplash
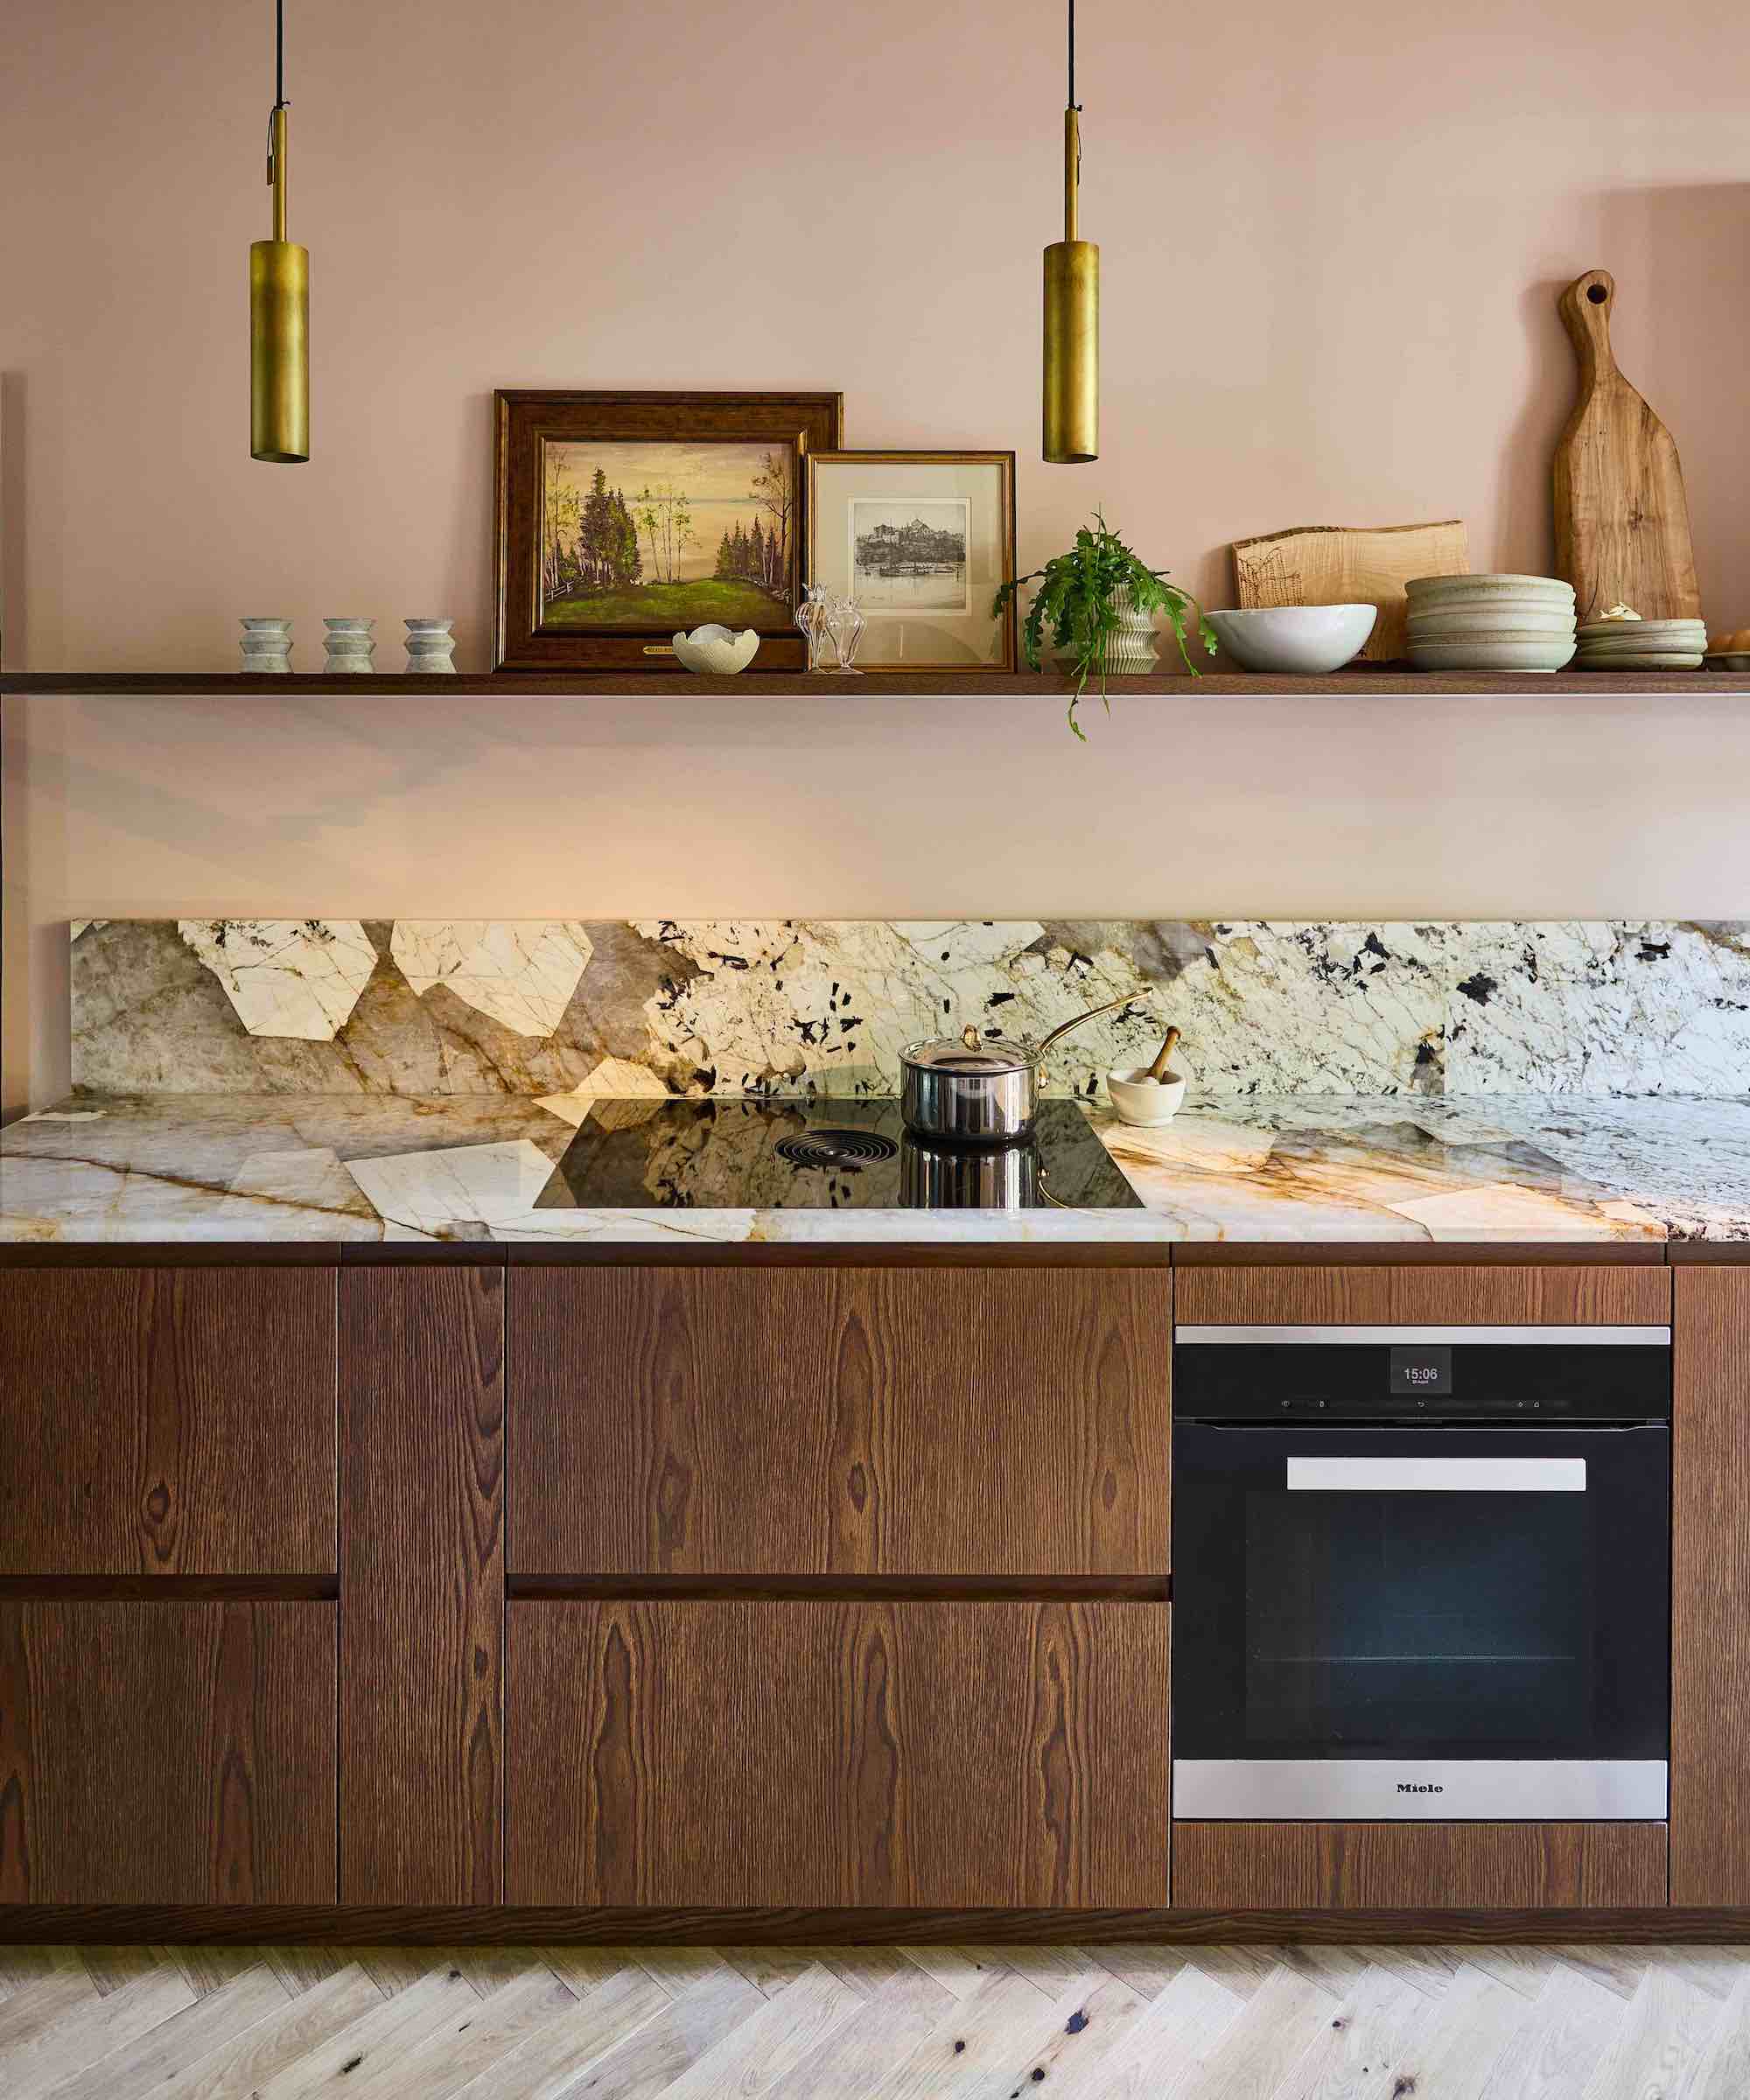
A traditional low backsplash – often around 4 inches high – provides a modest barrier immediately above the countertop. It uses relatively little material and can be useful where the wall above is intended to remain painted, paneled, or otherwise visually light. It also works particularly well when formed from the countertop material itself. Its limitation is obvious: anything splashed higher than the upstand reaches the wall finish, so it is less protective around sinks and vigorous cooking areas.
Countertop to Upper Cabinets
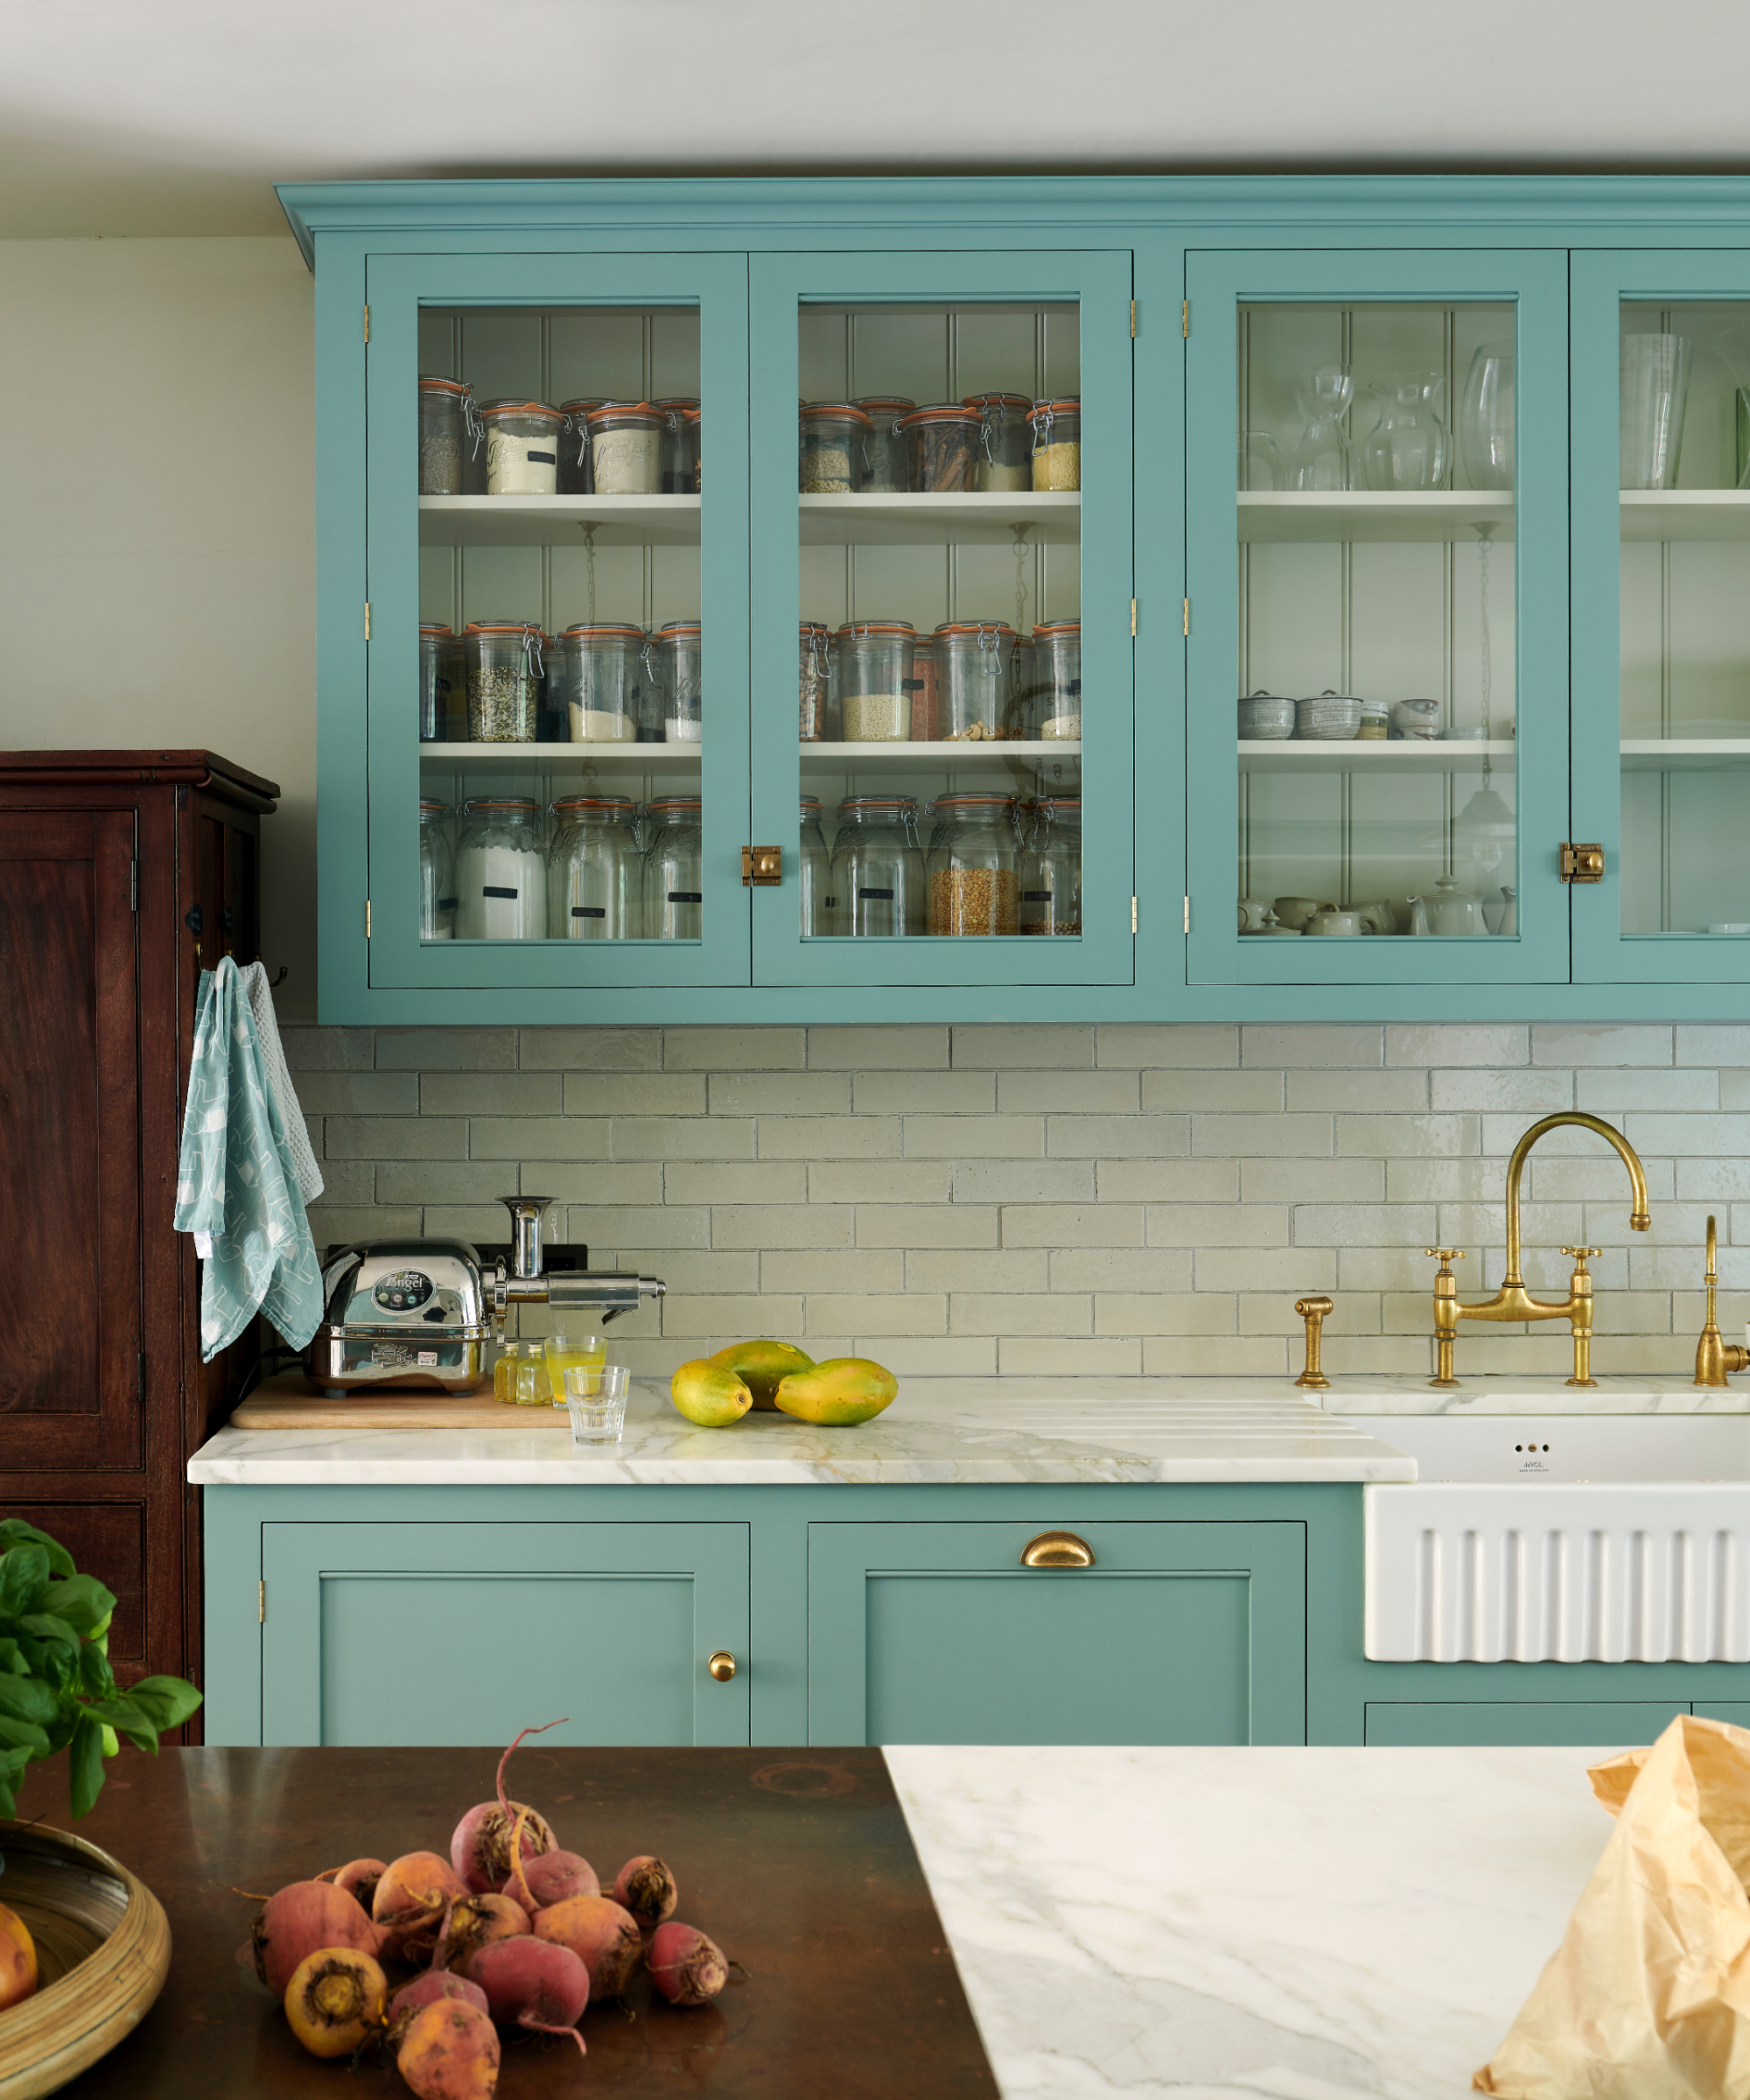
Filling the entire space between countertop and wall cabinets is probably the most straightforward approach because the cabinetry gives the backsplash a natural top line. Measure each section individually. The distance may not be identical throughout the kitchen, particularly beneath range hoods, around windows, or where cabinet heights change. This coverage also avoids an arbitrary horizontal termination in the middle of the wall.
Behind the Range Only
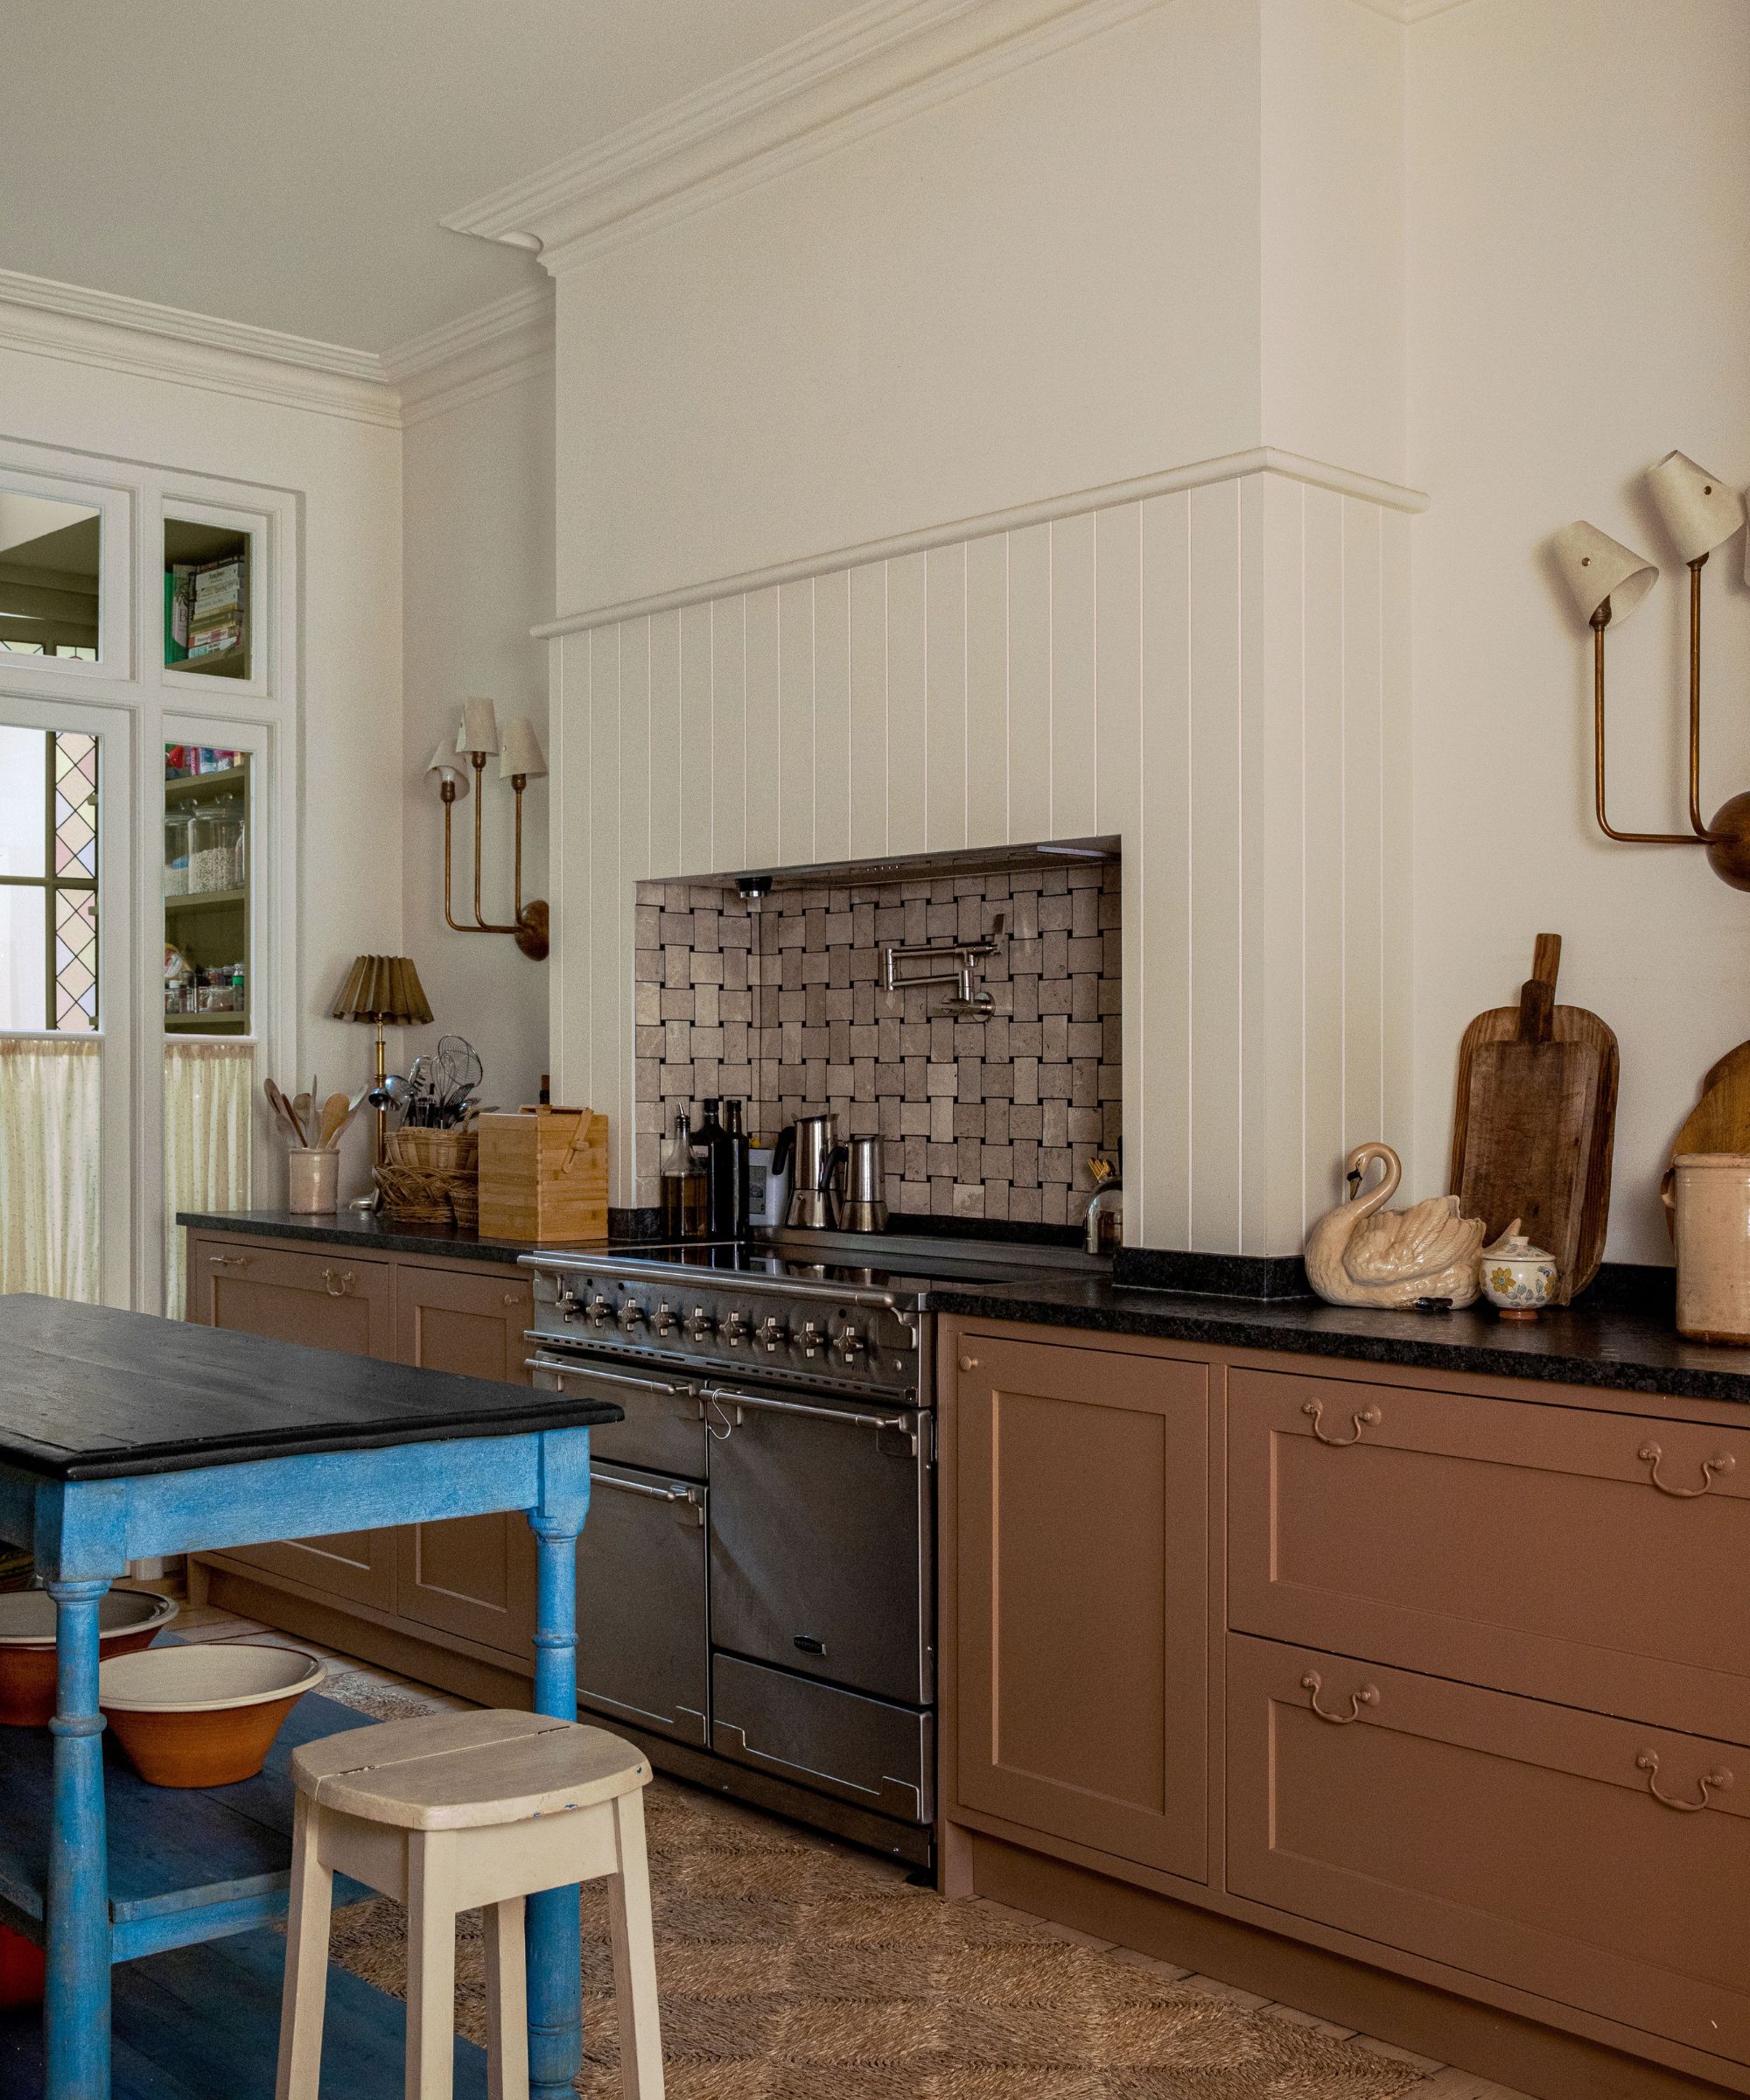
Concentrating a backsplash behind the range can be a useful way to introduce a more expensive or decorative material without committing to it throughout the kitchen. But treat it as part of the whole elevation. If the backsplash stops exactly at the appliance edges, does that width make sense with the hood above? Would aligning with surrounding cabinets create a better proportion? What happens at the countertop? Ideally, the answer needs to be drawn out on paper (or on screen), not decided by the installer standing in front of the wall.
Full Height or to the Ceiling
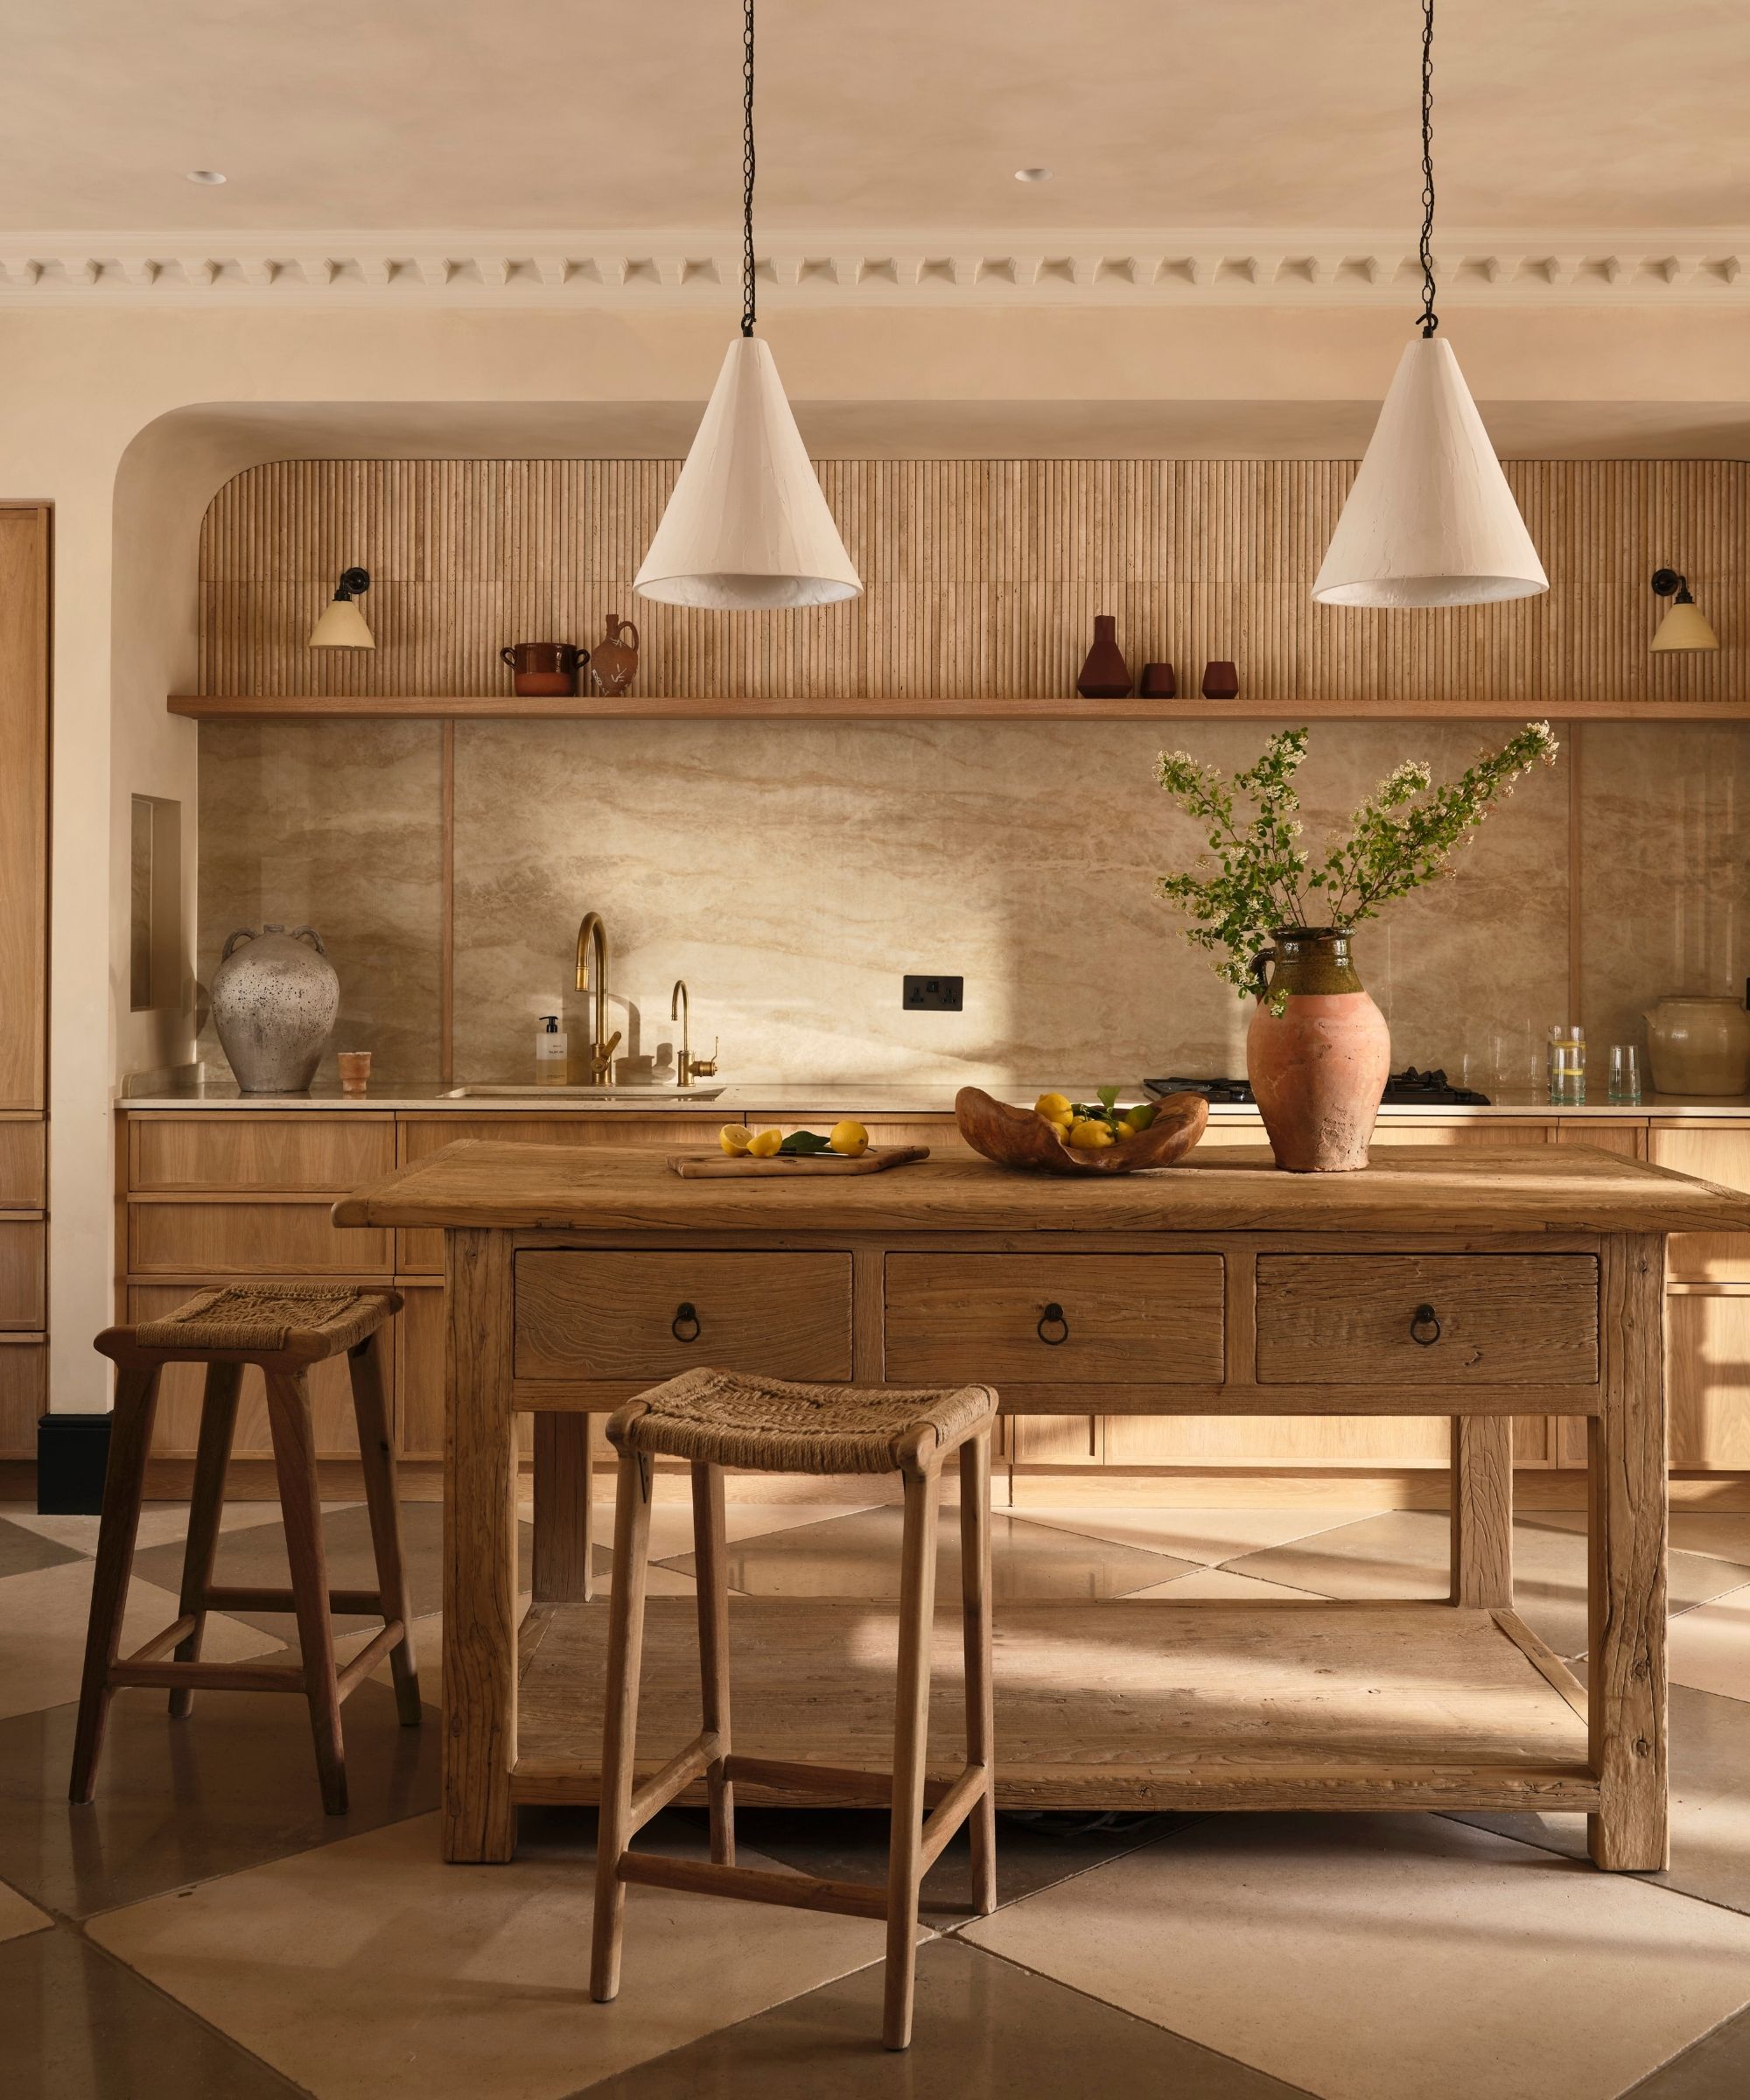
Where upper cabinetry is limited, extending the backsplash to the ceiling can give the wall a much stronger architectural finish. Slab materials can work particularly well because the surface remains relatively continuous; tile creates a more obvious field of pattern and grout. Cost becomes important here. Taking a premium stone or handmade tile from counter to ceiling can multiply both the material quantity and labor, so calculate square footage before becoming emotionally committed to the sample.
A kitchen window creates several possible stopping points: your backsplash can finish beneath the sill, wrap into the reveal, continue around the opening or cover the entire wall surrounding it. The cleanest choice will depend on the relationship between window trim, countertop and nearby cabinetry. If tile has to finish against traditional projecting trim, work out whether it dies neatly into the casing or requires a visible edge profile. If the window has a minimal reveal with no substantial trim, wrapping the backsplash inward can create a much more integrated look and a neat shelf.
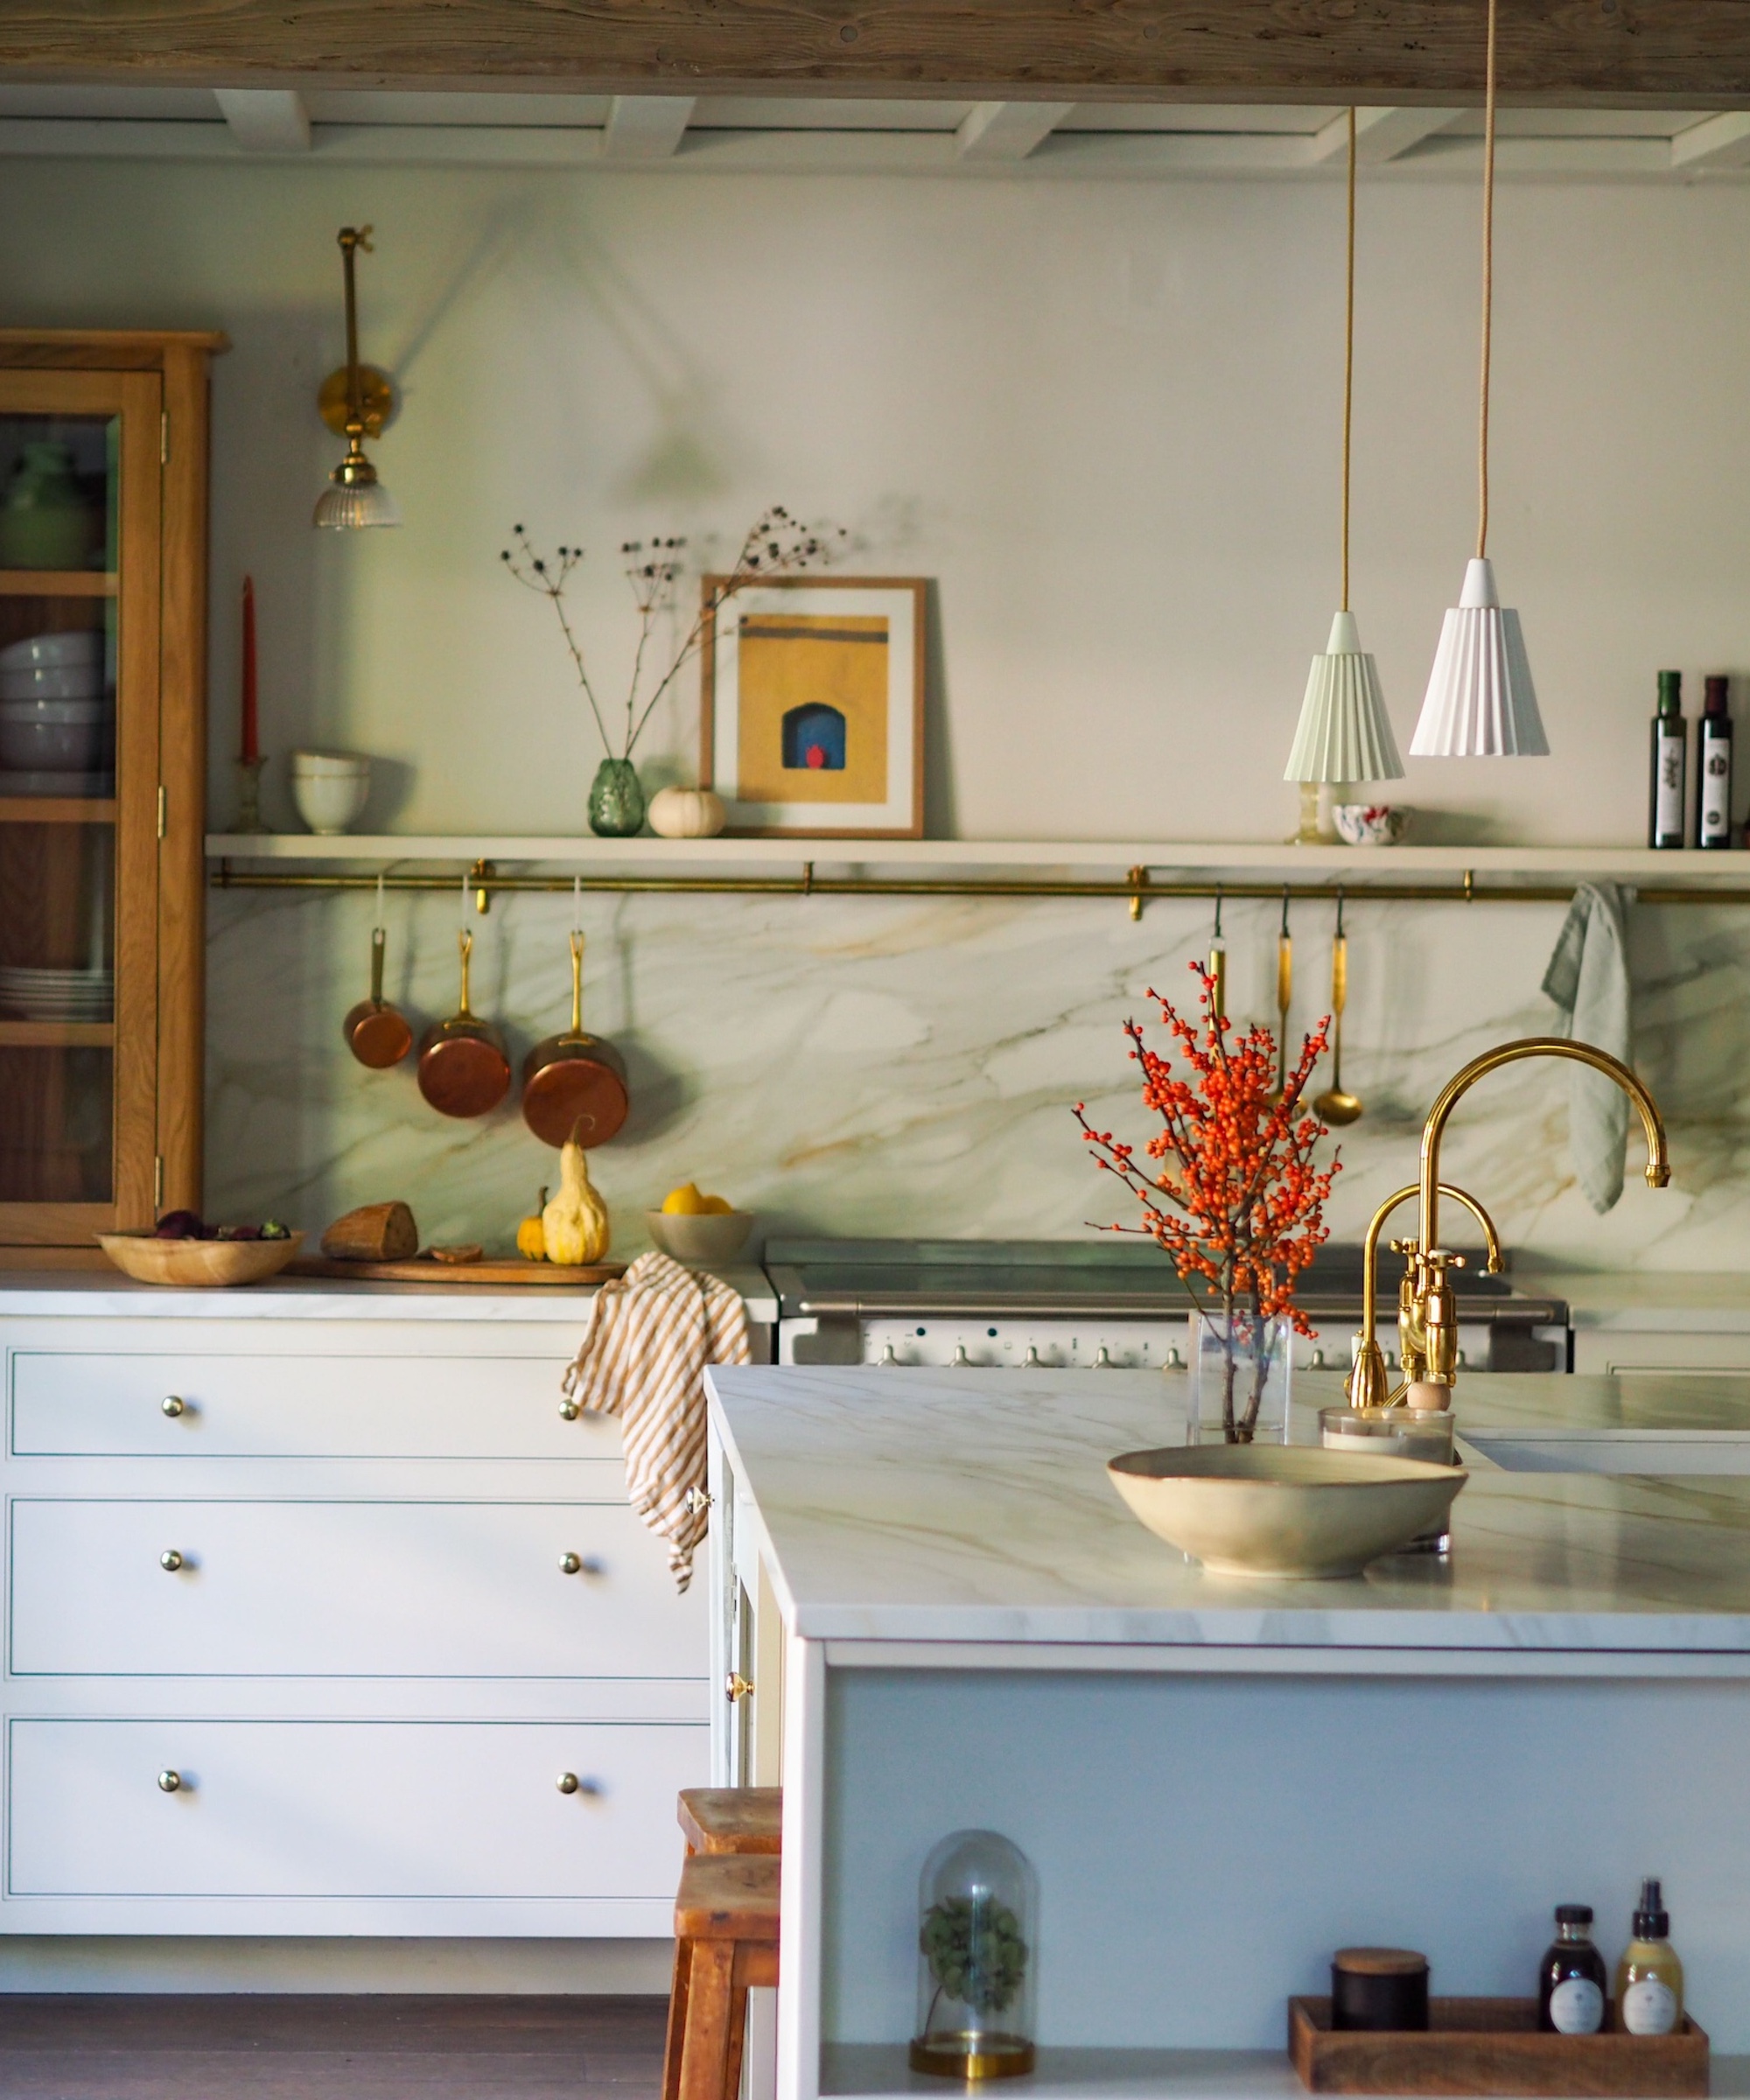
Open kitchen shelving gives you a little more flexibility than wall cabinetry. You can stop the backsplash neatly at the underside of the shelf, just as you would beneath a cabinet, or continue it behind the shelving to make more of the wall. It might run to the ceiling, align with another architectural feature, or stop at a deliberately chosen height.
If there’s nothing else on the wall and you don’t want to take the backsplash all the way to the ceiling, designers often suggest stopping it around a third of the distance from the countertop to the ceiling. This gives it enough height to feel intentional without letting it dominate the wall.
When a backsplash turns onto an adjacent wall, decide where the secondary run ends. Stopping after a random tile or at the end of the countertop can look awkward if nearby cabinetry tells a different story. Aligning with a cabinet edge, window, architectural return, or another clear vertical line generally makes the decision look intentional.
4. Choose the Right Tile Size, Shape and Layout
Once coverage is determined, tile size can be judged against the actual dimensions of the area, rather than against a sample board in a showroom. A 2-by-8-inch tile, for instance, behaves very differently across a narrow 18-inch backsplash zone than over an entire wall to the ceiling.
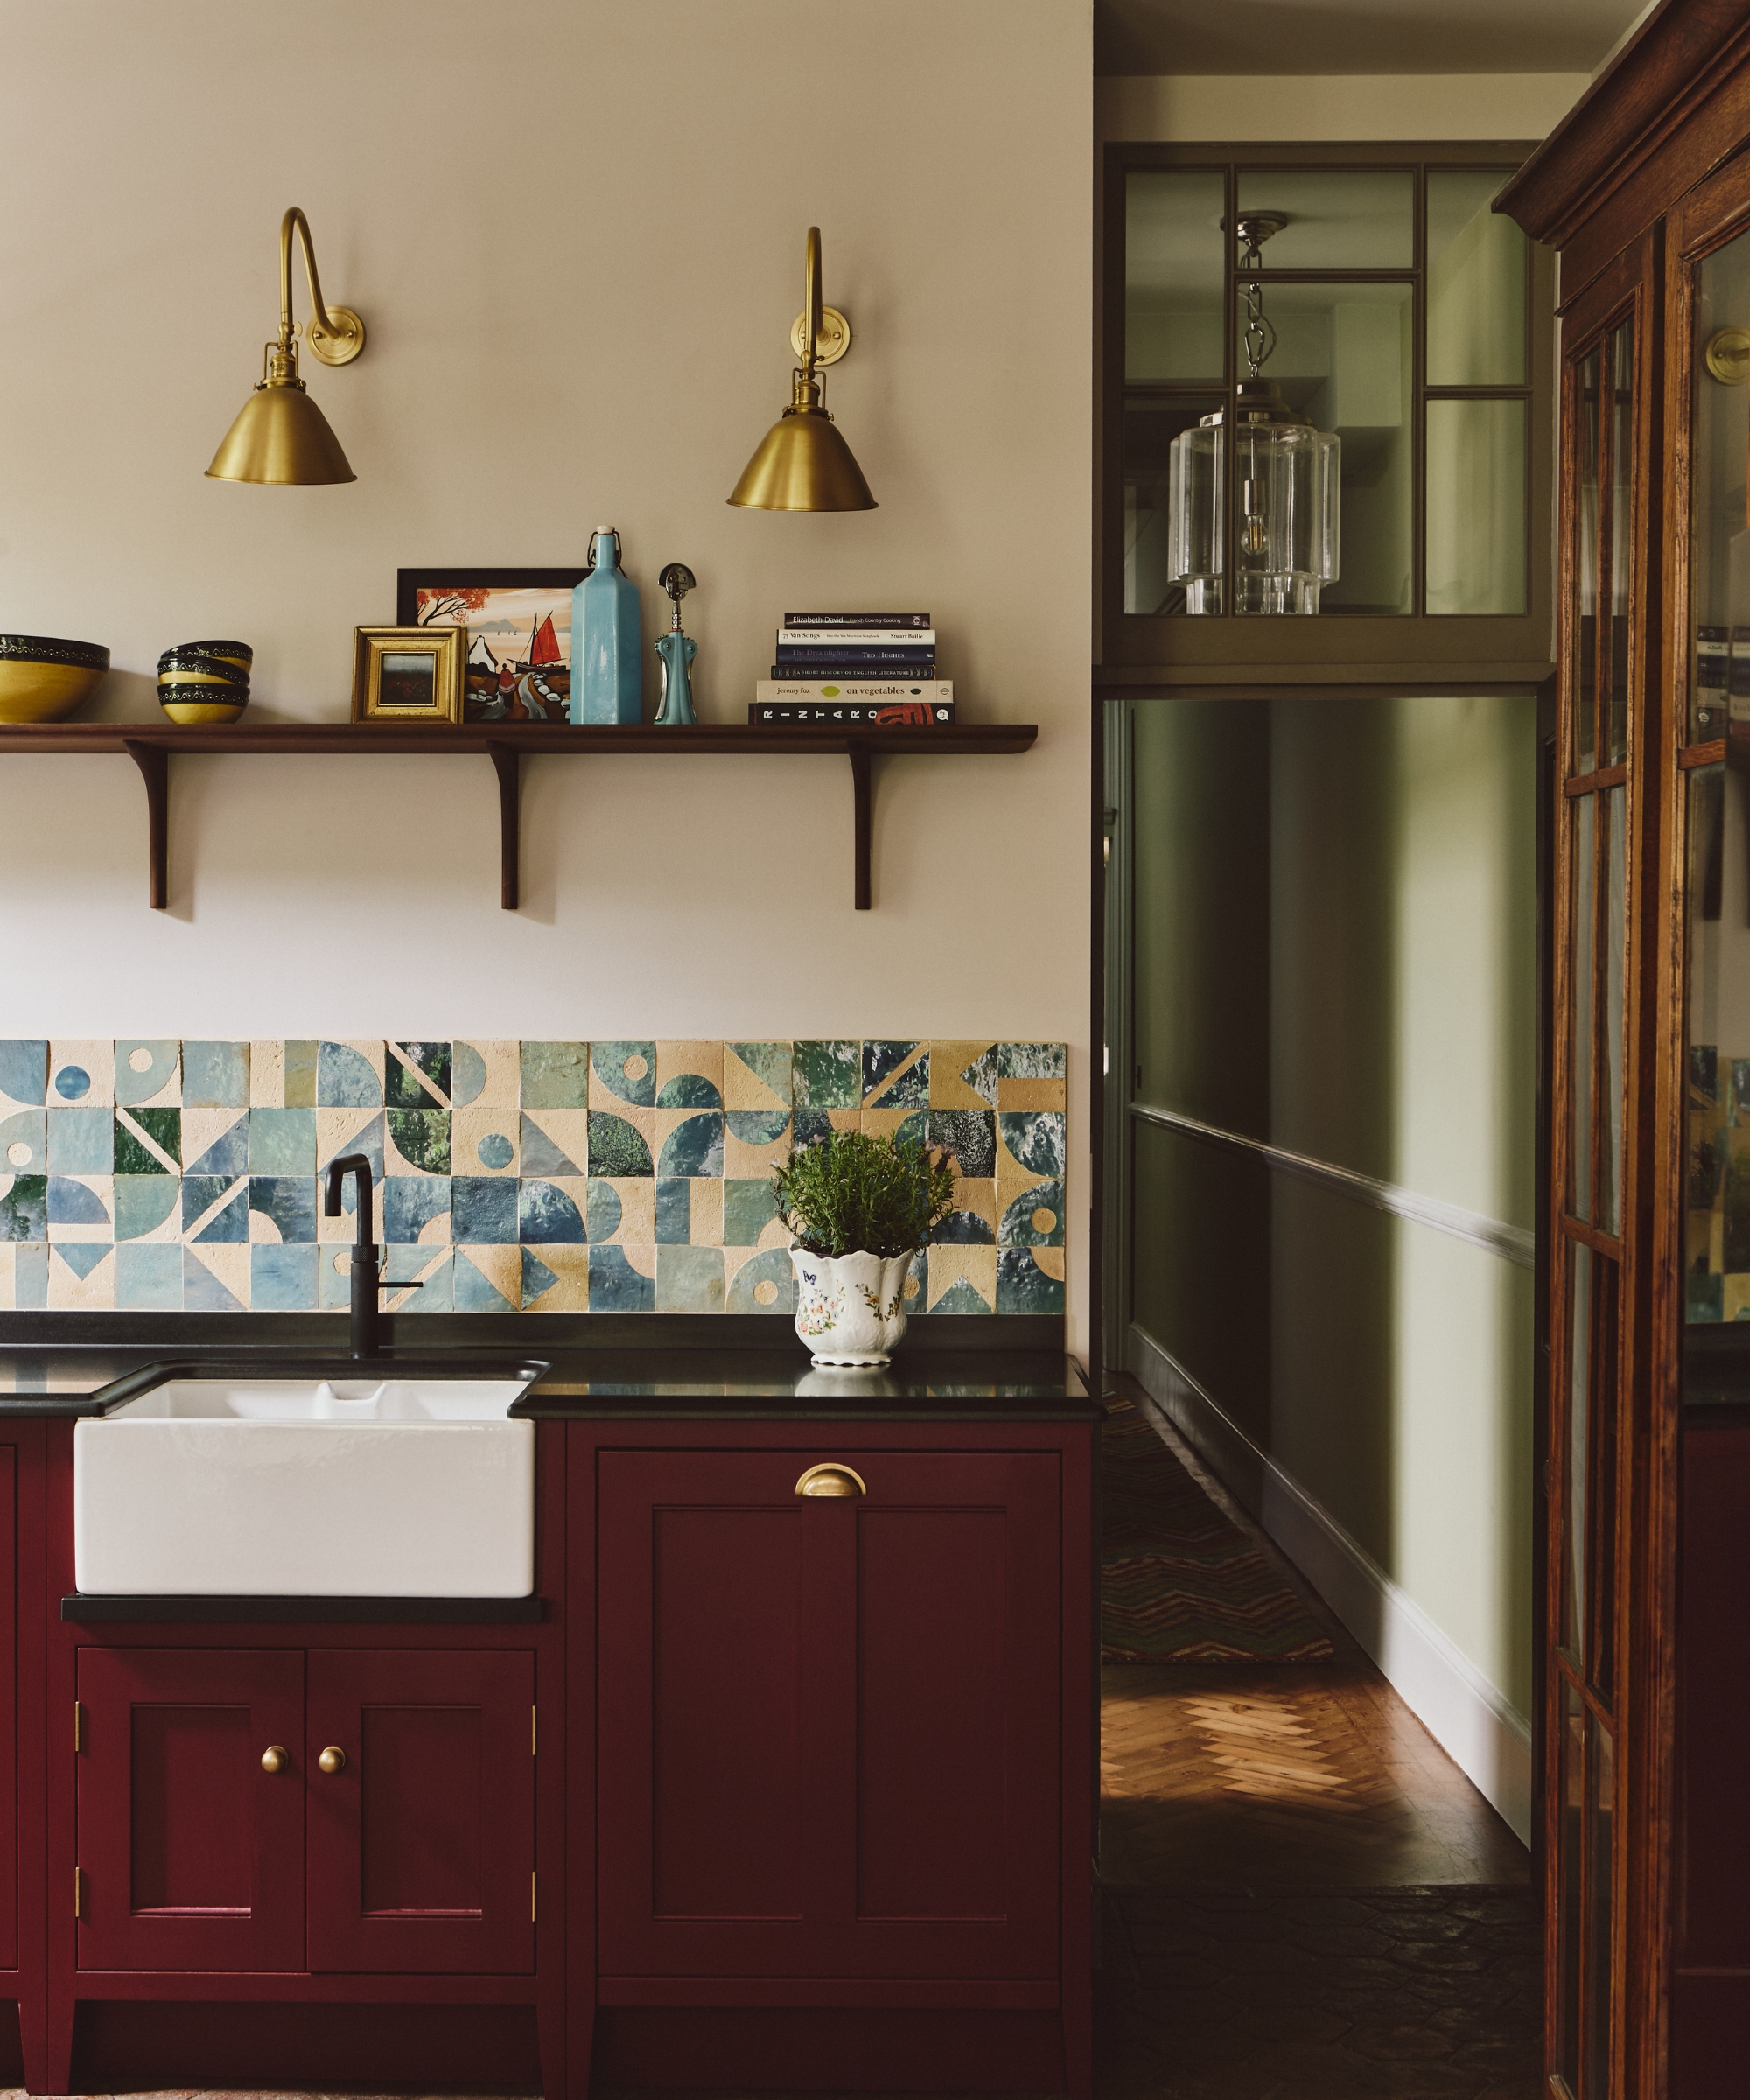
Small tile introduces more joints, more rhythm, and often more texture. It can also adapt readily around corners, irregular walls, and complicated details because individual pieces are relatively easy to manipulate.
The trade-off is grout. A mosaic may contain many times more joint length than a 12-by-24-inch tile over the same area. Larger tiles produce fewer joints and can make a backsplash read as a broader surface rather than a pattern of individual units. They are not necessarily simpler to install, however. A large-format tile crossing several outlets may require awkward cuts, and flatter walls become increasingly important as tile dimensions increase.
Look At the Cuts Before Choosing the Tile
‘My first priority is to lay out my tiles after determining the measurements of my cabinets. Laying out my tiles at the start helps me to avoid buying the wrong amount of tiles for my project. Also, it ensures that I do not end up with small odd-shaped tiles that are less than an inch in size,’ explains Mike Belk, Founder of BELK Tile.
To try and minimize awkward cuts, measure the distance from countertop to upper cabinet and divide it by the proposed tile dimension, including the grout joints. Will you get two full tiles and an unattractive thin strip? Can the layout be centered to balance the cuts? Would rotating the tile solve the problem? Then do the same horizontally at windows, corners, and the range.
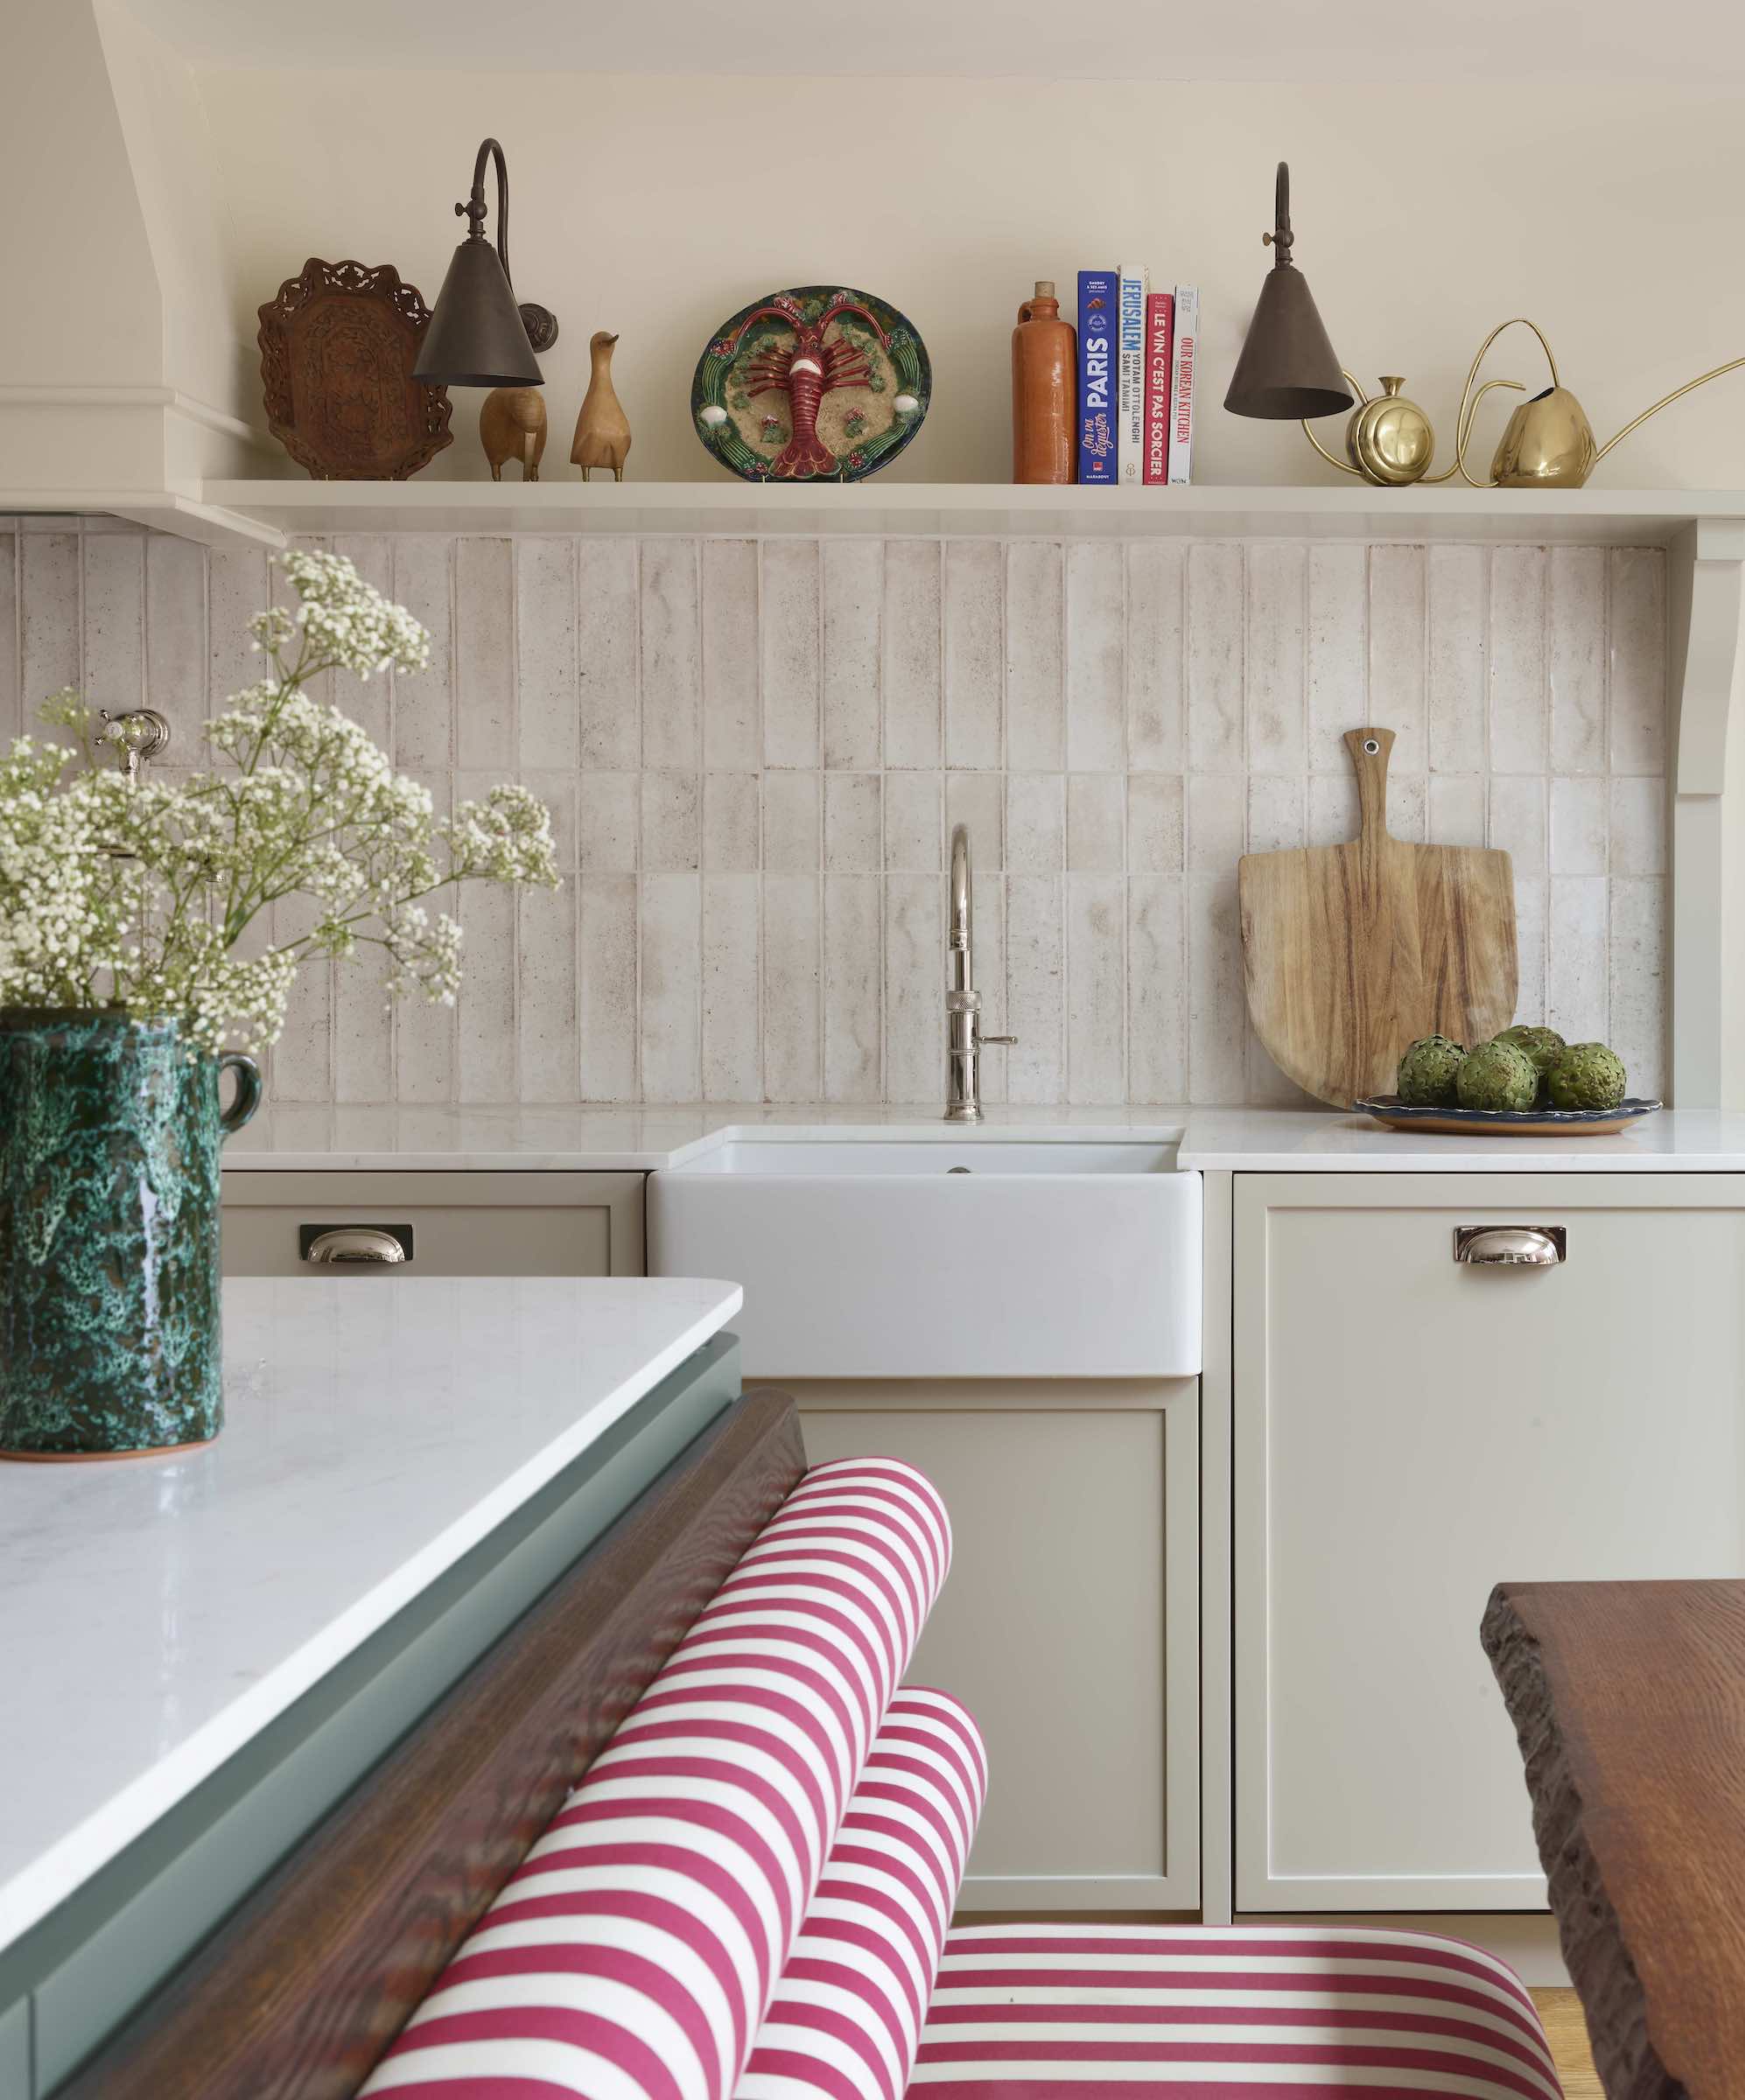
Rectangular tiles laid horizontally emphasize the width of the backsplash, while the same format turned vertically accentuates height. That doesn't mean horizontal automatically makes a small kitchen look wider or vertical makes it taller; surrounding cabinet lines and grout contrast have a significant influence. But orientation changes the direction in which the eye reads the pattern. Vertical layouts can also work particularly well where the distance between counter and wall cabinets accommodates the tile module neatly.
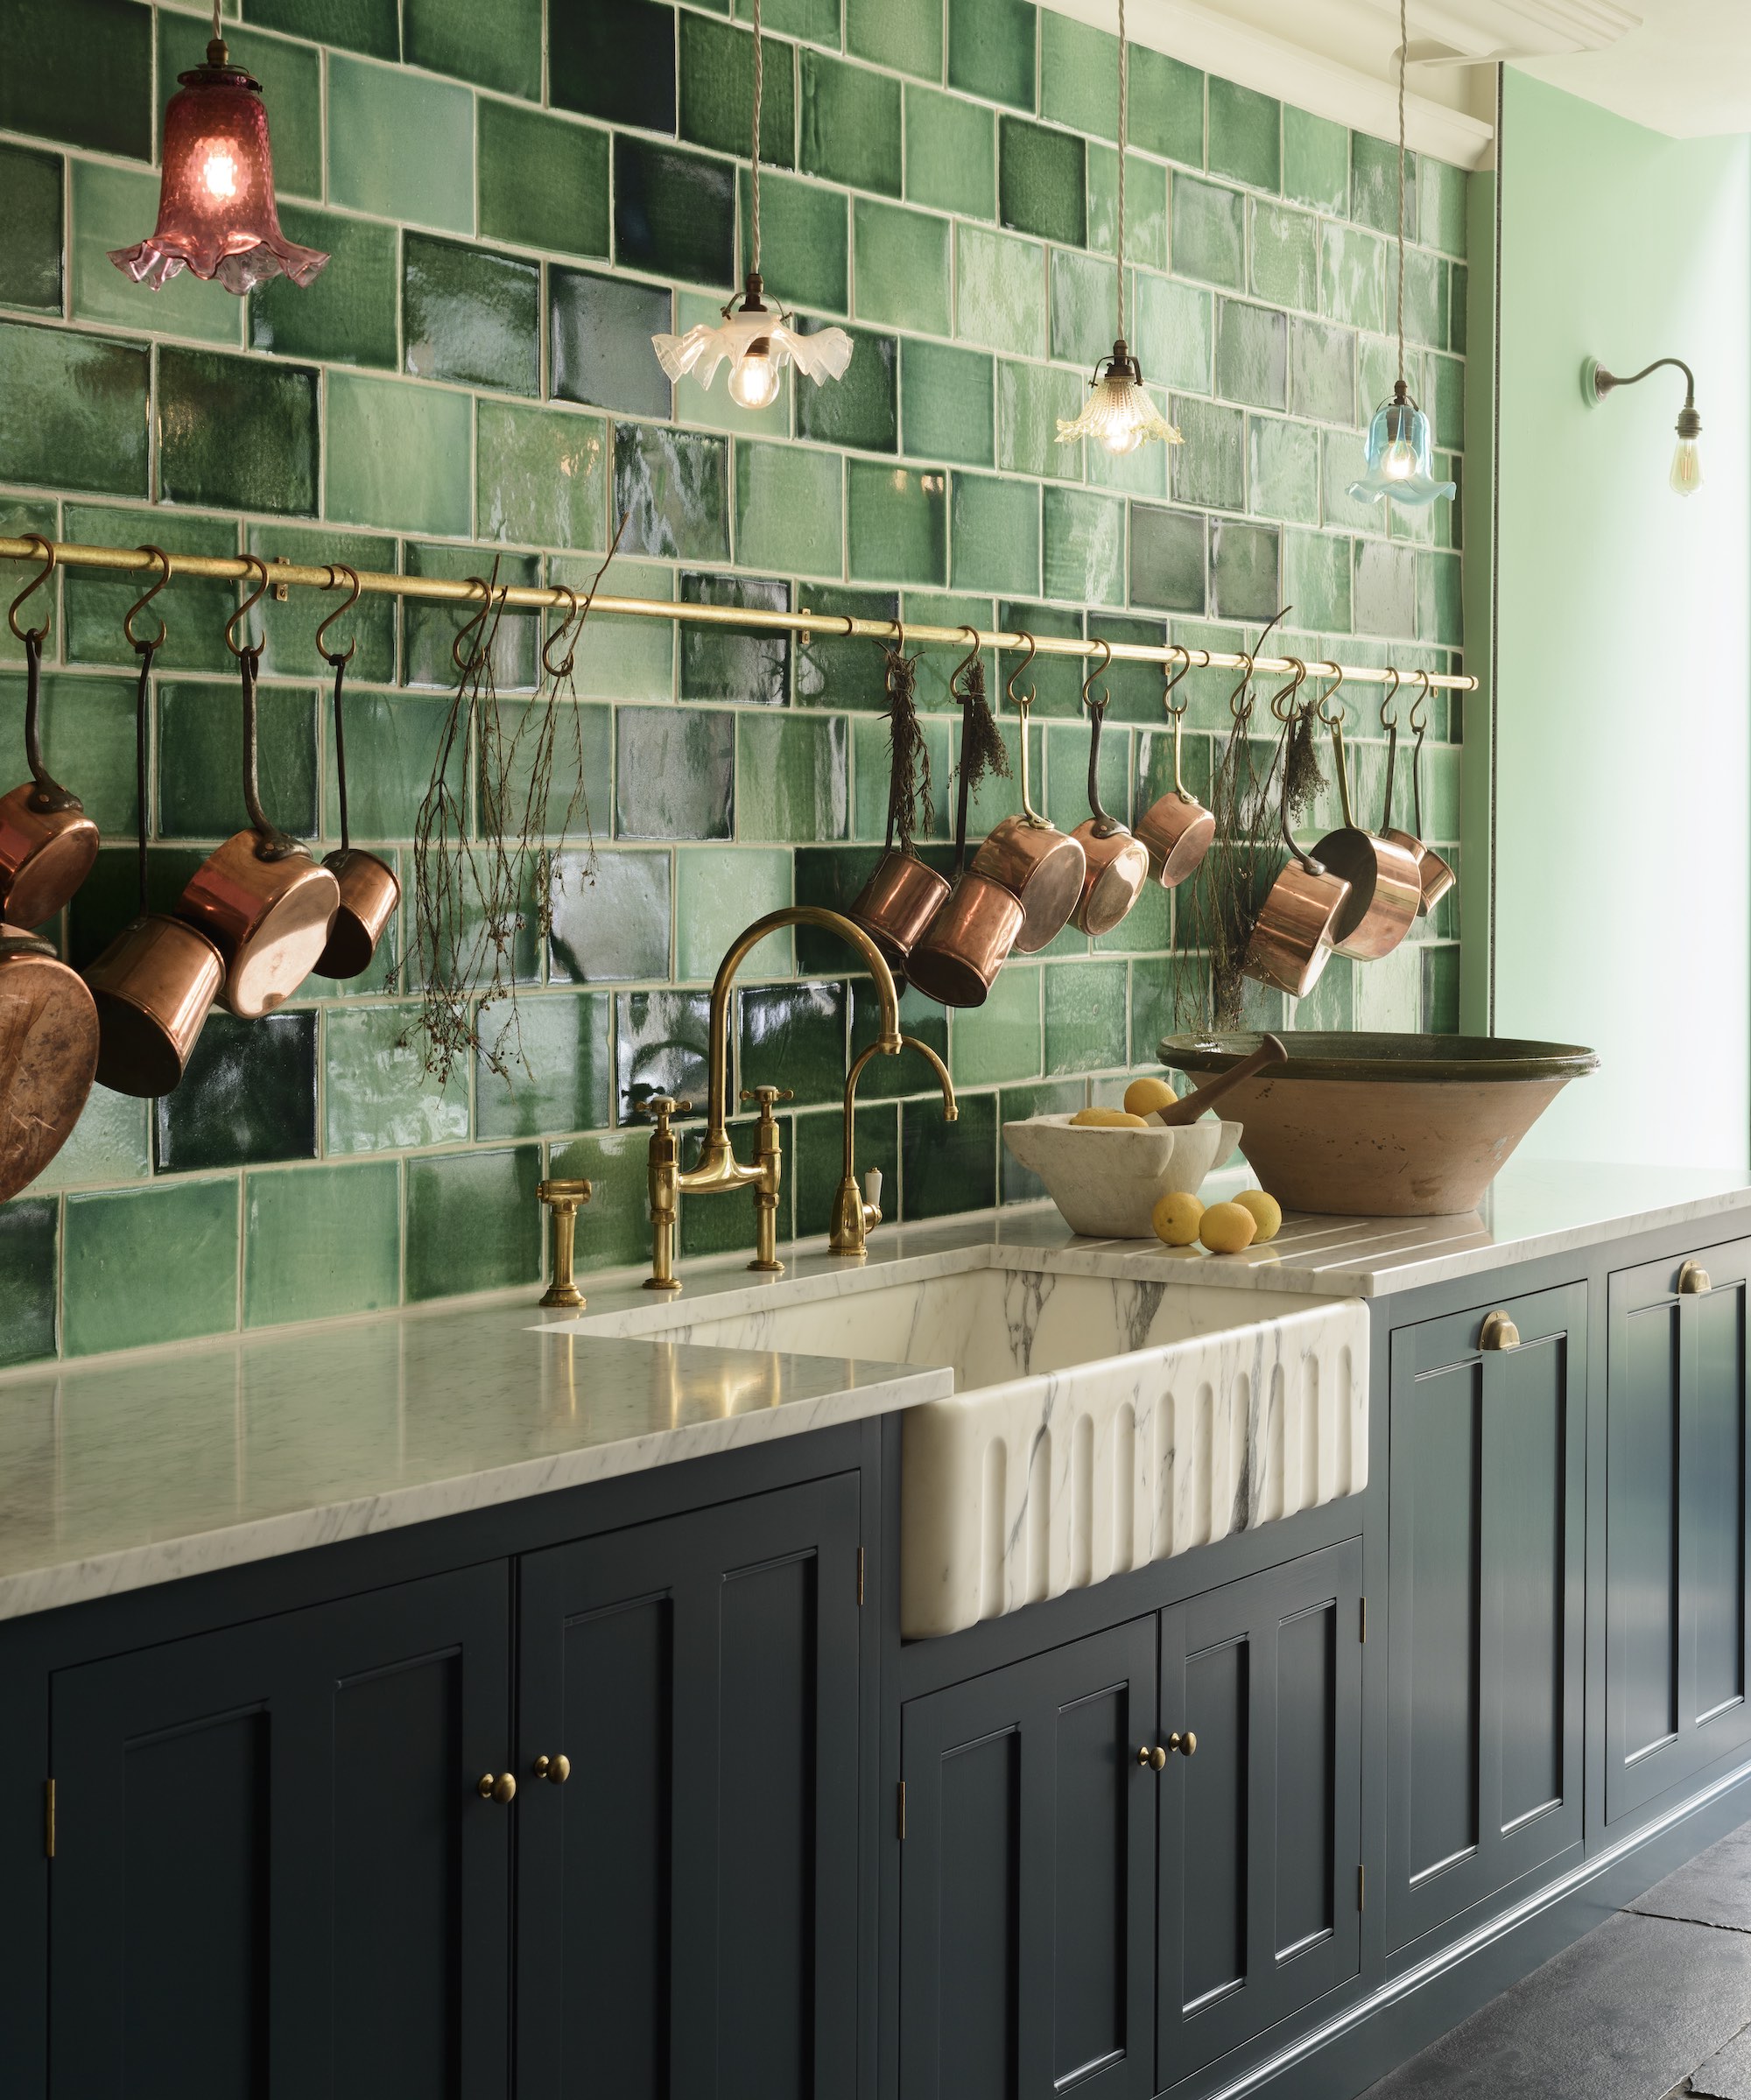
A straight stack aligns the joints to produce a regular grid. With narrow rectangular tiles, it can feel graphic and ordered. Running bond offsets each row. The degree of offset matters, particularly with long rectangular tiles that may have some natural bowing from manufacture. Tile manufacturers may recommend specific offsets and grout widths for particular products, so don't assume every long tile should automatically be laid in a 50% brick bond.
Herringbone and More Complex Patterns
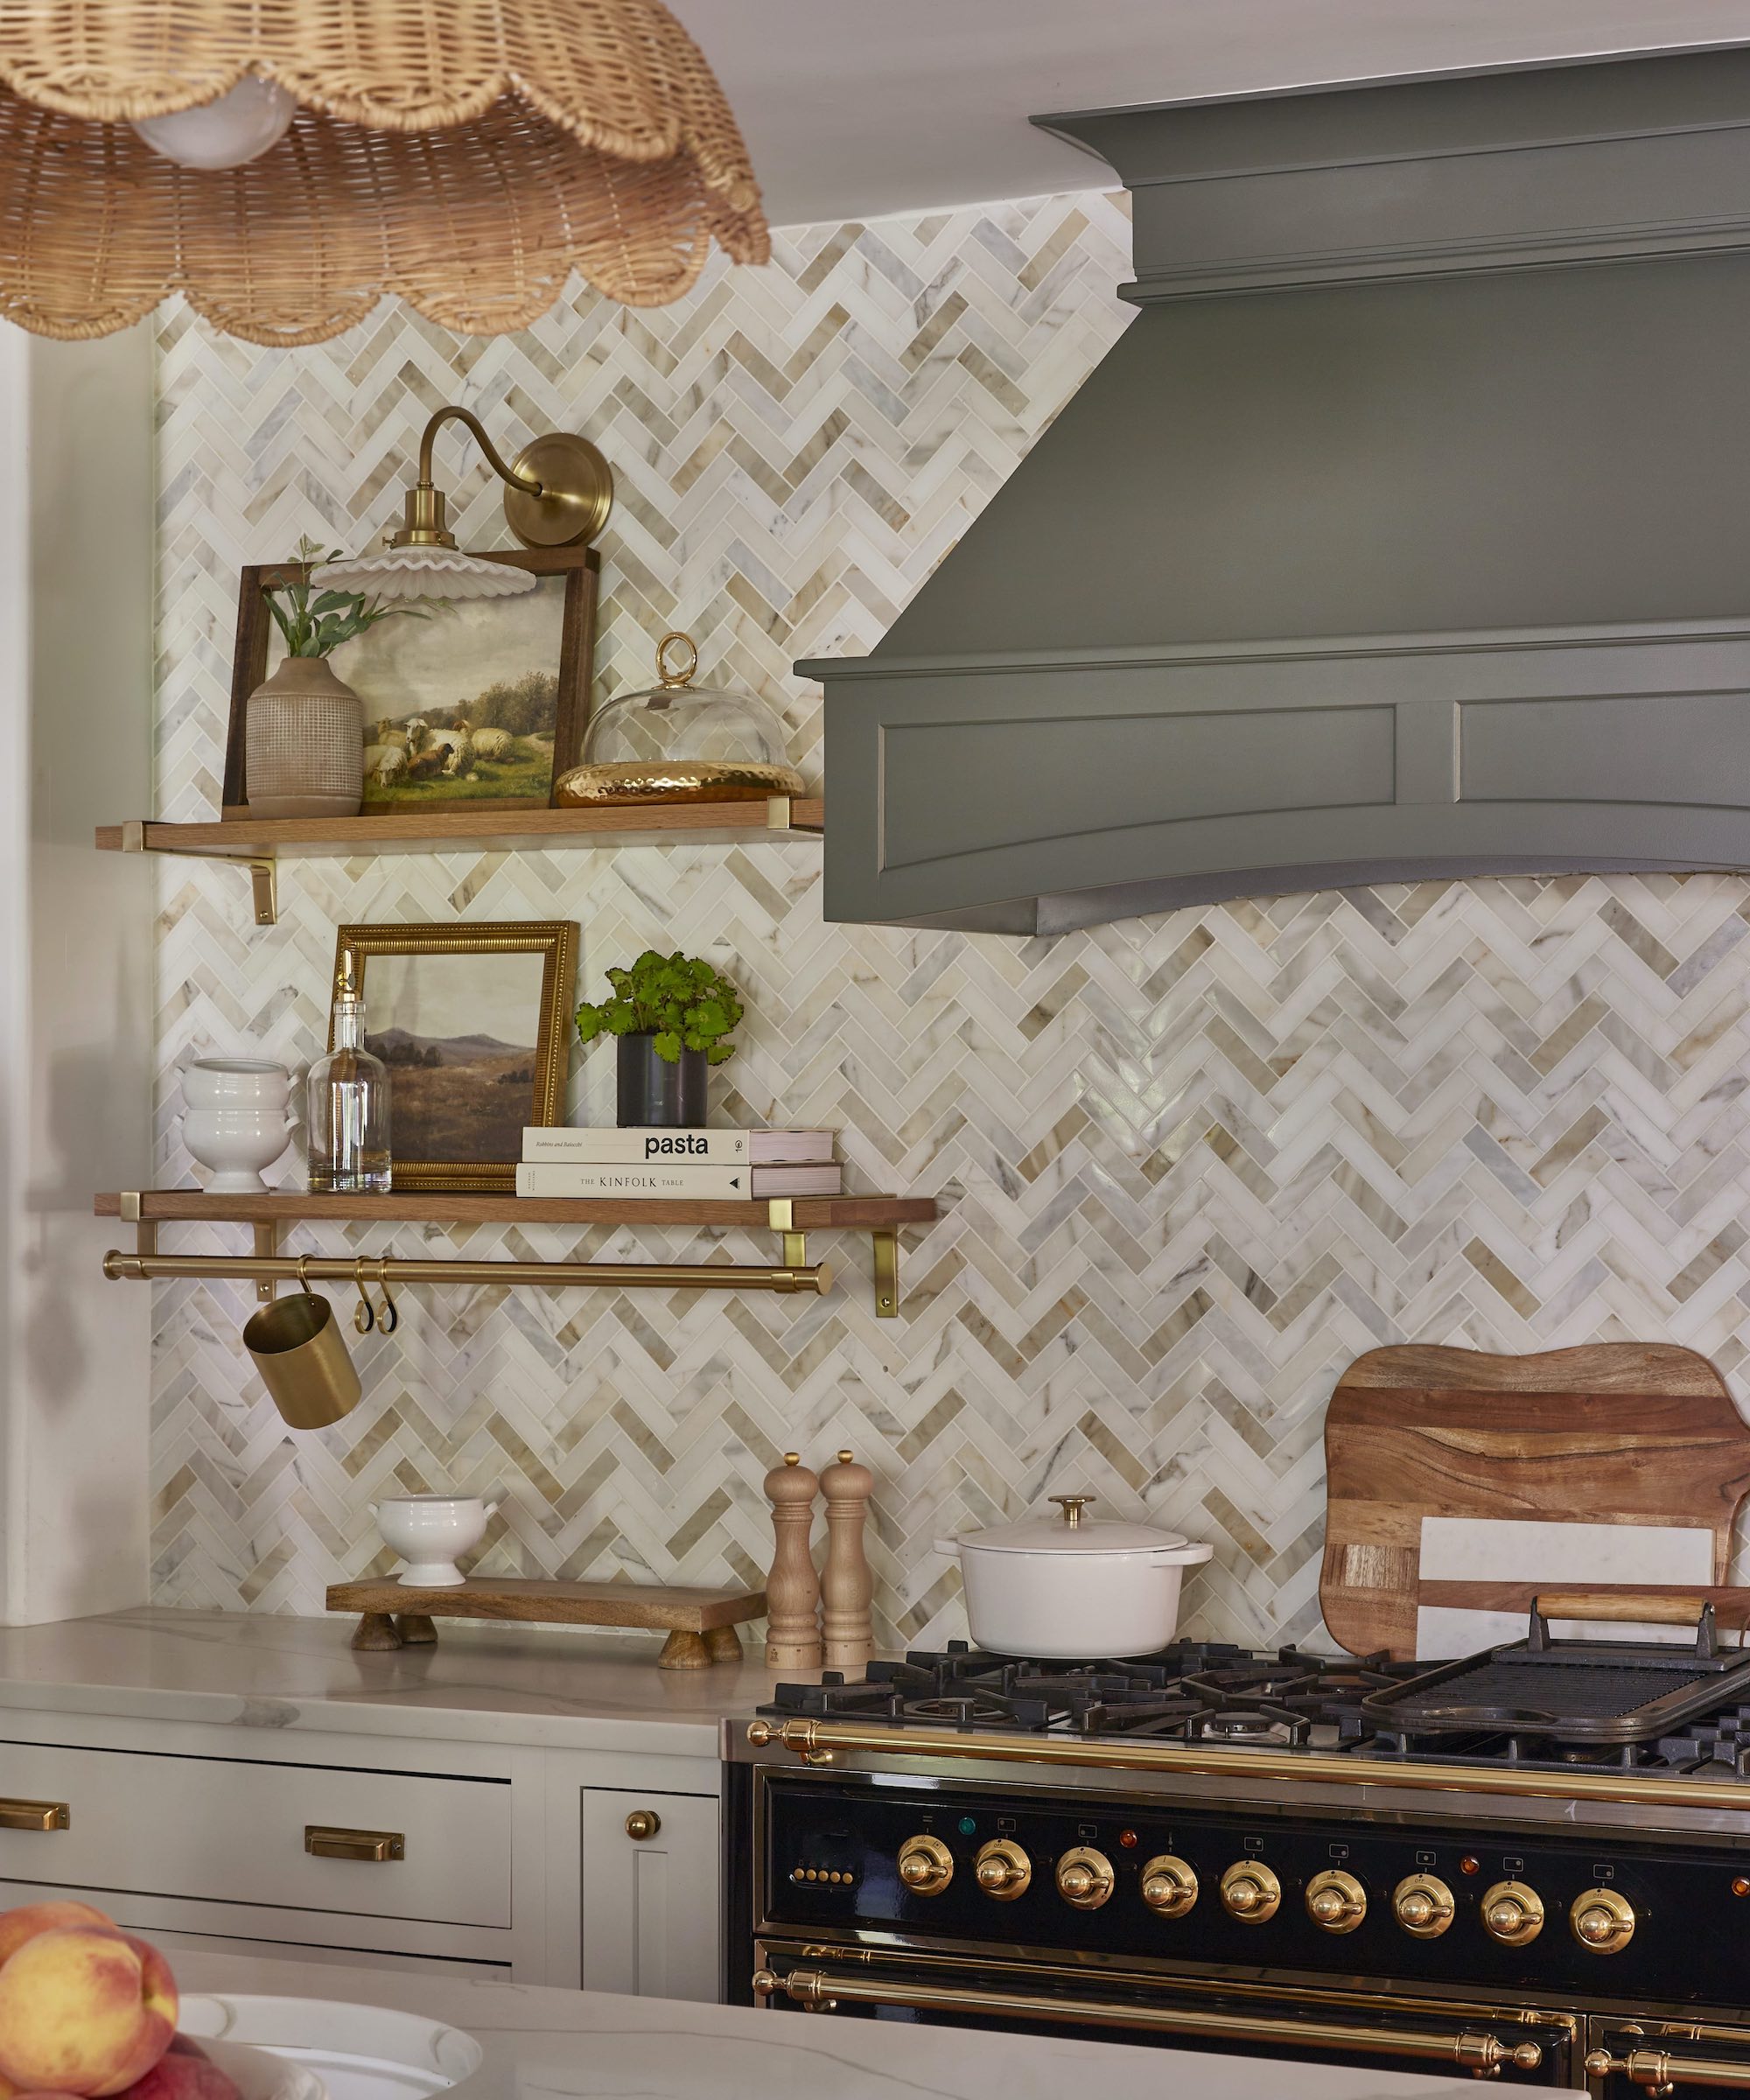
Herringbone, chevron, and other directional patterns introduce more cuts, particularly around the perimeter and obstacles. That means the installation cost may be considerably more than for exactly the same tile laid in a straightforward stack. Wastage is also likely to increase. Think about where the pattern begins and where the focal point lies. Centering herringbone behind a range, for example, may matter more than achieving identical cuts at two distant corners.
Handmade and Irregular Tile
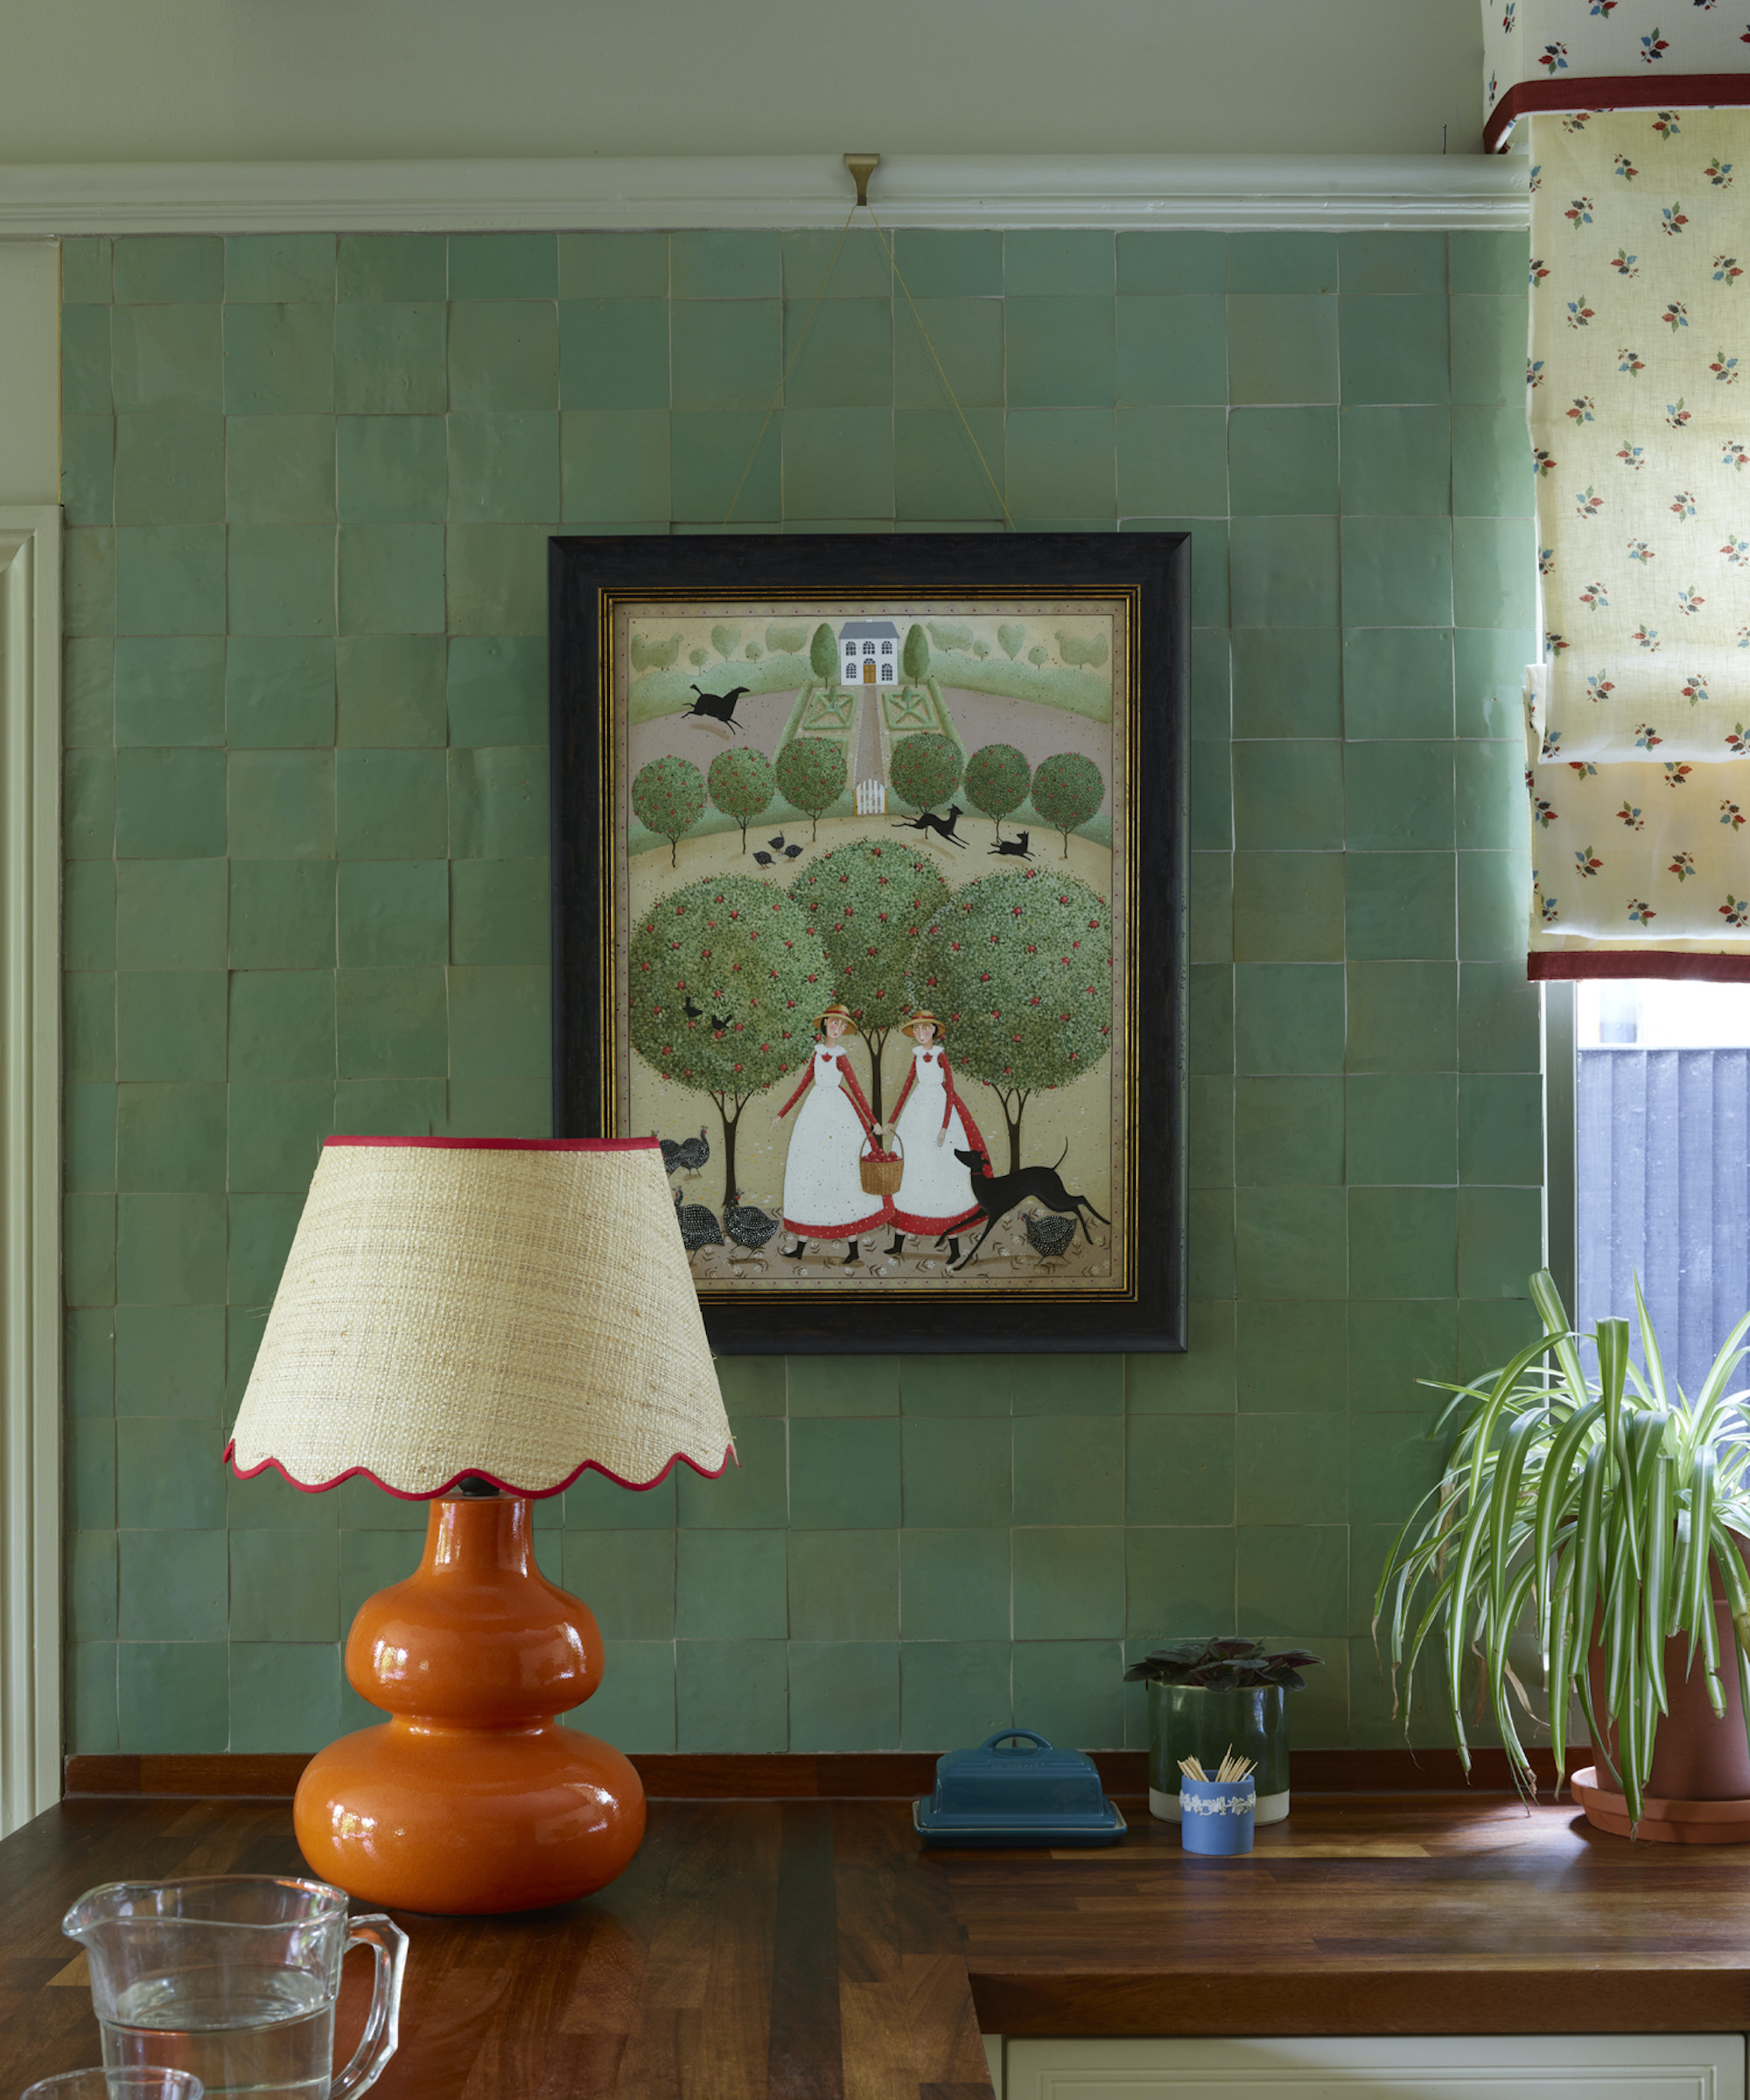
Uneven edges and variable surfaces are part of the appeal of handmade tile like zellige and bejmat, but they also mean joint widths and alignment will not look mechanically perfect. That variation can disguise small imperfections and create a beautifully lively surface. It can equally drive someone who wants laser-straight grout joints slightly insane. If this is you, stick to rectified tile that’s precision-cut by machine. Judge your choice on the installed effect (many tile showrooms will have large tile display boards), not one particularly perfect sample tile.
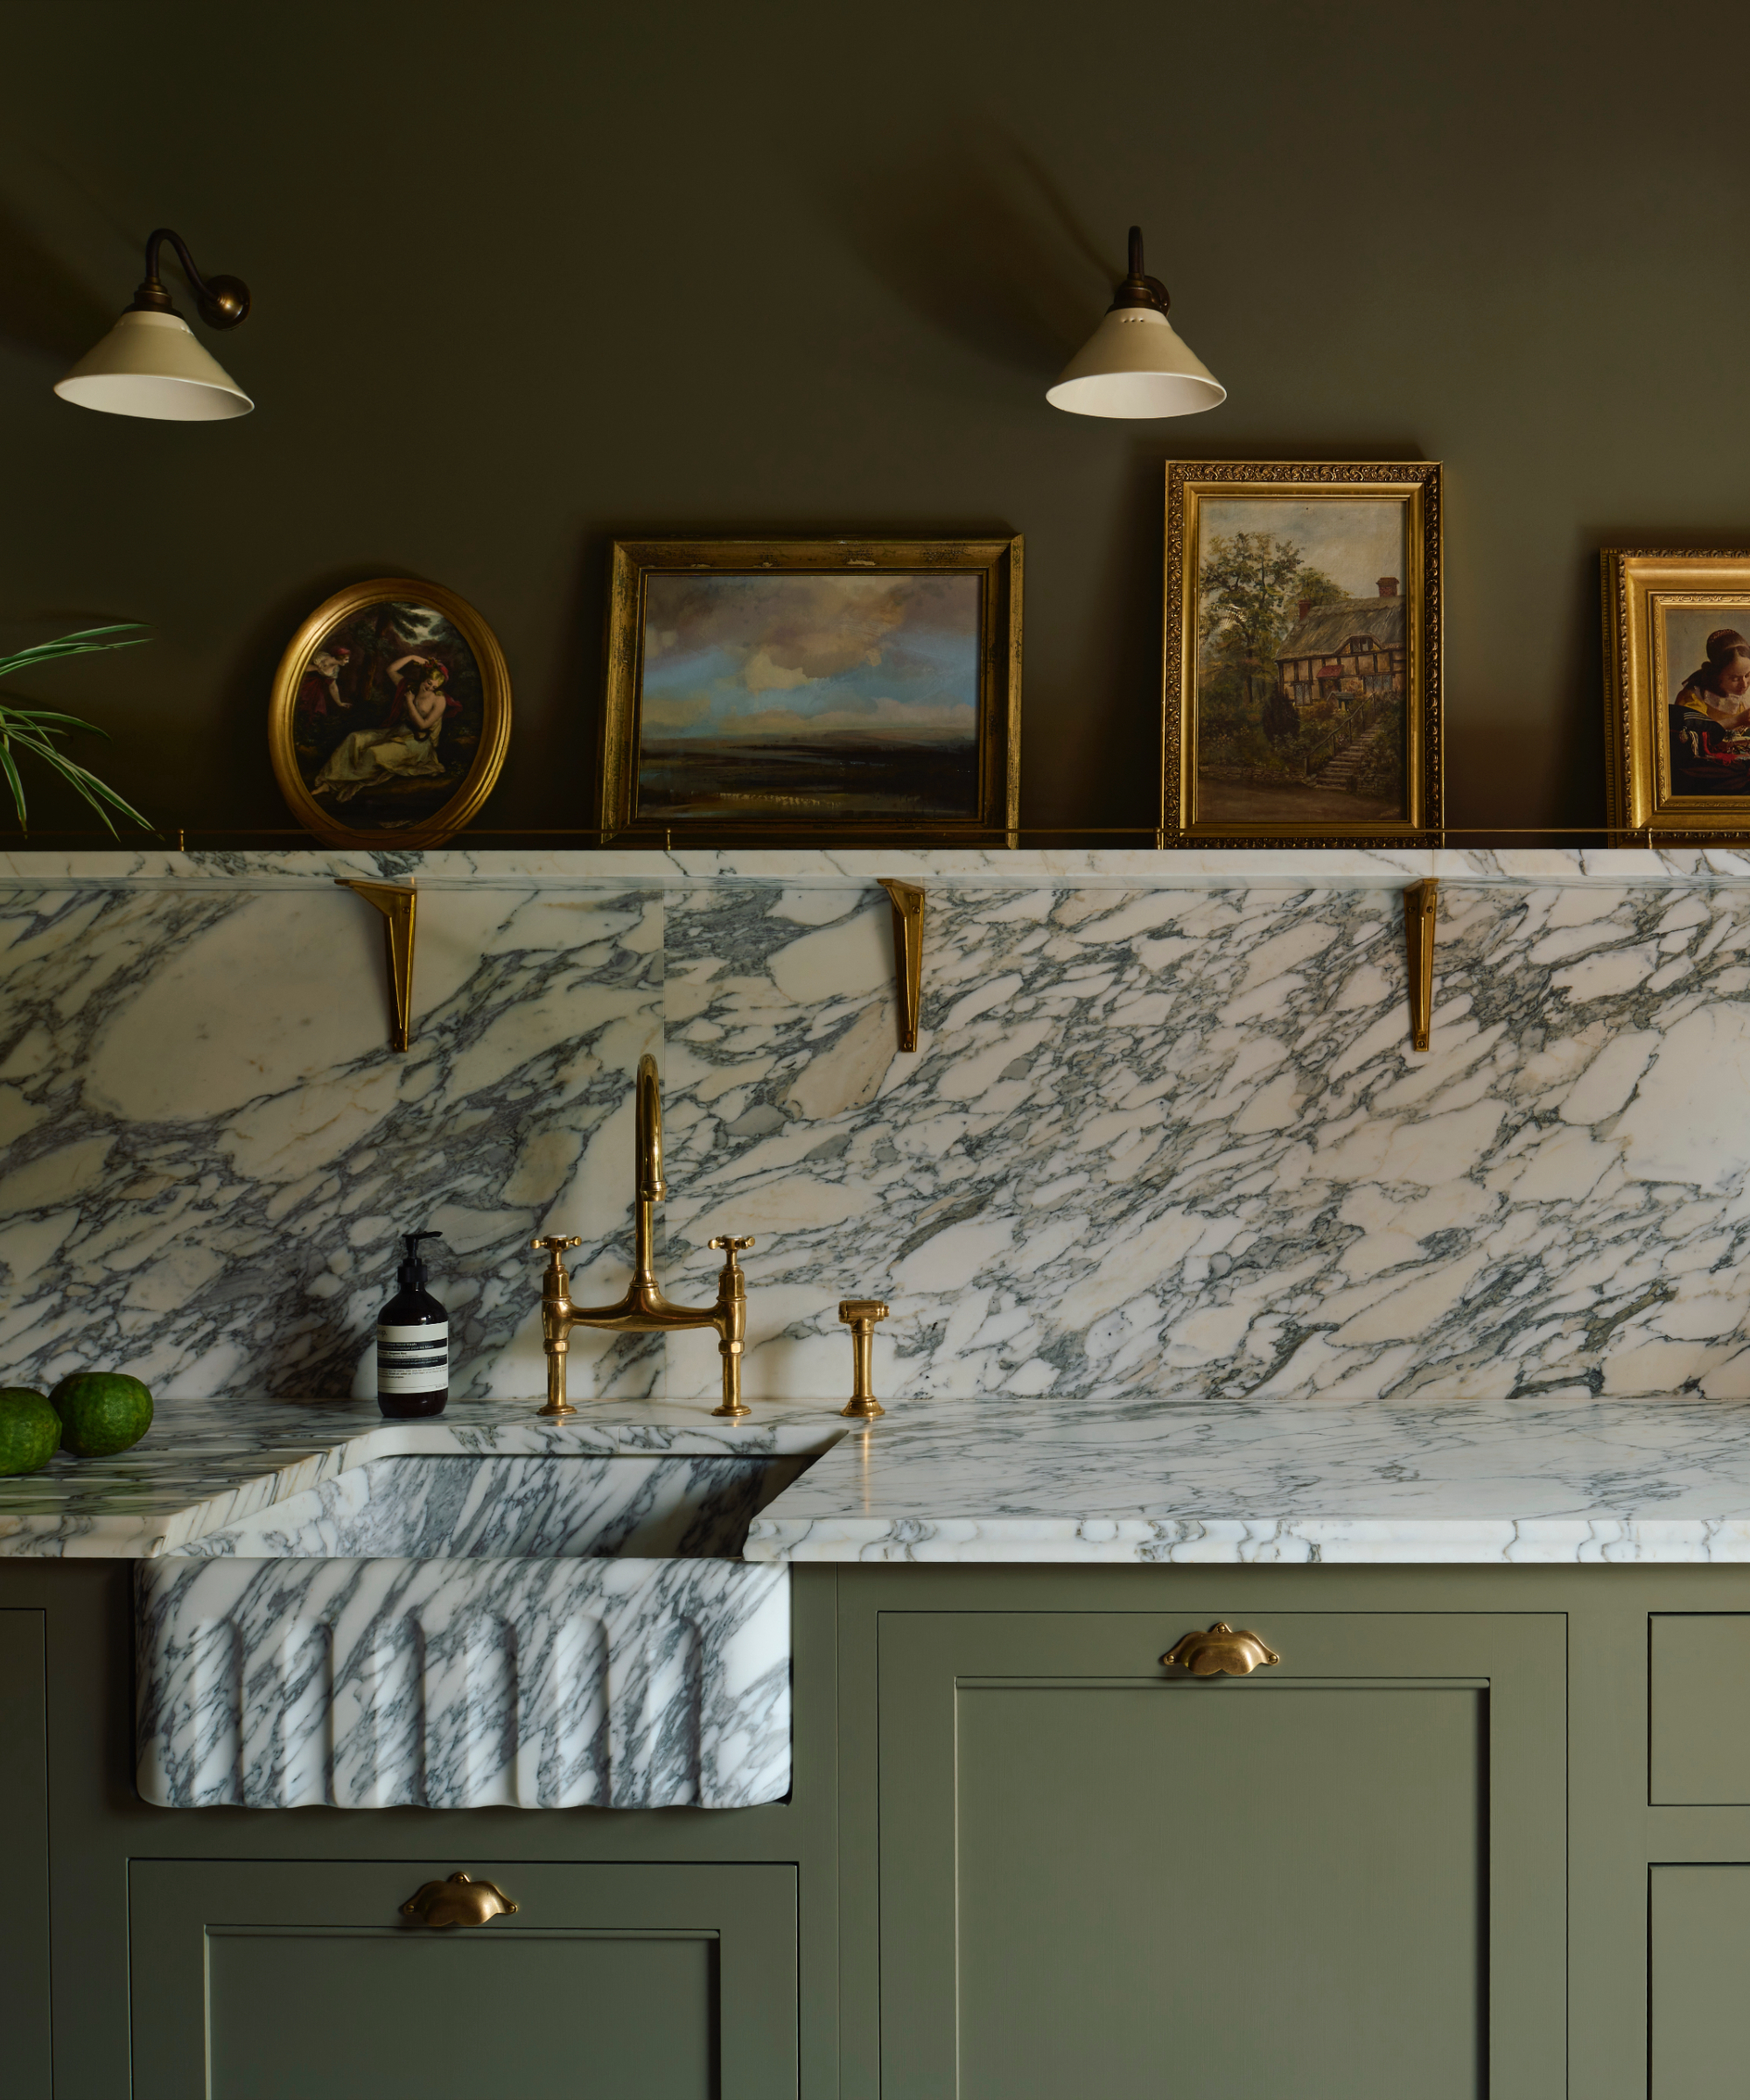
A slab-style backsplash shifts the design emphasis away from tile pattern and toward the movement or color of the material itself. It can minimize grout, but seams and cut-outs become much more significant. Where veining is prominent, discuss how slabs will be templated and where joins will fall.
5. Grout – What, Why and Where You Need It
Grout isn’t just there to frame the tiles, it fills the joints between them, protects vulnerable tile edges and stops dirt and moisture from collecting in the gaps. Traditional cement-based grout is naturally porous, however, which is why pale shades can be such a magnet for cooking splashes and stains. Sealing can help, or you can choose a more stain-resistant epoxy or high-performance grout in hardworking areas.
Matching or Contrasting Grout
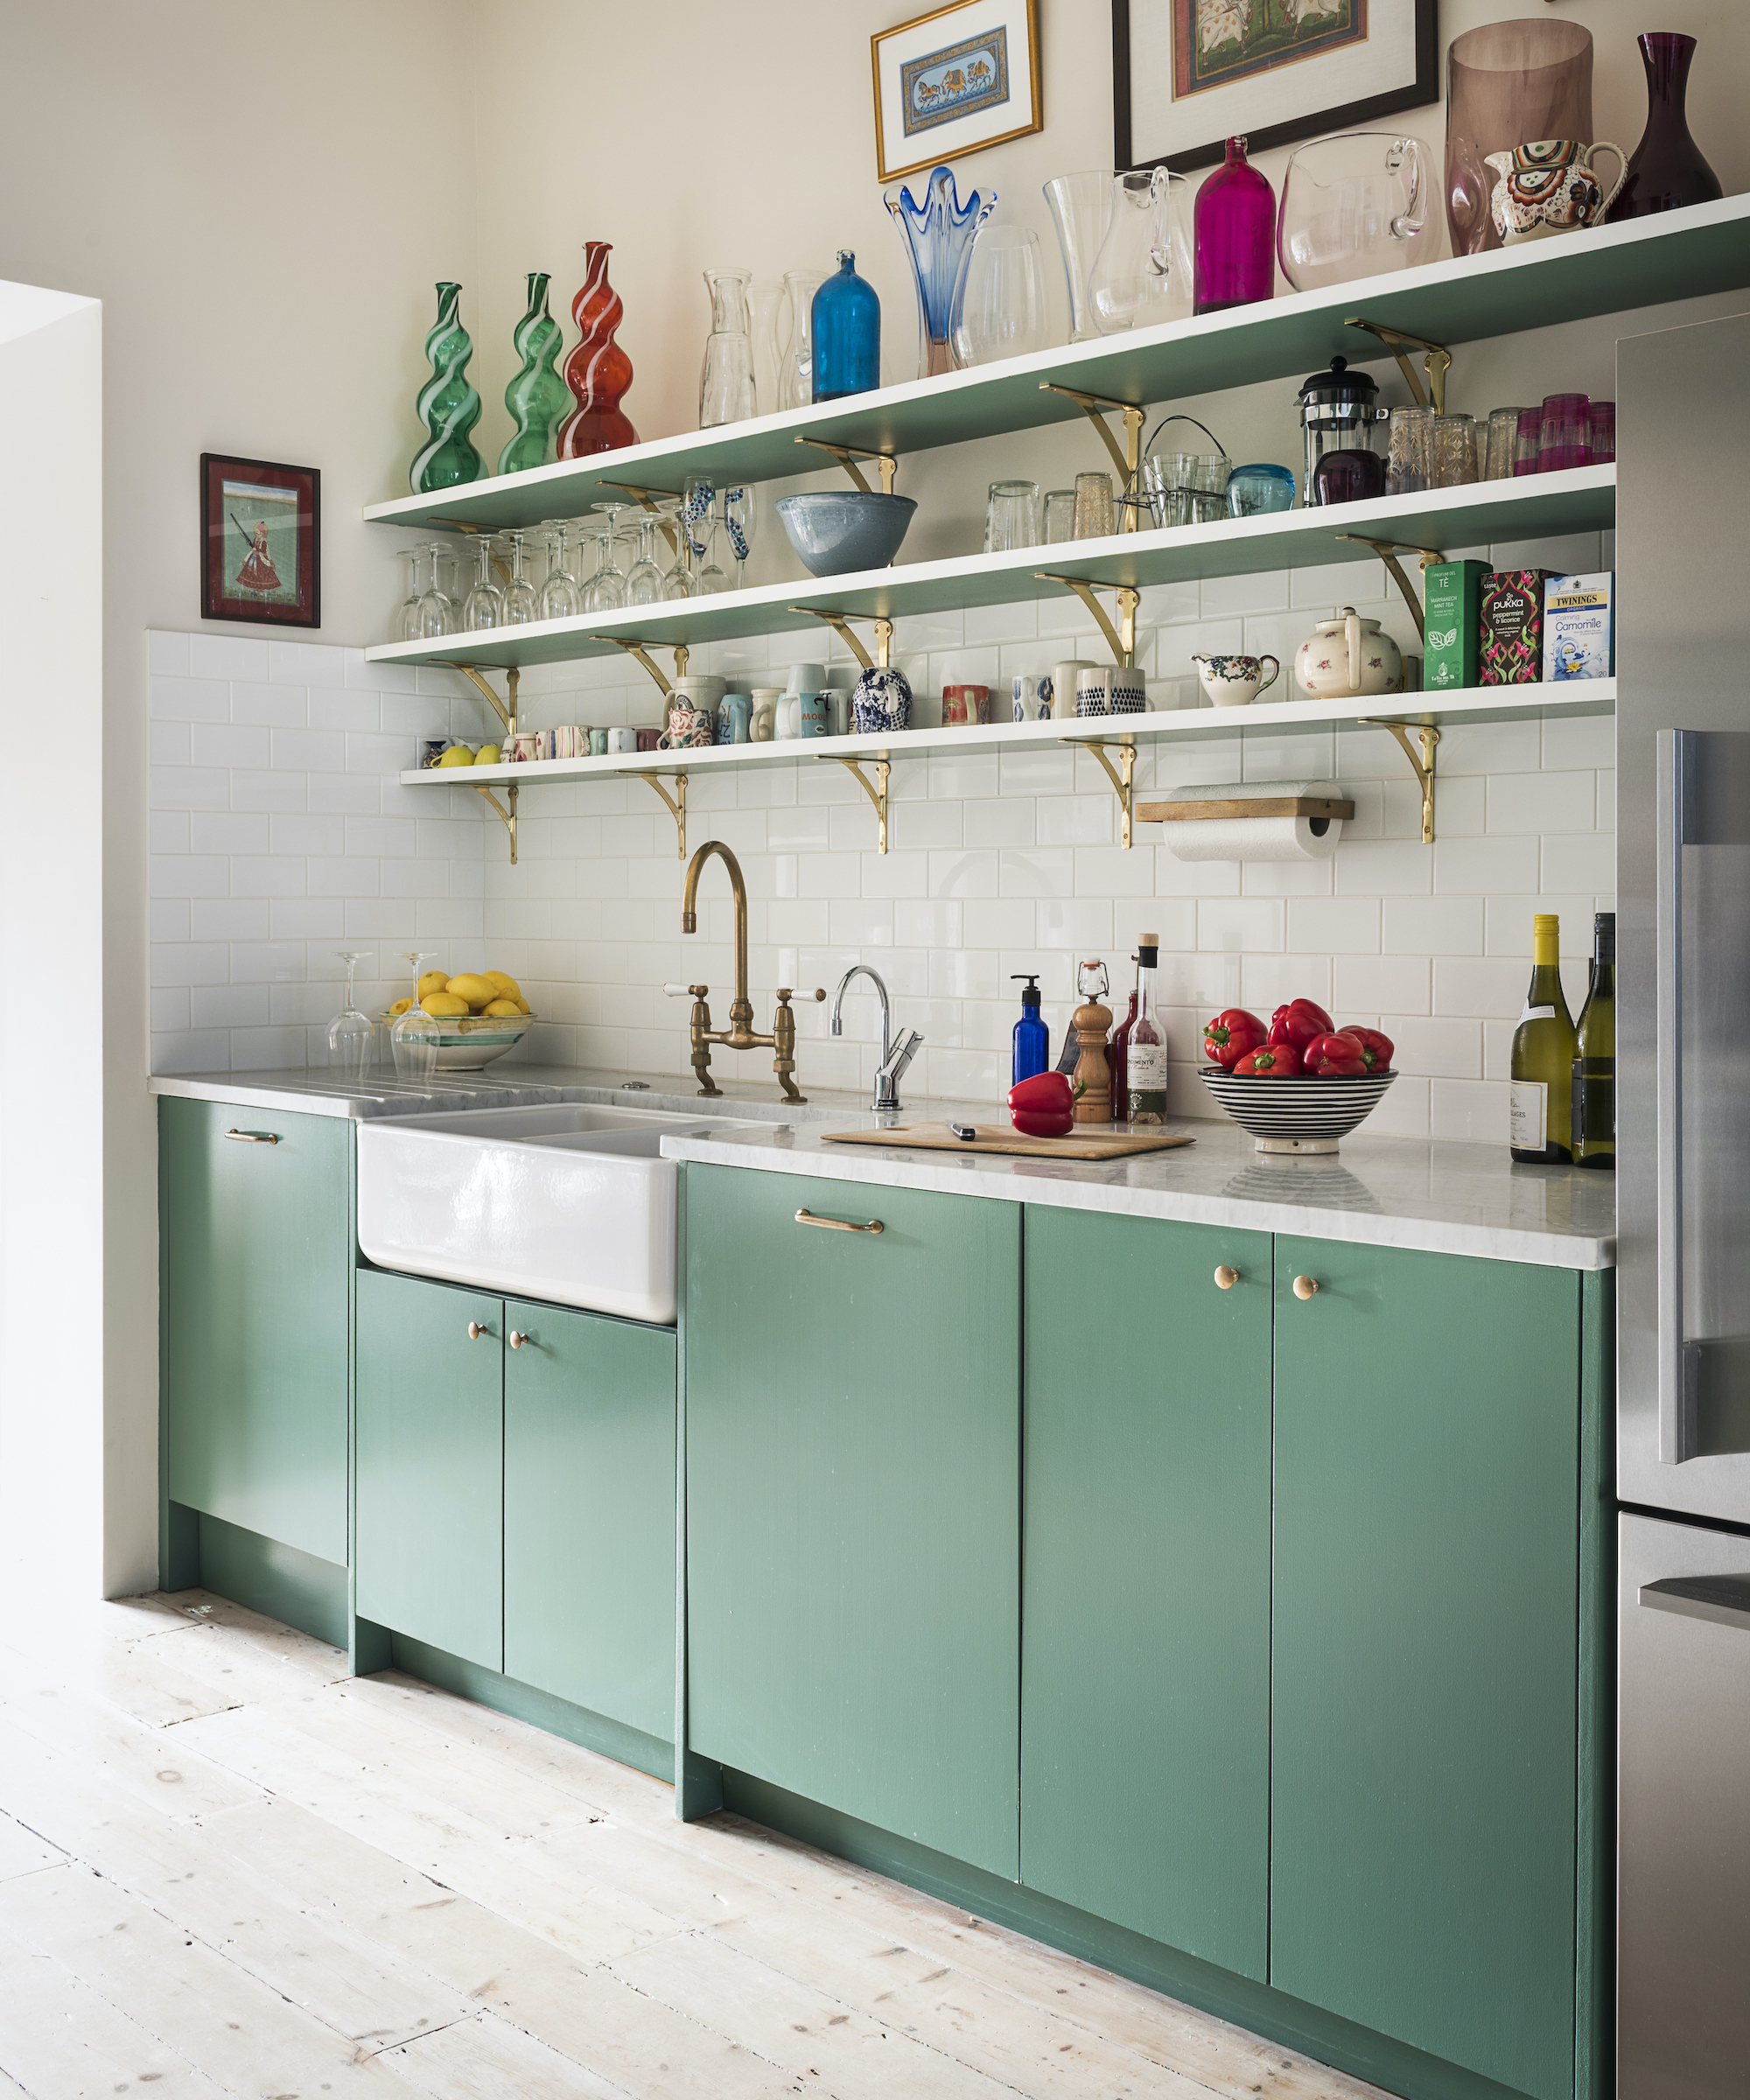
‘It never ceases to amaze us how many clients overlook grout, making it the last decision after choosing tiles. We always emphasize that high-contrast grout makes each tile and line stand out, while matching grout gives a softer, calmer feel,’ says Nancy Vu. Matching grout can also help disguise uneven tile if your walls aren’t dead flat, as well as any imperfect moments if you’re DIY tiling!
Once you’ve settled on color, think about joint width. Narrow joints mean less grout and can create a crisper look, but the tile itself should determine how tight you can realistically go. Handmade and rustic tiles generally need more generous joints to accommodate variations in size and shape, while rectified tiles – mechanically finished to more precise dimensions – can usually be laid closer together.
‘In most cases, I will suggest that you use a very close joint of 1/16 inch for a contemporary look or 1/8 inch for natural/handmade tiles,’ adds Mike Belk.
Traditional cement-based grout is the most familiar and usually the most affordable, but it can be porous and prone to staining, so some products benefit from sealing. It’s still a perfectly good choice for many backsplashes, particularly away from the messiest cooking zones, and an easy DIY option.
Epoxy grout costs more and can be trickier to work with (it dries very quickly), but it absorbs very little moisture and is highly resistant to grease, stains and household chemicals. There are also ready-to-use and newer high-performance grouts that sit somewhere in between, offering improved stain resistance and often no need for sealing, without some of the installation faff of epoxy. Whichever type you choose, check the manufacturer’s advice on joint width, sealing and cleaning rather than assuming all grout needs the same treatment.
And grout can be renewed. If it starts looking tired or stained, it can usually be removed and replaced without redoing the whole backsplash.
Grout can look surprisingly different once it’s installed. Water content, application, lighting, tile color and even site conditions can all affect the finished shade, so color cards and online swatches are only a rough guide. If getting the tone exactly right matters, test it with your chosen tile on a sample board or order a real grout sample chip before committing.
6. How Should the Backsplash Work with Countertops and Cabinetry?
The backsplash occupies the visual space where the two largest kitchen finishes – cabinets and countertops – meet, so it rarely makes sense to select it independently. ‘I never choose a backsplash in isolation. I like to view the sample vertically against the actual countertop and cabinetry finishes because that is how the materials will relate to one another in the finished kitchen,’ says Kanika Bakshi Khurana, Principal Interior Designer and Founder of Kanika Design. There are three main choices: match, complement or contrast.
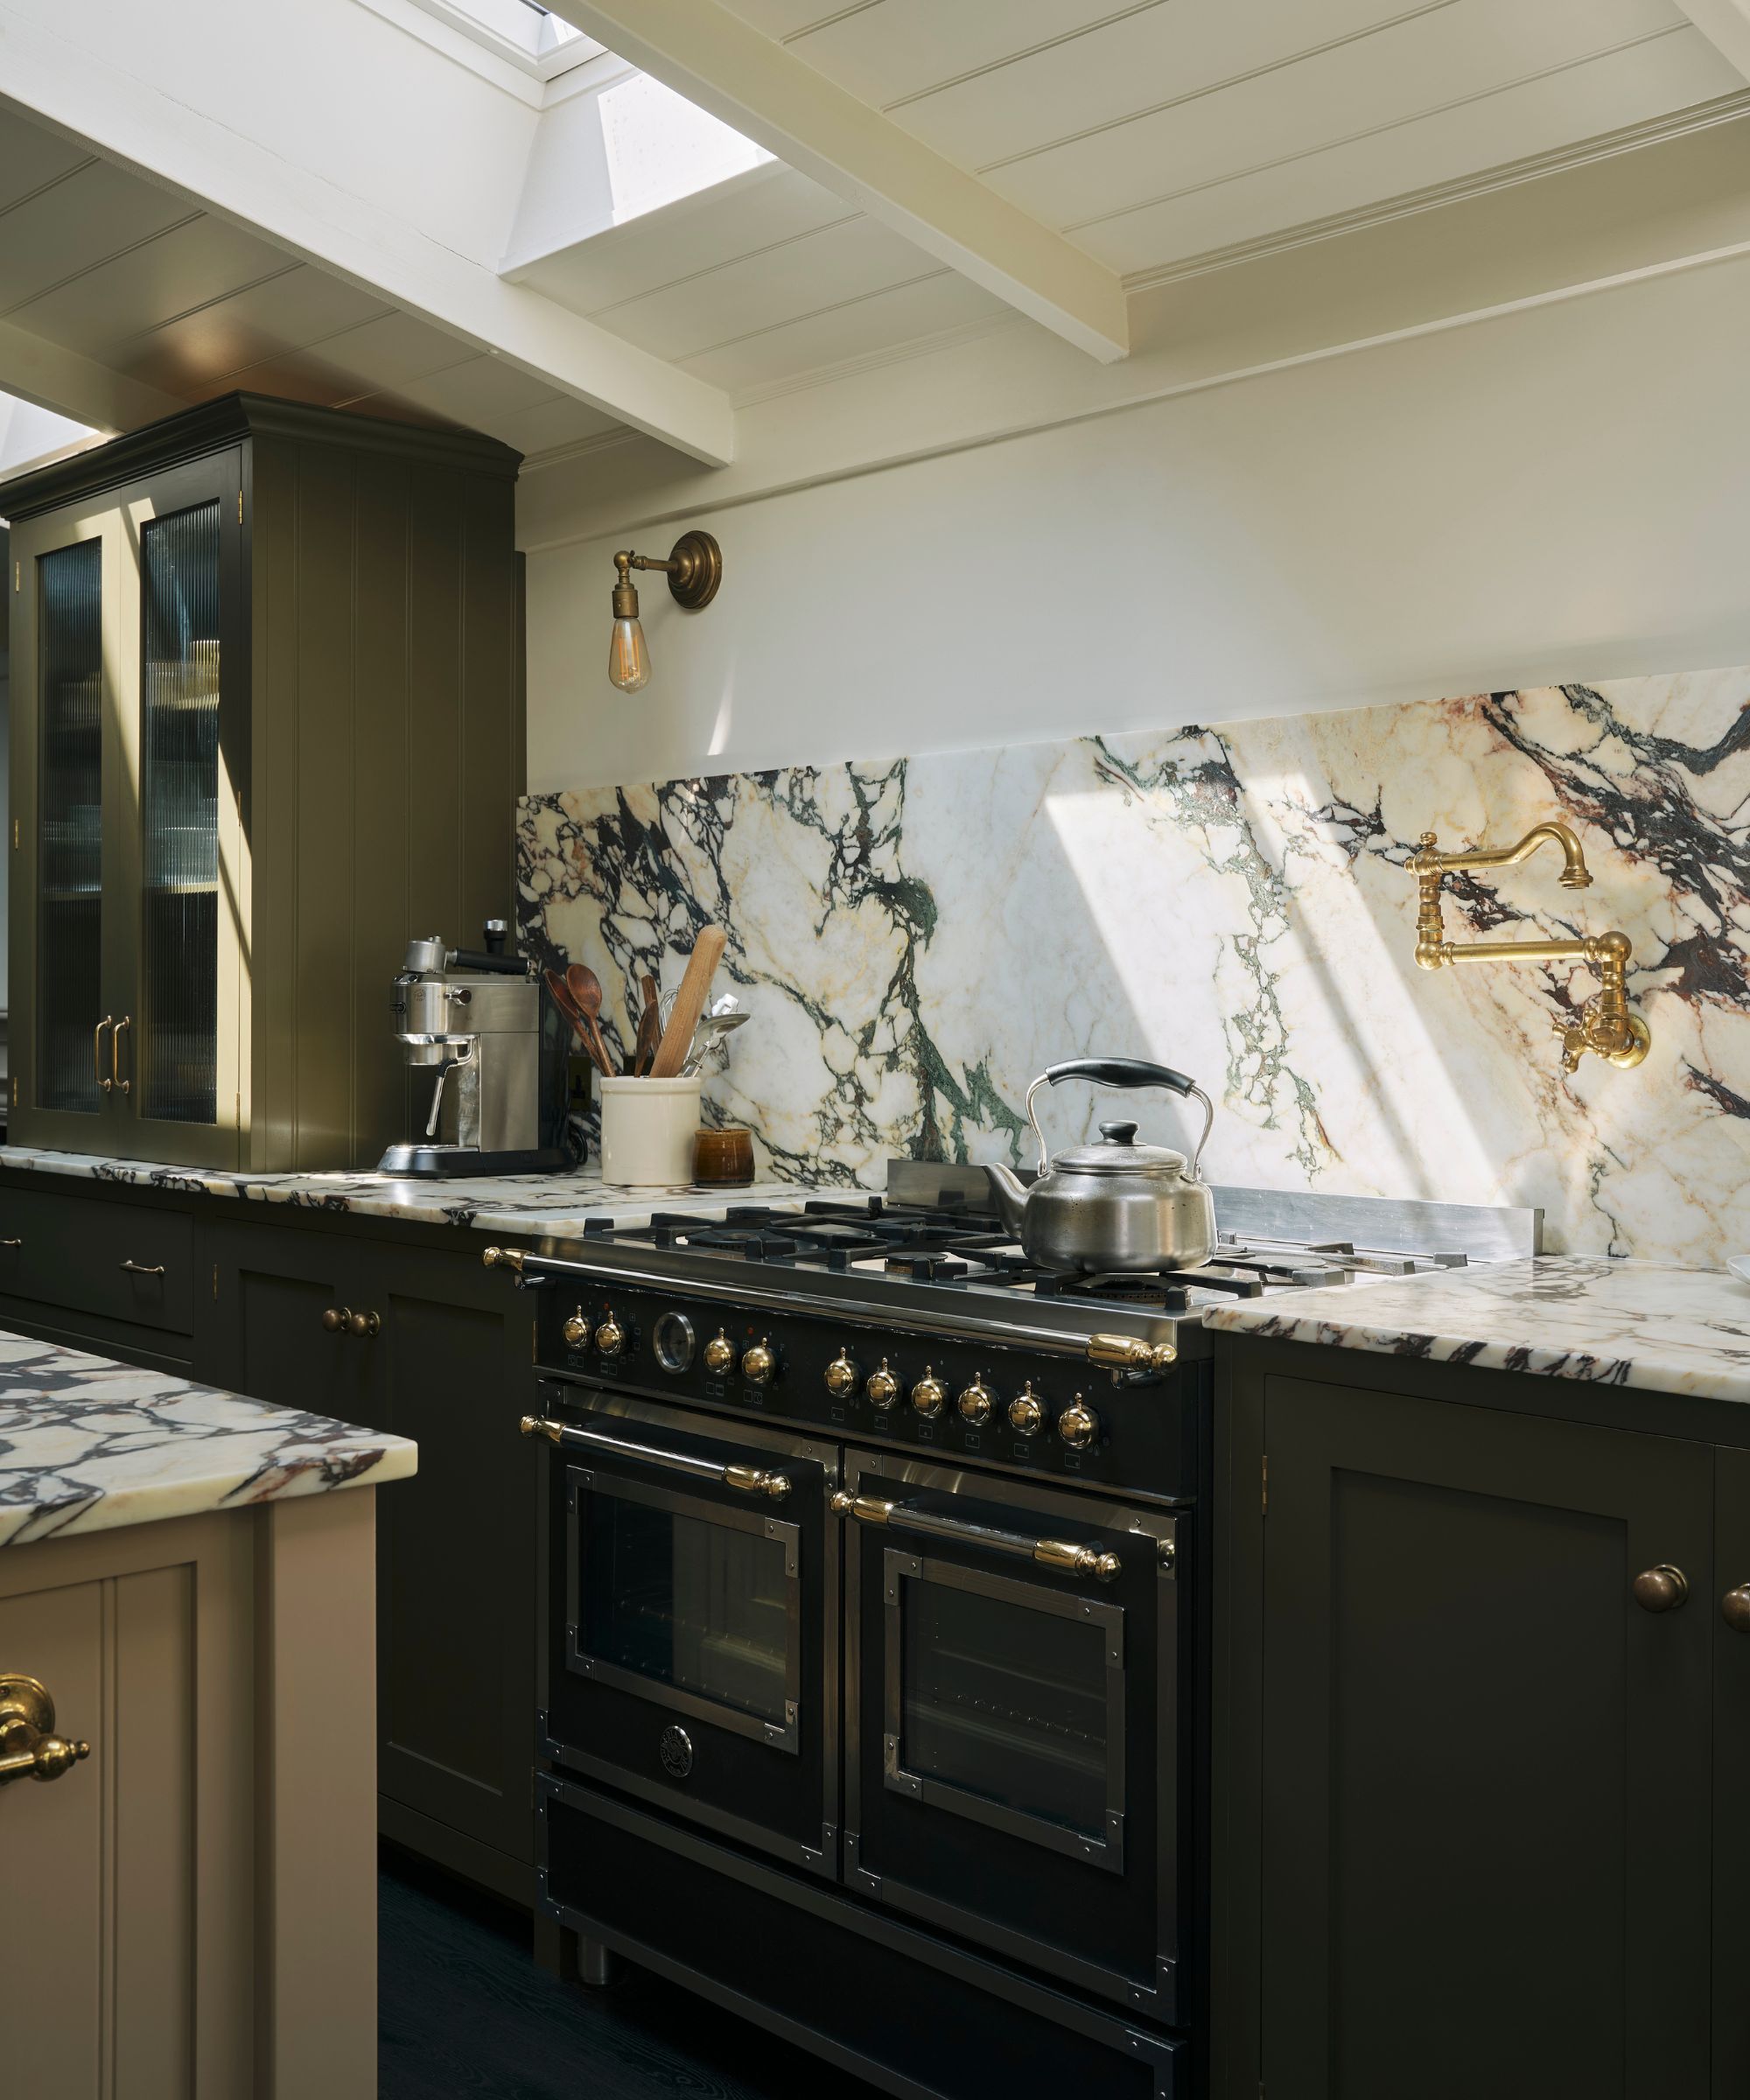
Using the same slab material on the kitchen countertop and backsplash creates the strongest continuity. This can be particularly effective with veined stone, porcelain, or another large-format surface because the eye reads both planes as part of one composition. It also avoids introducing another color, pattern or texture into the scheme.
If the slab contains strong veining, ask the fabricator whether the backsplash can be cut so the movement relates to the countertop. Exact vein matching isn't always possible or desirable, but completely unrelated sections can look messy.
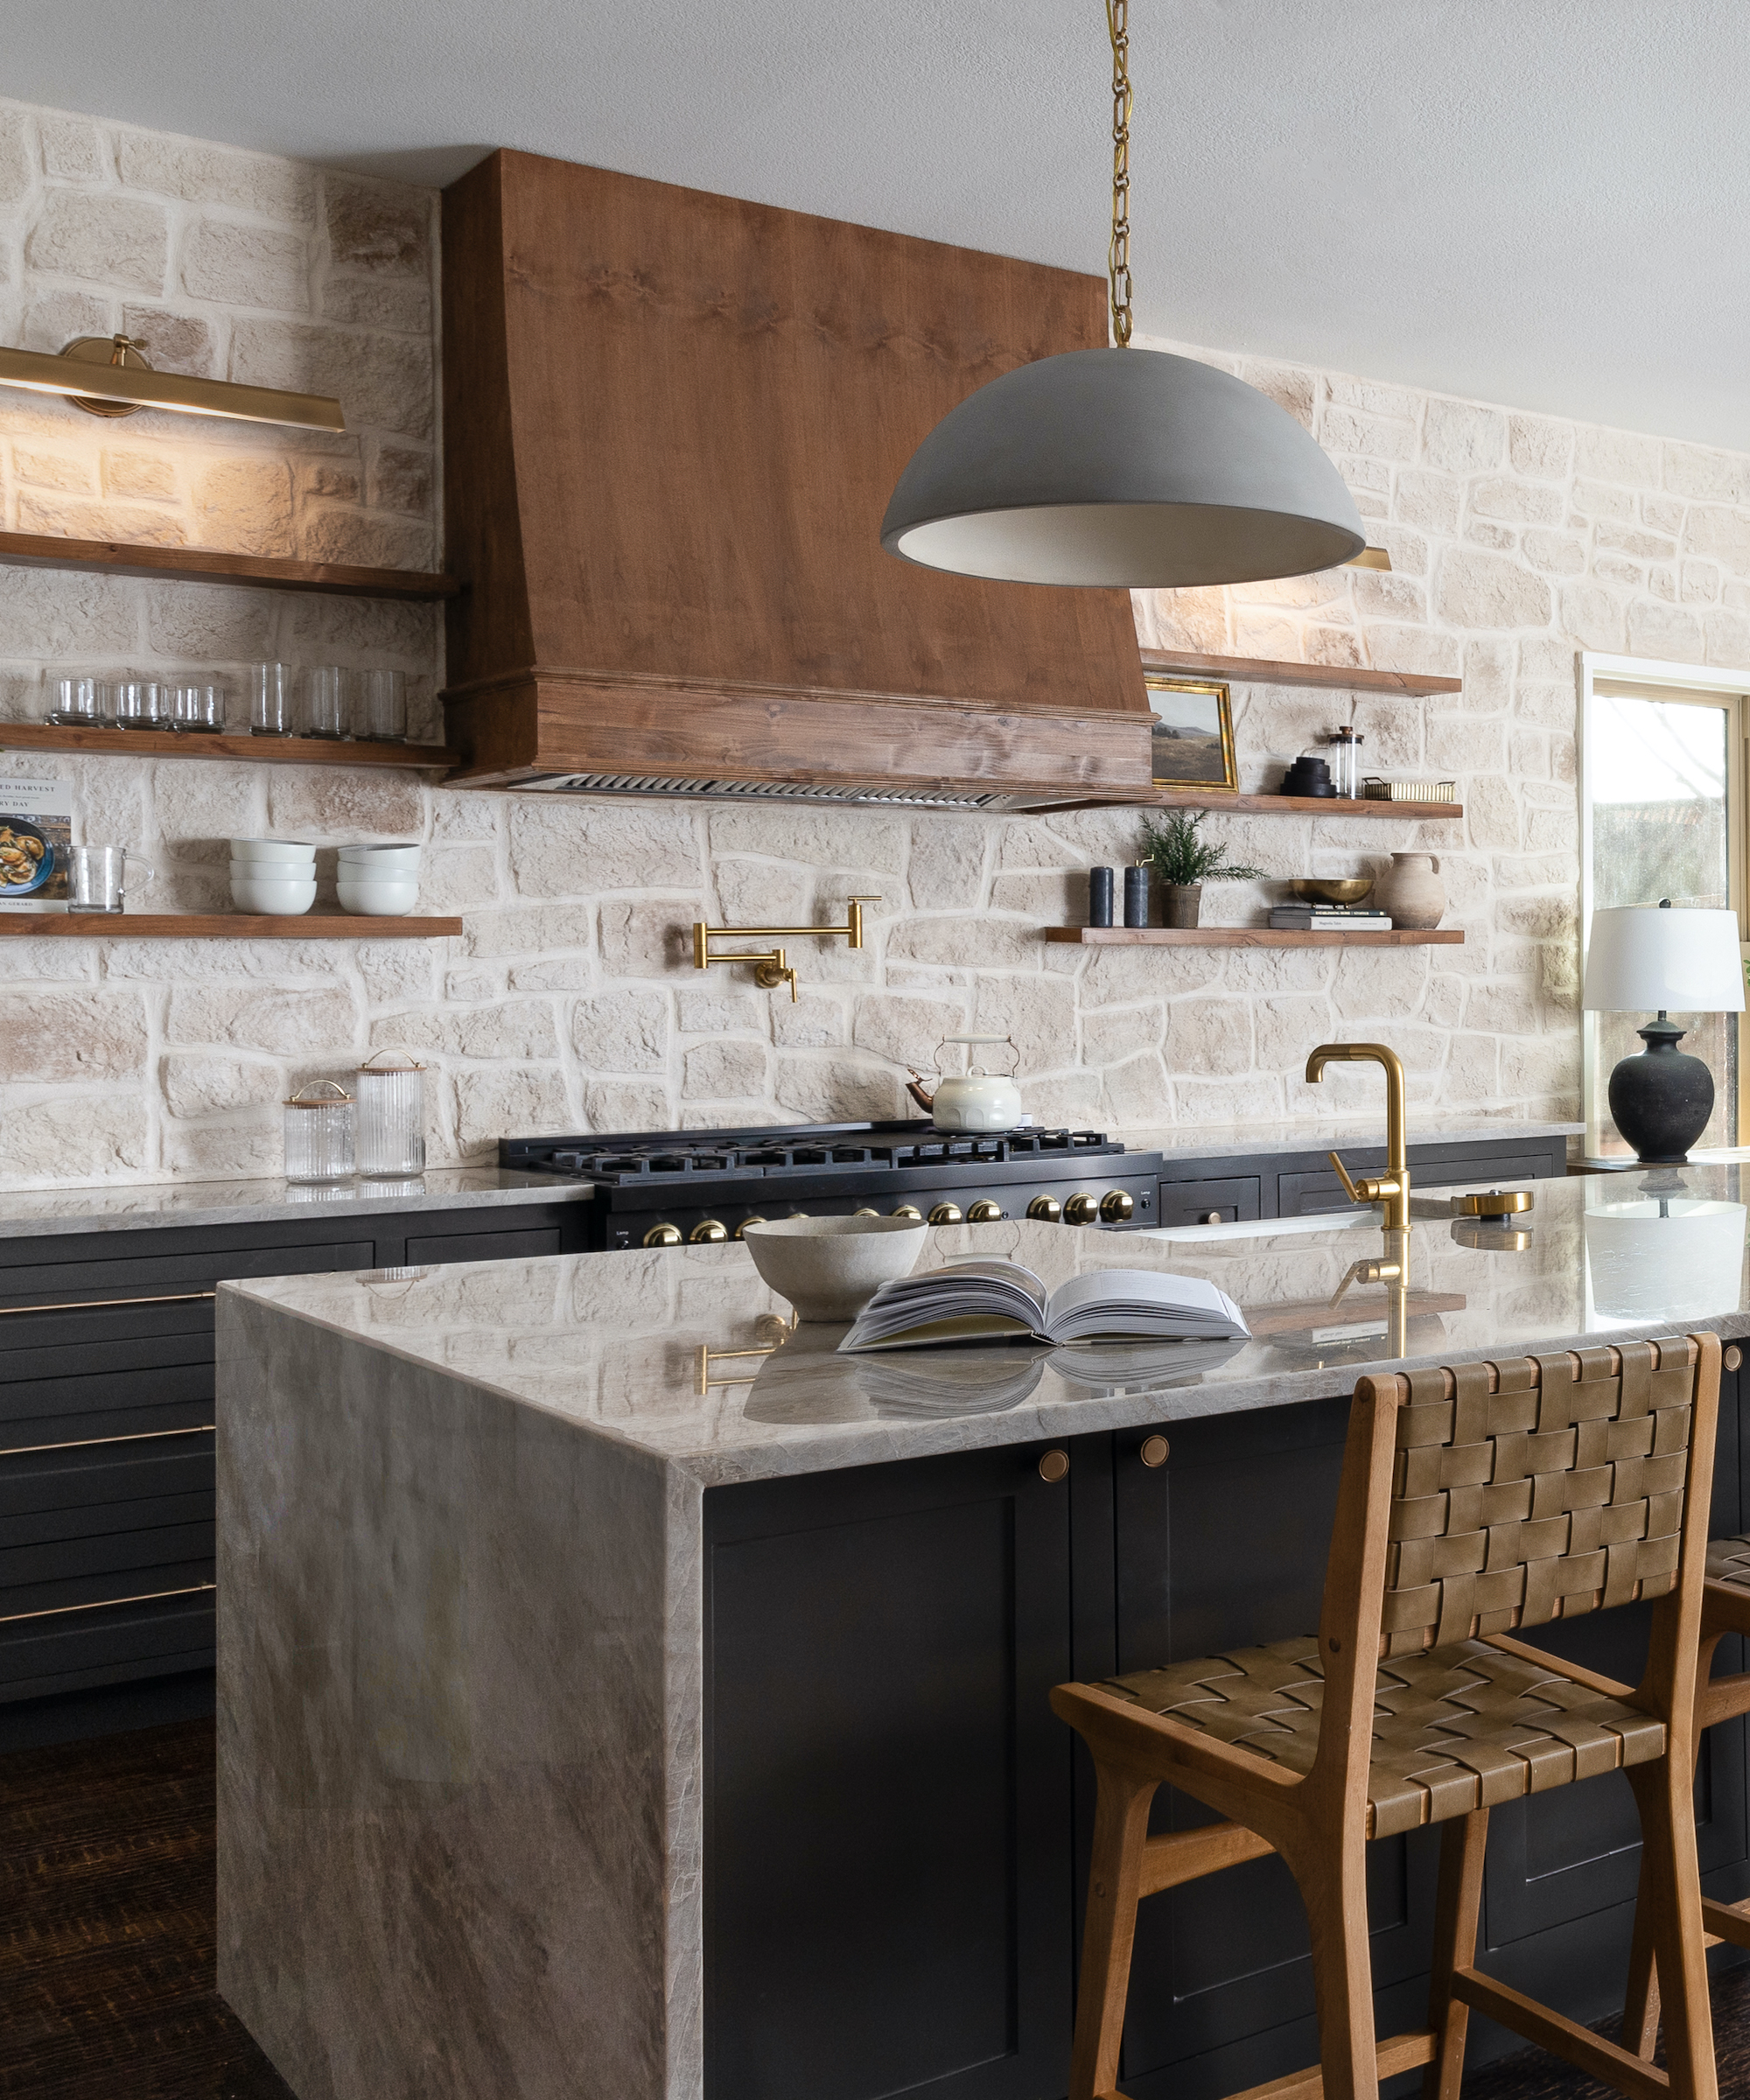
Complementing isn’t the same as exact matching. It simply means the surfaces have something in common: an undertone, material character, color family or degree of visual movement. ‘Viewing backsplash samples in the space makes undertones much easier to identify,’ adds Kanika. ‘If the countertop has strong movement or veining, I will often let that lead and choose a backsplash that supports it rather than competes with it.’
A creamy limestone-look tile might pick up warmer areas in a quartzite counter, for example, while a soft green ceramic can echo the cabinetry without matching it exactly. Pay particular attention to undertones: two whites that look interchangeable online can reveal very different blue, gray, pink or yellow notes side by side. View physical samples together in the room, and prop the backsplash sample upright rather than laying everything flat, as light hits vertical and horizontal surfaces differently.
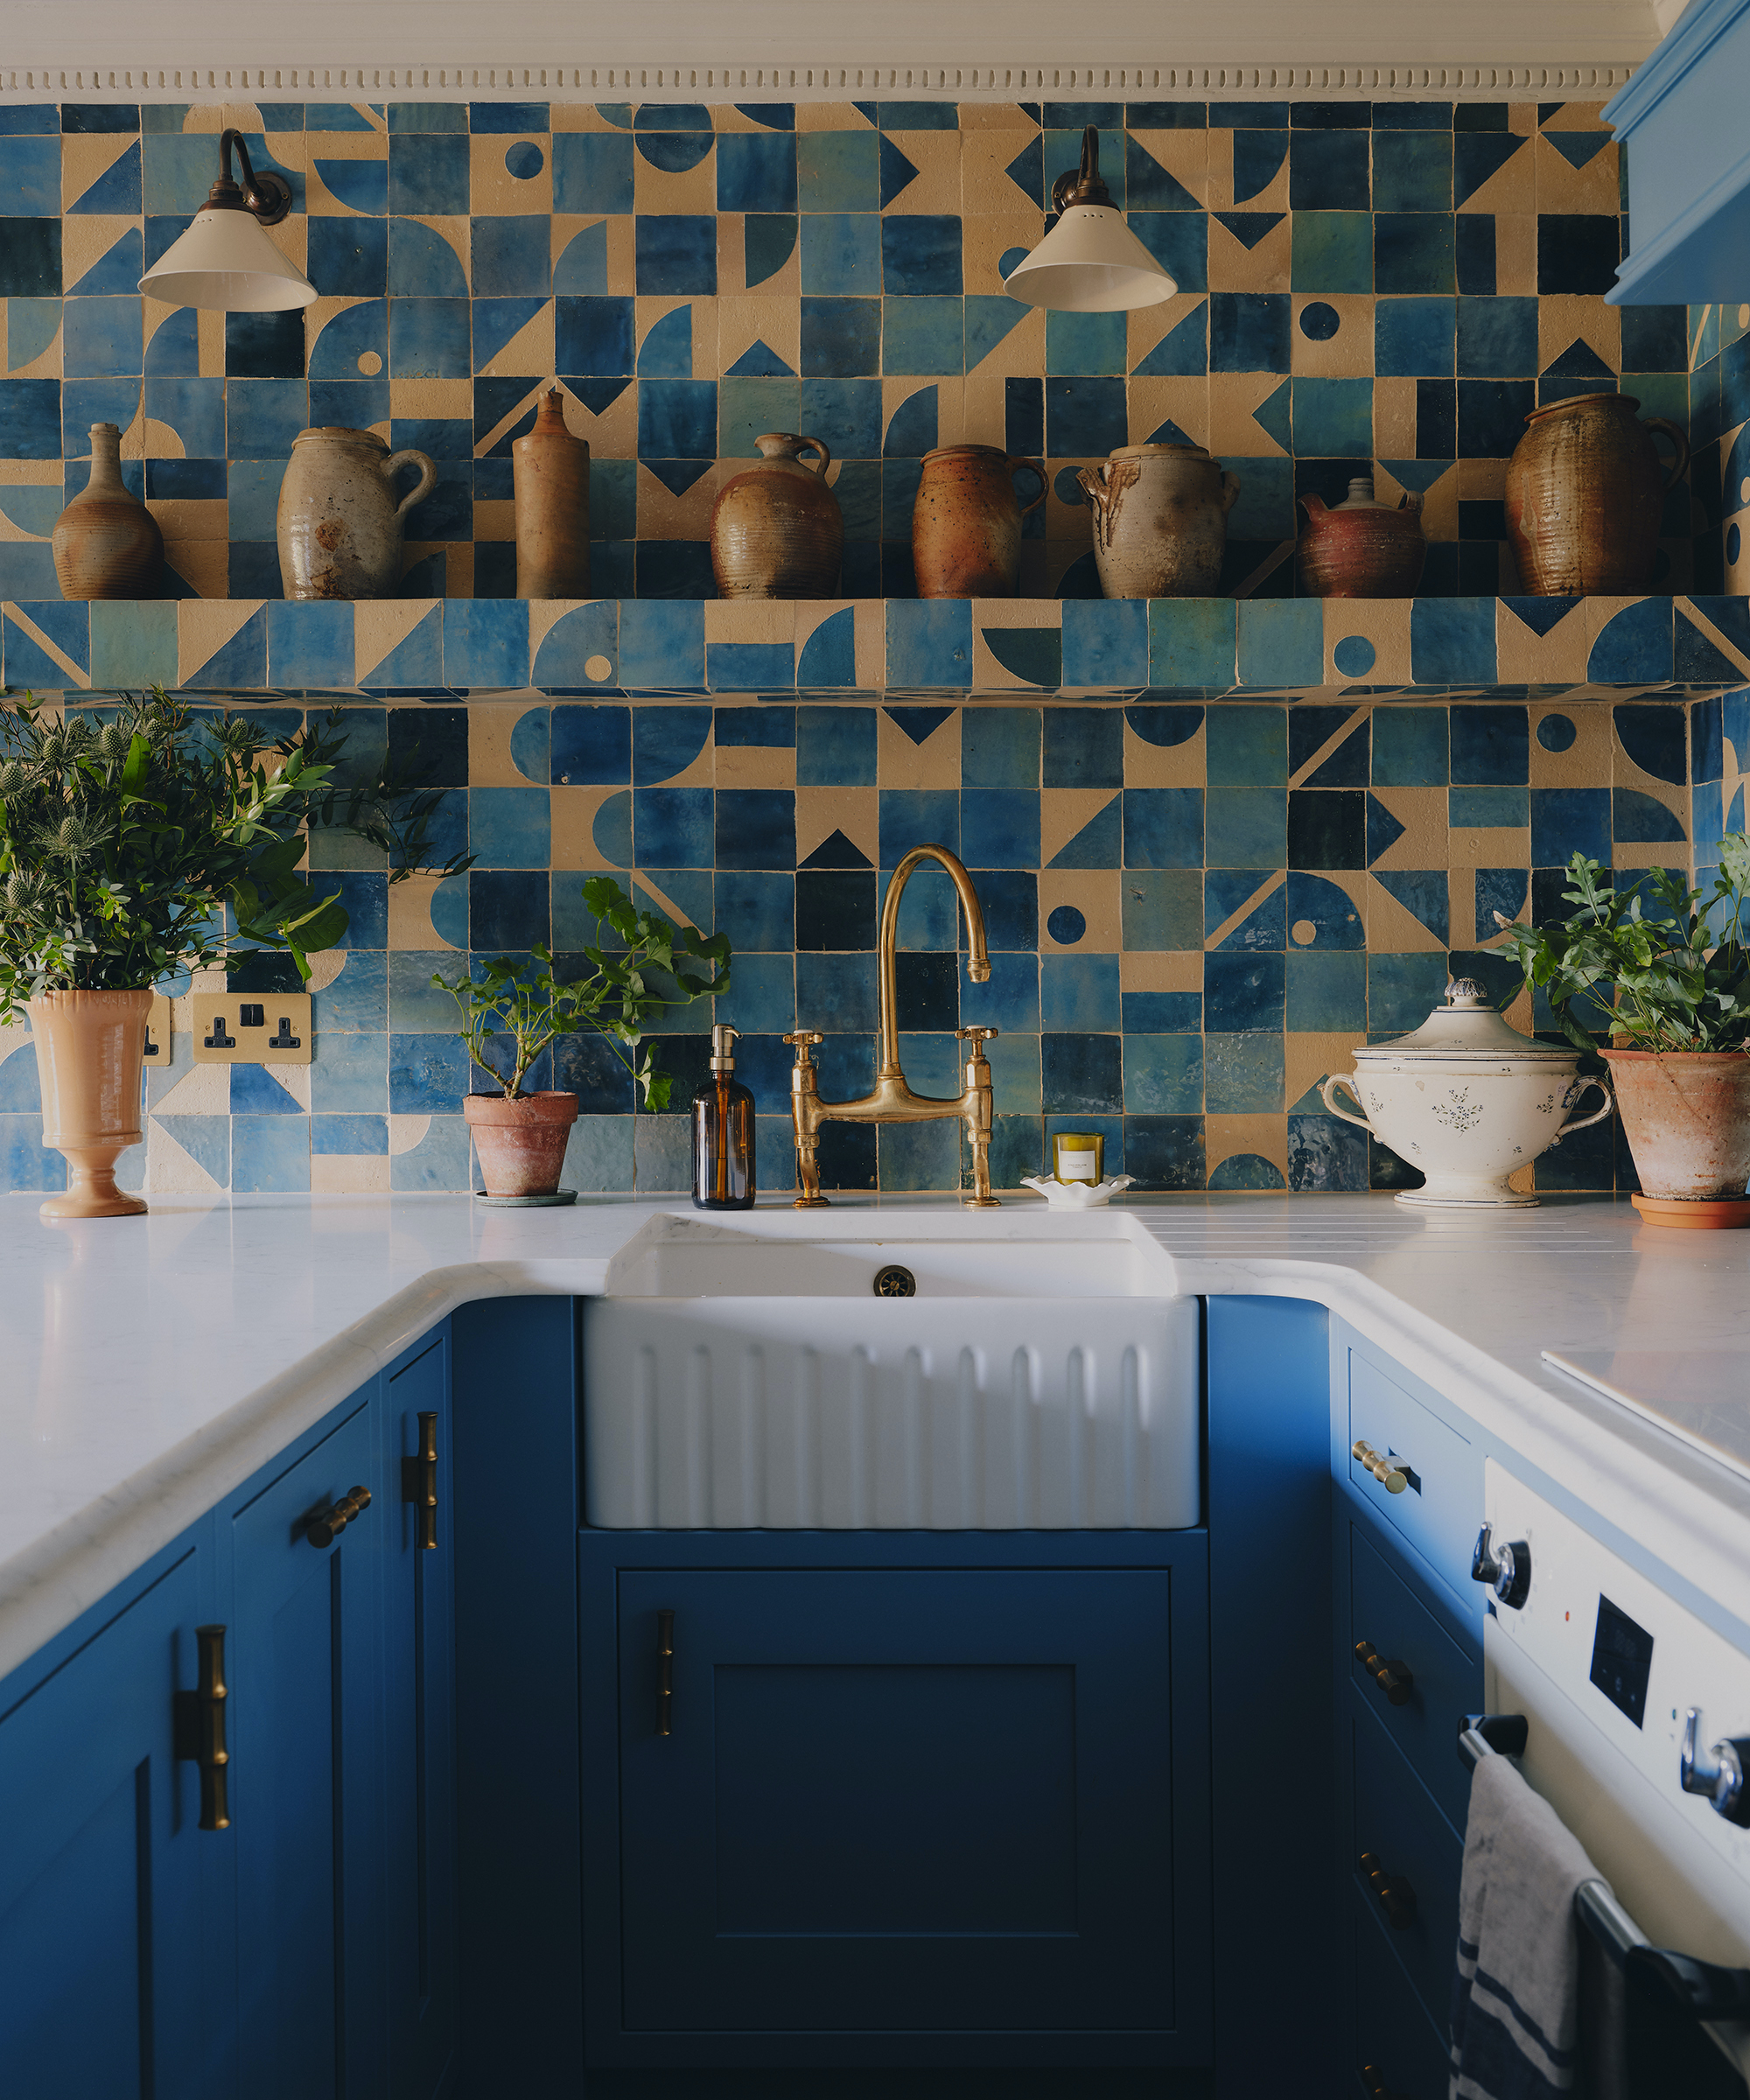
Contrast gives the backsplash an independent role. This might mean pale tile above dark cabinets, deeply colored stone against warm timber or a highly textural backsplash with a relatively plain countertop.
The key is to decide which surface should lead. If the countertop already has strong veining or movement, a tonal handmade tile can add depth without introducing another competing pattern. With a simpler countertop, you have more freedom to use the backsplash for color, pattern or texture. The greater the contrast, the more useful it is to keep one element visually calmer than the other.
7. Color, Pattern and Texture
Once the material and its relationship with the rest of the kitchen are established, choosing color, pattern, and texture becomes much easier because you have some context. The aim isn’t necessarily to make the backsplash disappear, but to work out how much visual work it needs to do.
Start with the Fixed Colors
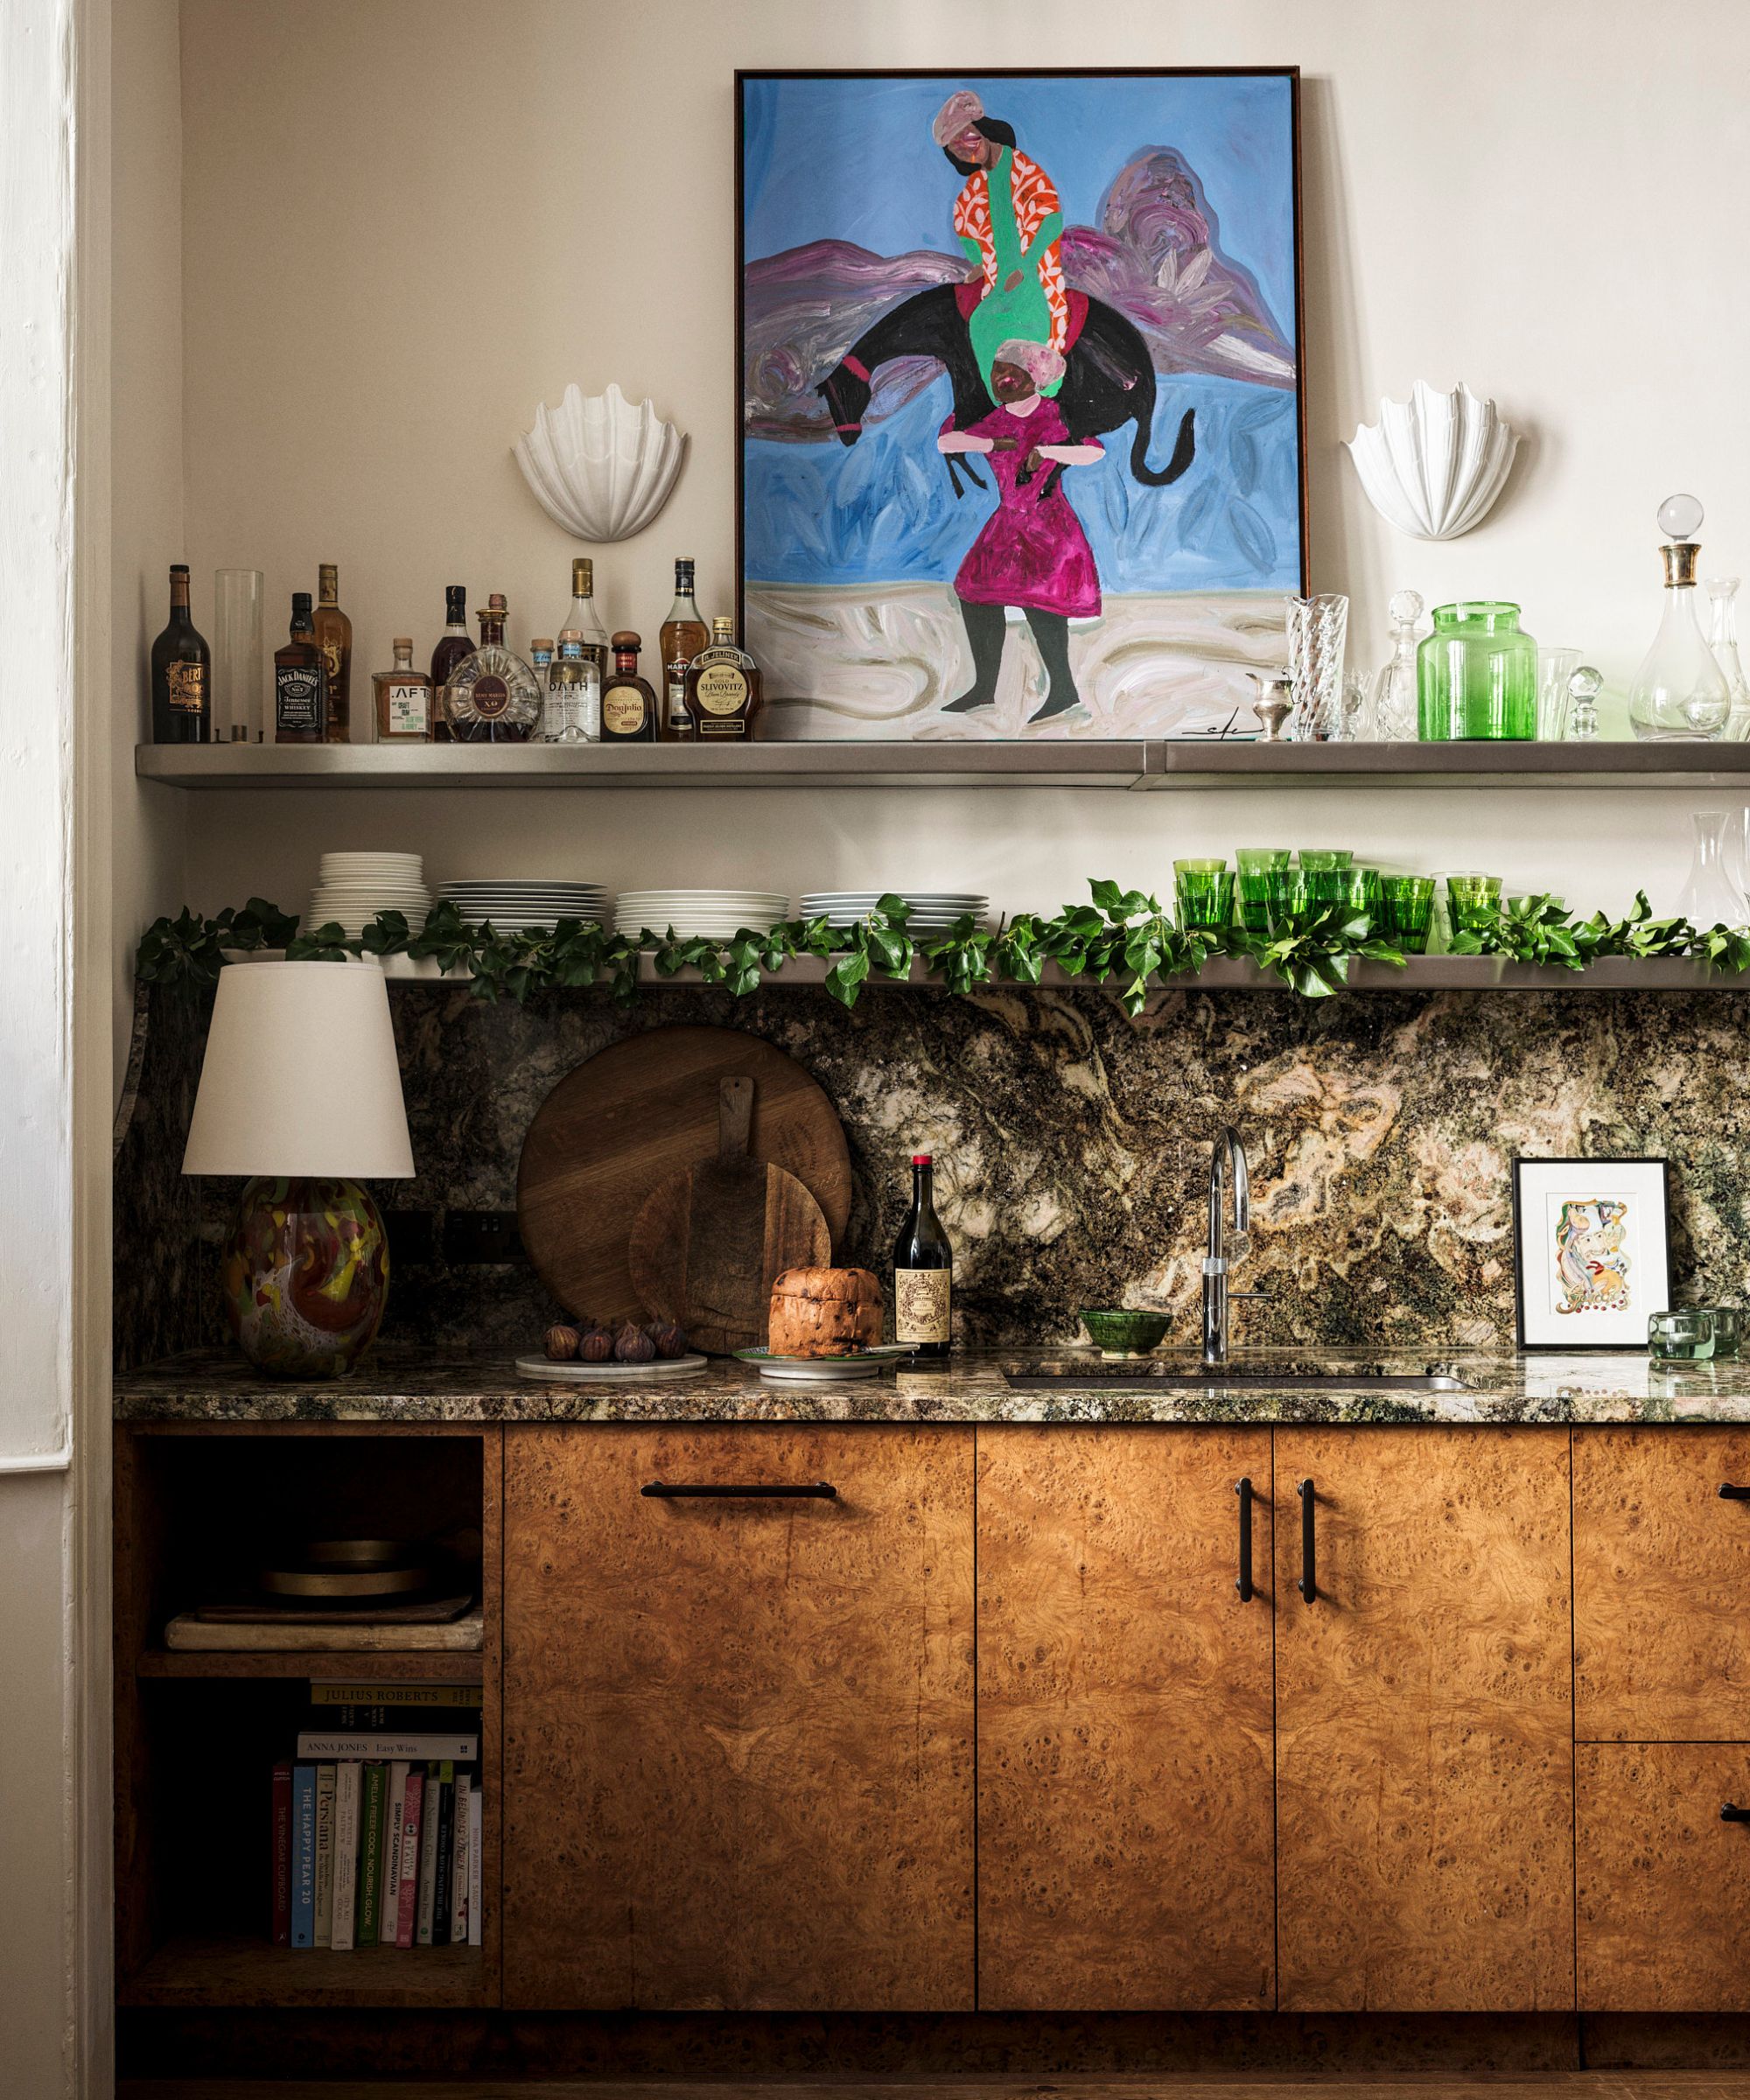
Cabinetry, flooring and countertops are generally larger and more expensive elements than the backsplash, so use those as your starting point. Look for colors already present in the room that you can pick up or develop rather than introducing something completely unrelated. A subtle vein in the countertop, the undertone of painted cabinetry or even a tone in the flooring, window treatments or artwork can all provide a useful lead.
Think about intensity as well as hue. A saturated color used on a small backsplash can feel like a neat hit of contrast; spread the same shade across a full wall and up to the ceiling and it starts to overpower.
Pattern or Plain?
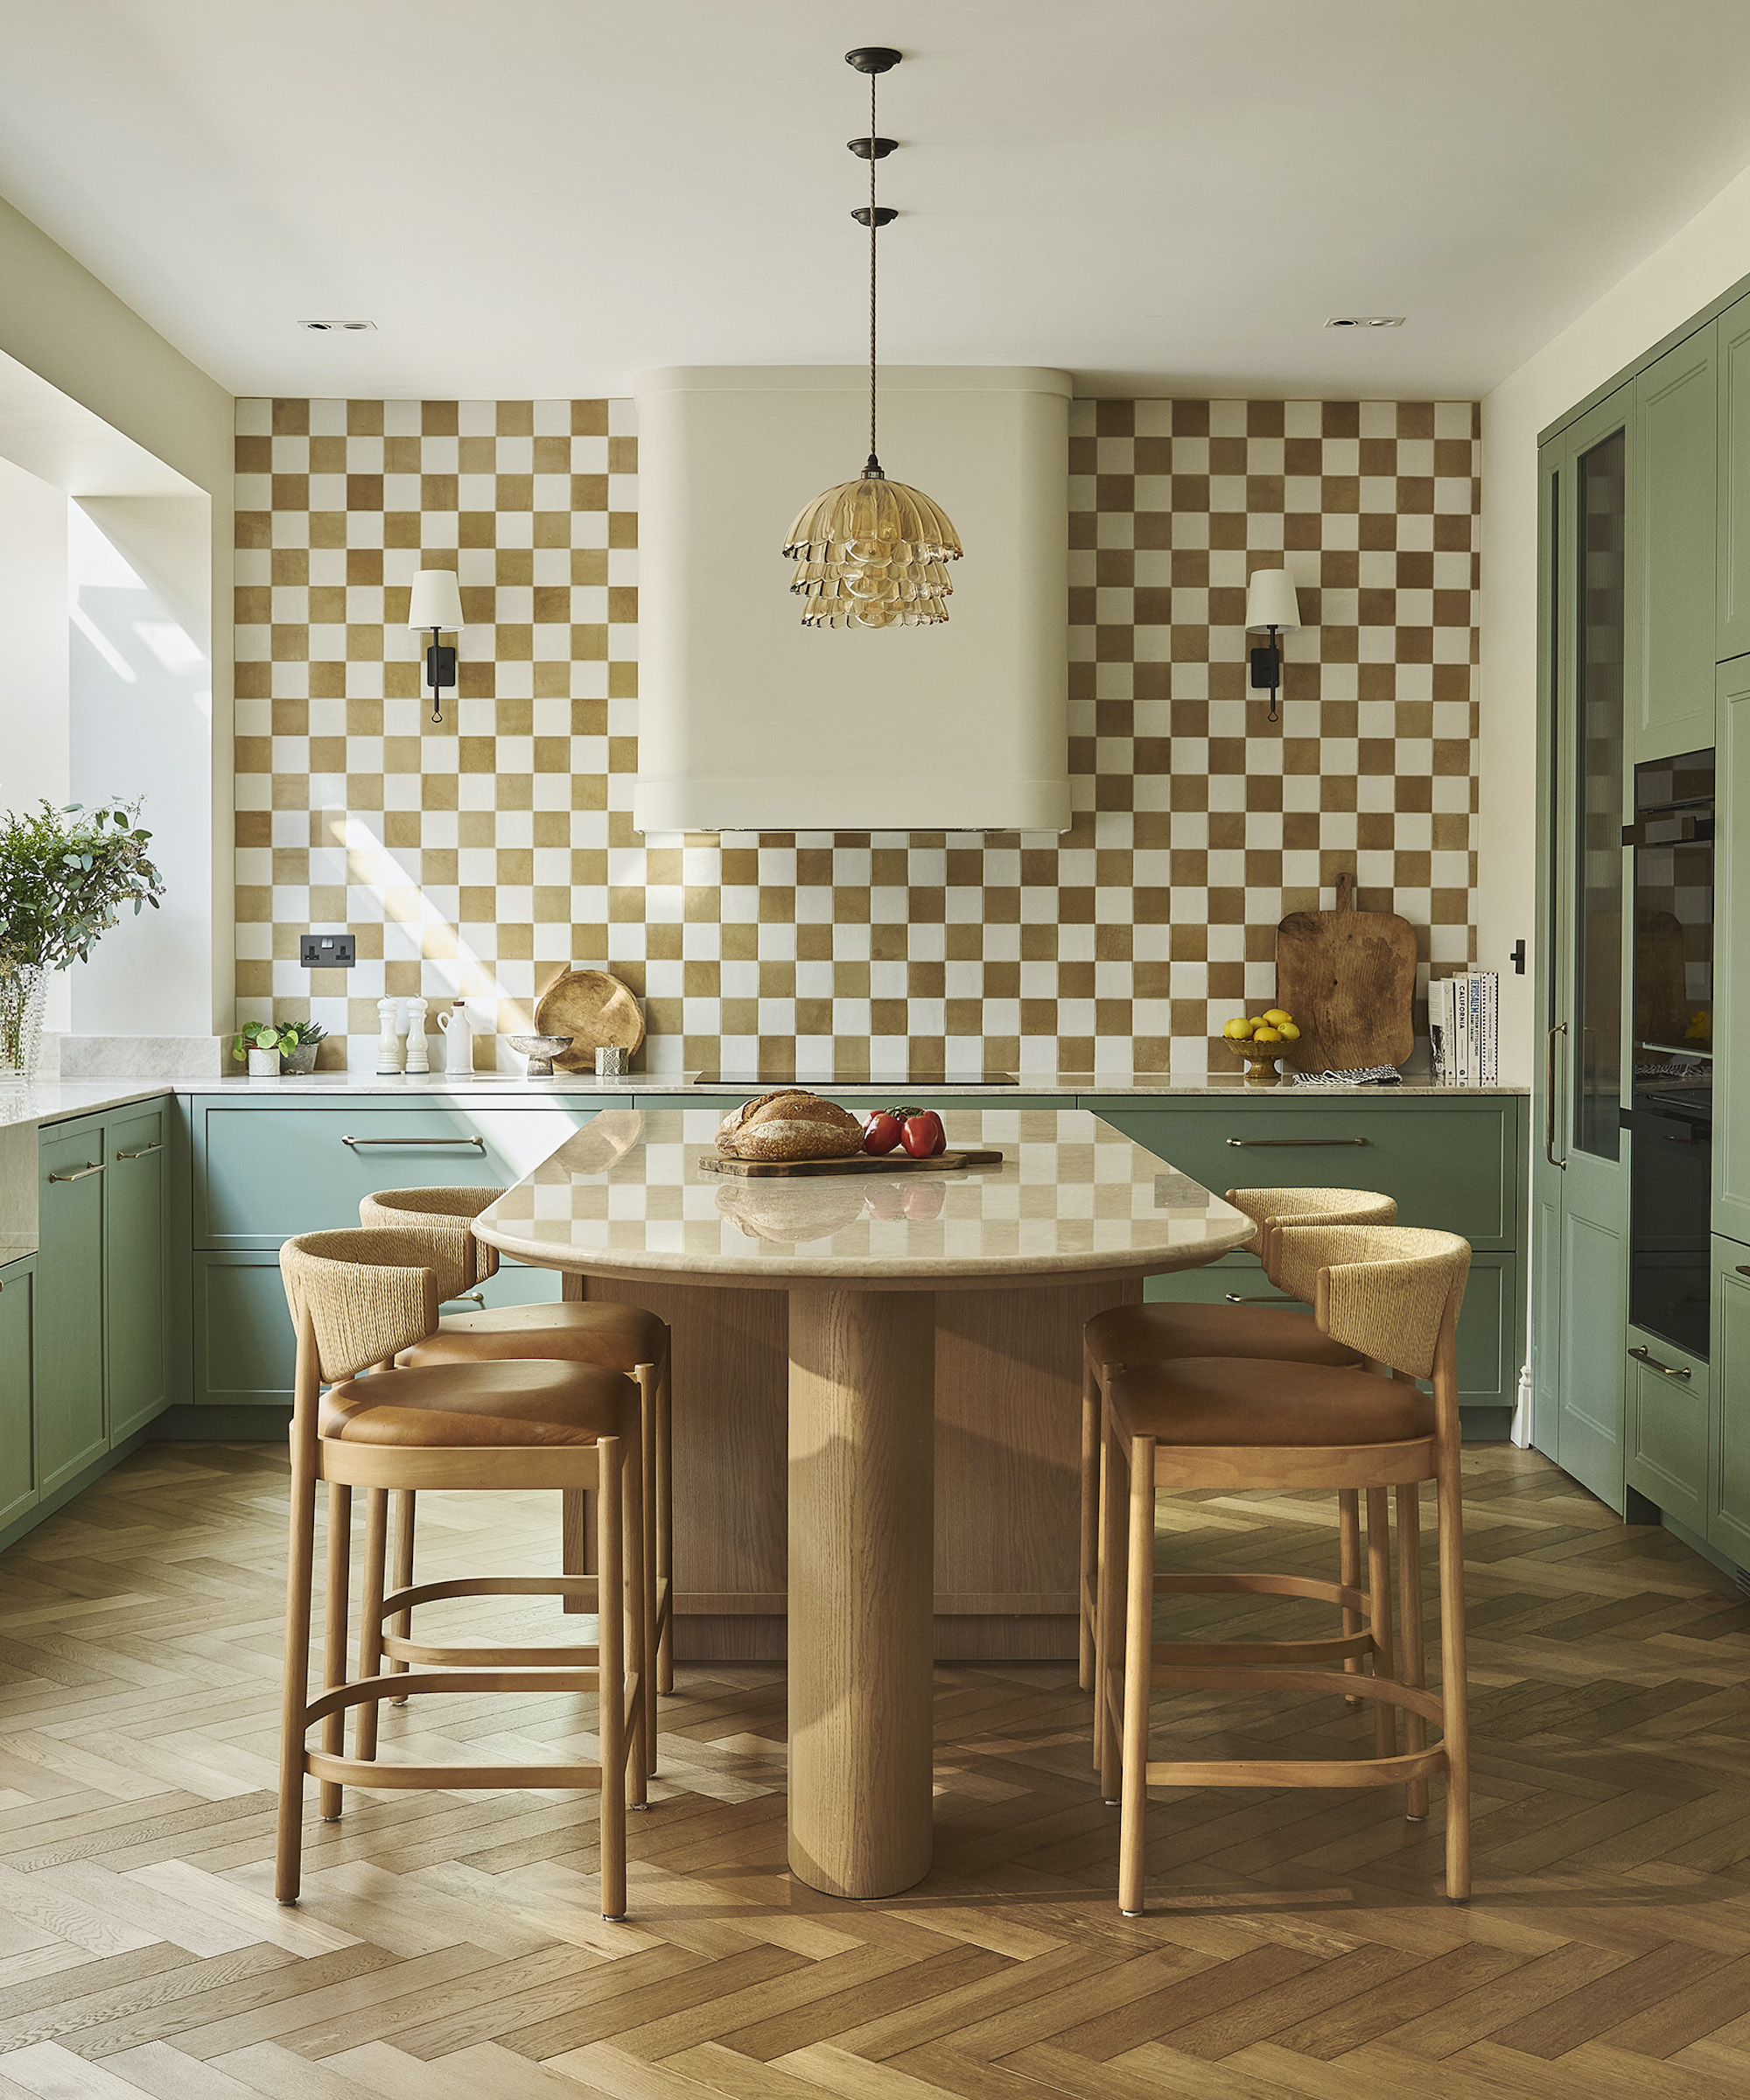
Pattern can come from more than a printed motif. Tile shape, layout and grout all contribute, so a plain rectangular tile in herringbone or a simple square with contrasting grout may already be doing plenty. Natural stone and stone-look backsplash designs can also introduce plenty of pattern through veining – a heavily figured slab can feel just as busy as a boldly patterned tile.
‘The more visual information a kitchen already contains, the more selective I become with the backsplash. It doesn't necessarily need to be plain, but every material should have a clear role,’ says Kanika. ‘If the countertop, cabinetry or flooring is already making a strong statement, I usually want the backsplash to provide balance and give the eye somewhere to rest rather than introduce another competing focal point.’
Texture or Smooth?
Texture can add depth without adding another color or obvious pattern. Rippled glazes, handmade edges, and three-dimensional surfaces catch light differently throughout the day and can make even a single-color backsplash feel much richer. Judge texture at wall scale rather than from one tile, though; something that looks subtle in your hand can feel far more animated across several square feet. And factor in cleaning. Flat glazed surfaces are generally quickest to wipe down, while deeply textured tiles give grease and dust more ridges and recesses to settle into.
8. Lighting and Reflection
Backsplash materials are unusually affected by lighting because they sit vertically, often beneath cabinetry and close to task lighting. A sample viewed flat under showroom lights can therefore look surprisingly different once it is on your wall.
First test your choice in daylight. Daylight changes throughout the day, so compass direction is useful context rather than a color-selection rule. North-facing kitchens tend to receive cooler, more consistent light; south-facing rooms often get stronger, warmer light, while east- and west-facing spaces can change dramatically between morning and evening. Buildings, trees, overhangs and glazing will alter things further.
The most reliable test is the simplest: prop the actual sample vertically where the backsplash will sit and look at it morning, midday and evening. If the kitchen isn’t installed yet, place the countertop sample beneath it too. Upper cabinets also cast shade, so check any material that will extend from a darker area beneath cabinetry into a more exposed section of wall.
Check the Artificial Light
Under-cabinet lighting can change both the color and character of a backsplash after dark. Warm lamps tend to emphasize creams, pinks, browns and golds, while cooler light can bring blue and gray tones forward; strongly colored cabinetry may also bounce color onto a pale surface.
‘Under-cabinet lighting should always be tested with the backsplash material before finalizing, because light skimming down a wall exaggerates everything, from textures and tile edges to grout joints. A handmade ceramic or zellige tile that comes across as subtle in daylight becomes very animated in the evening. That’s not necessarily a problem, but it should be a decision, not a surprise,’ explains Shelly Yoder, Project Designer,Next Stage Design + Build. Ideally, choose the backsplash and lighting together rather than treating them as completely separate decisions.
Consider the Finish
Gloss tile, polished stone, glass and mirror can bounce light around and add depth but remember that reflective finishes show more than light: they also pick up whatever is opposite them. A garden may introduce a green cast, brickwork can warm the color, and dark cabinetry or pendant lights may appear in the surface itself.
They can also show glare, water spots and surface imperfections more readily. Highly polished sheet materials may make an uneven wall more obvious, while smaller-format tile can disguise minor variations in the surface behind. Honed stone and matte tile diffuse light rather than creating clear reflections, which can make them appear softer and more consistent under strong lighting.
9. Think About the Details
This is where an otherwise simple backsplash can become technically busy. Before ordering material, mark every outlet, switch, window, hood, shelf, light, and plumbing fitting on the elevation. The more patterned or large-format the surface, the more important that planning becomes.
Plan the Interruptions
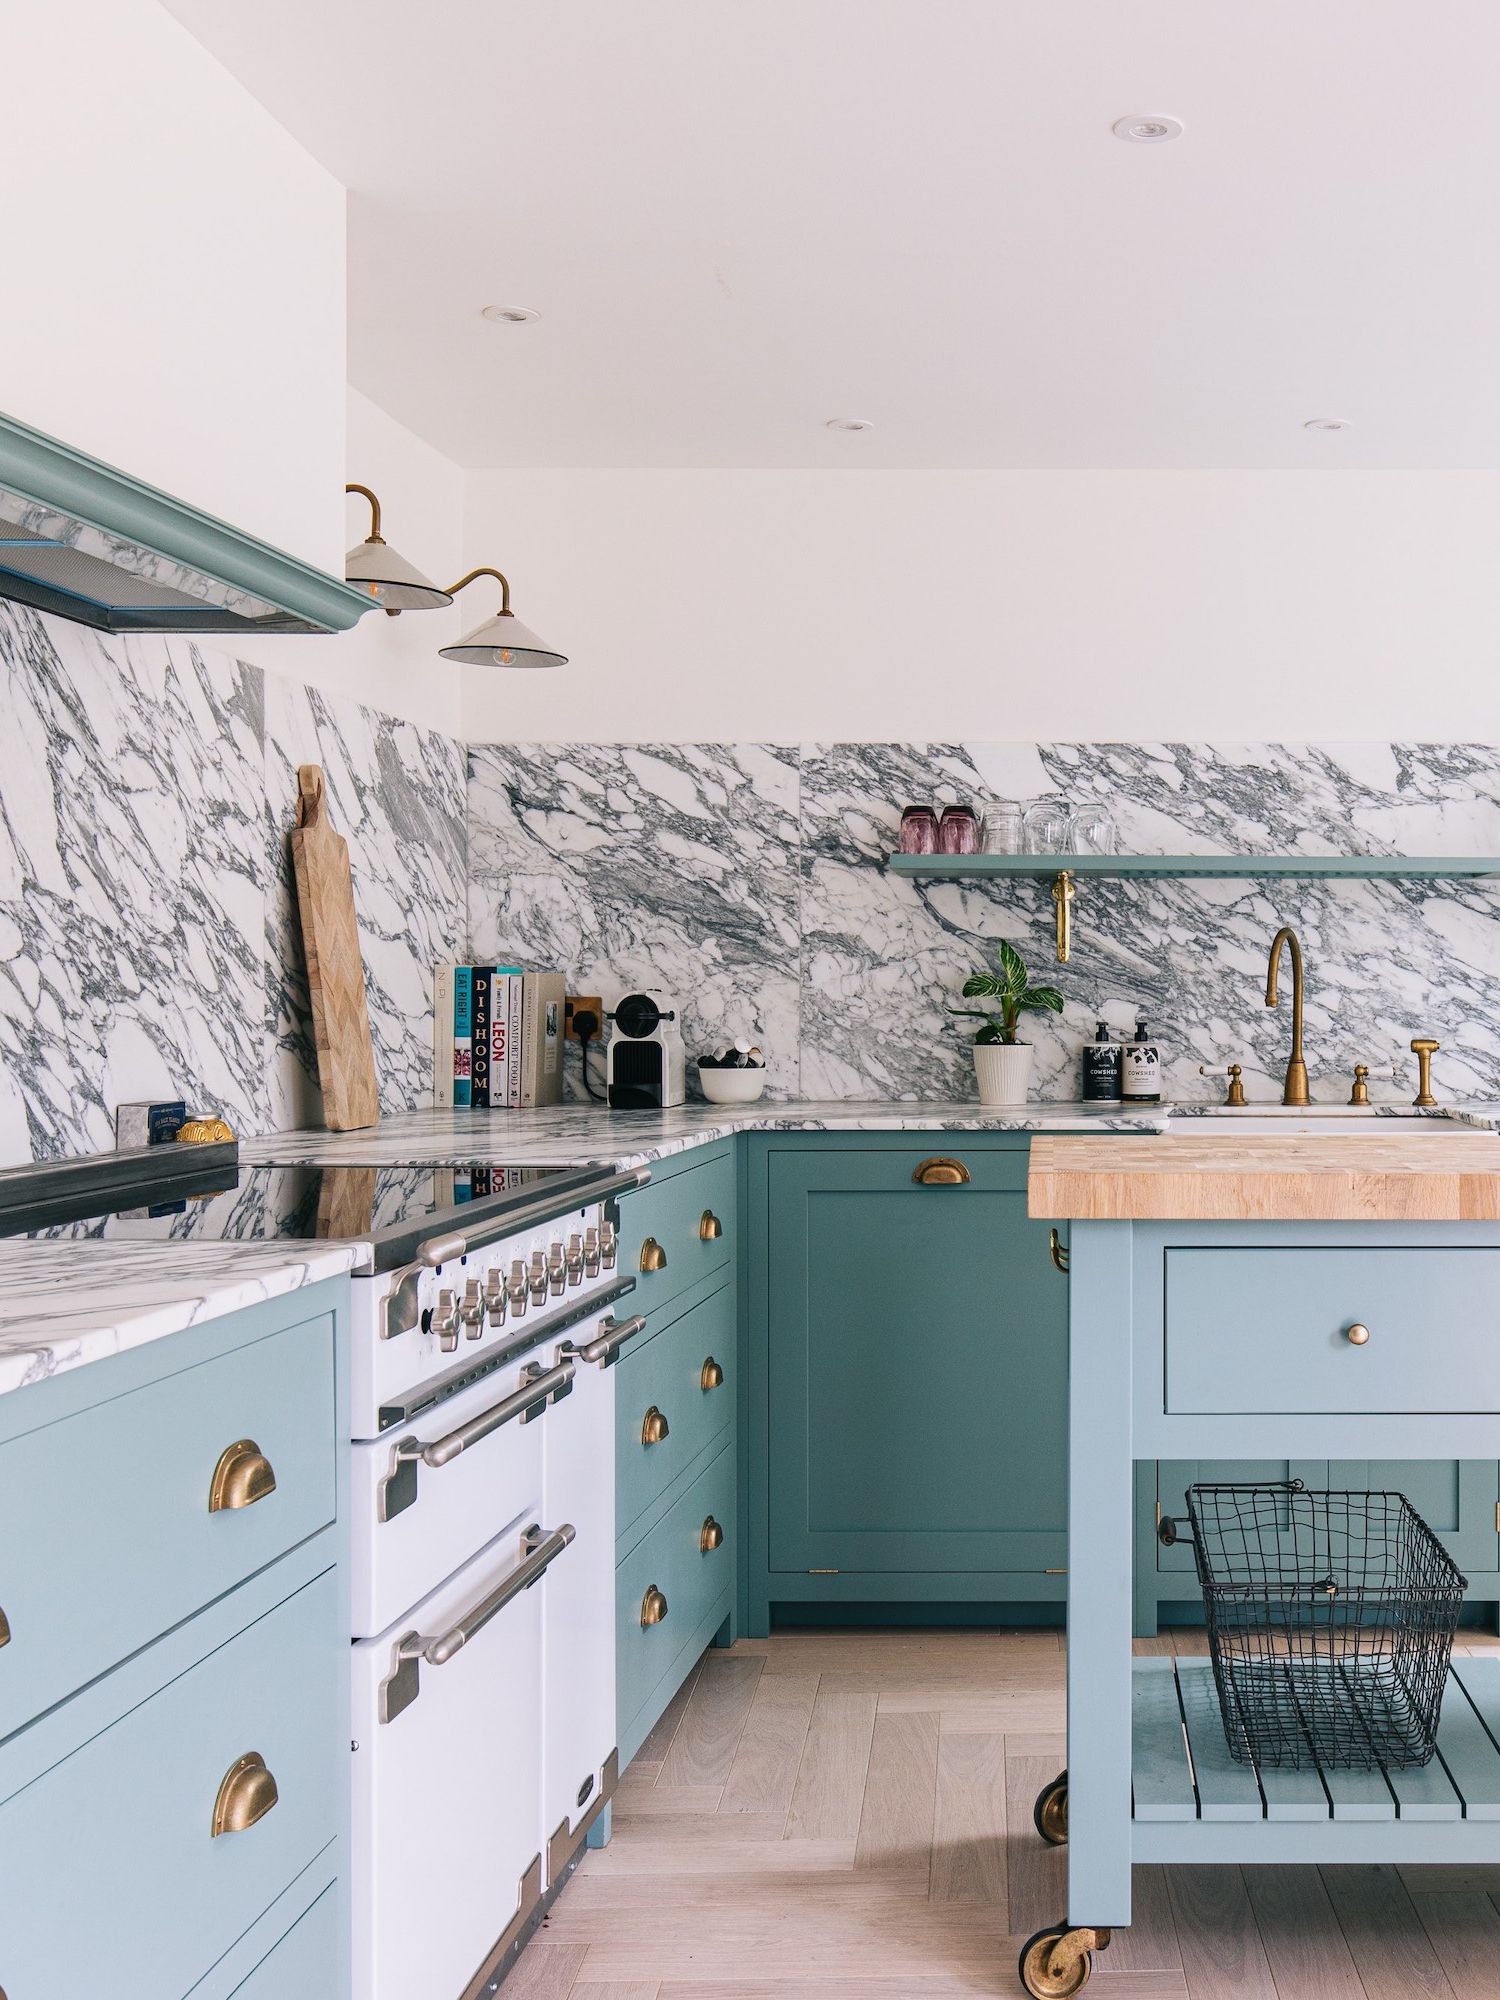
Outlets and switches can cut awkwardly through tile layouts, mosaics and veined slabs, so coordinate their positions as early as possible. If the electrical plan is still flexible, ask whether outlets can be aligned more neatly, tucked beneath upper cabinets using an approved system or positioned where cuts fall naturally. Electrical codes always take priority, of course. Cover plates matter too: standard white plastic will be far more noticeable against dark stone than pale ceramic.
‘Outlets and switches should be coordinated as early as possible, ideally while the backsplash is being designed rather than after the tile has been selected,’ says Seth Ballard, Founder & Principal Architect, Ballard & Mensua Architecture. ‘Early in my career, I learned this lesson the hard way: an outlet placed in the middle of an otherwise beautiful tile pattern can completely disrupt the design. Whenever possible, we move outlets to a less visually intrusive location, such as directly beneath the wall cabinets, so the backsplash can read as a cohesive composition.’
The same applies to sconces, pot fillers and wall-mounted faucets. Mark their centerlines against the planned tile or veining so they don’t land awkwardly on a grout joint or key piece of pattern.
Coordinate What Sits on the Wall
Decide early whether the backsplash will stop at, run behind or continue around a range hood, and check the appliance manufacturer’s heat and clearance requirements before finalizing the detail. Also look at how the range or cooktop meets the wall: gaps and ledges can trap food and make cleaning harder.
Shelves and wall-mounted fittings may need structural backing, while faucets and pot fillers can require waterproofing and plumbing behind the finished surface. Cable routes for sconces and integrated lighting should be sorted before the wall is tiled, too.
Plan the Edges
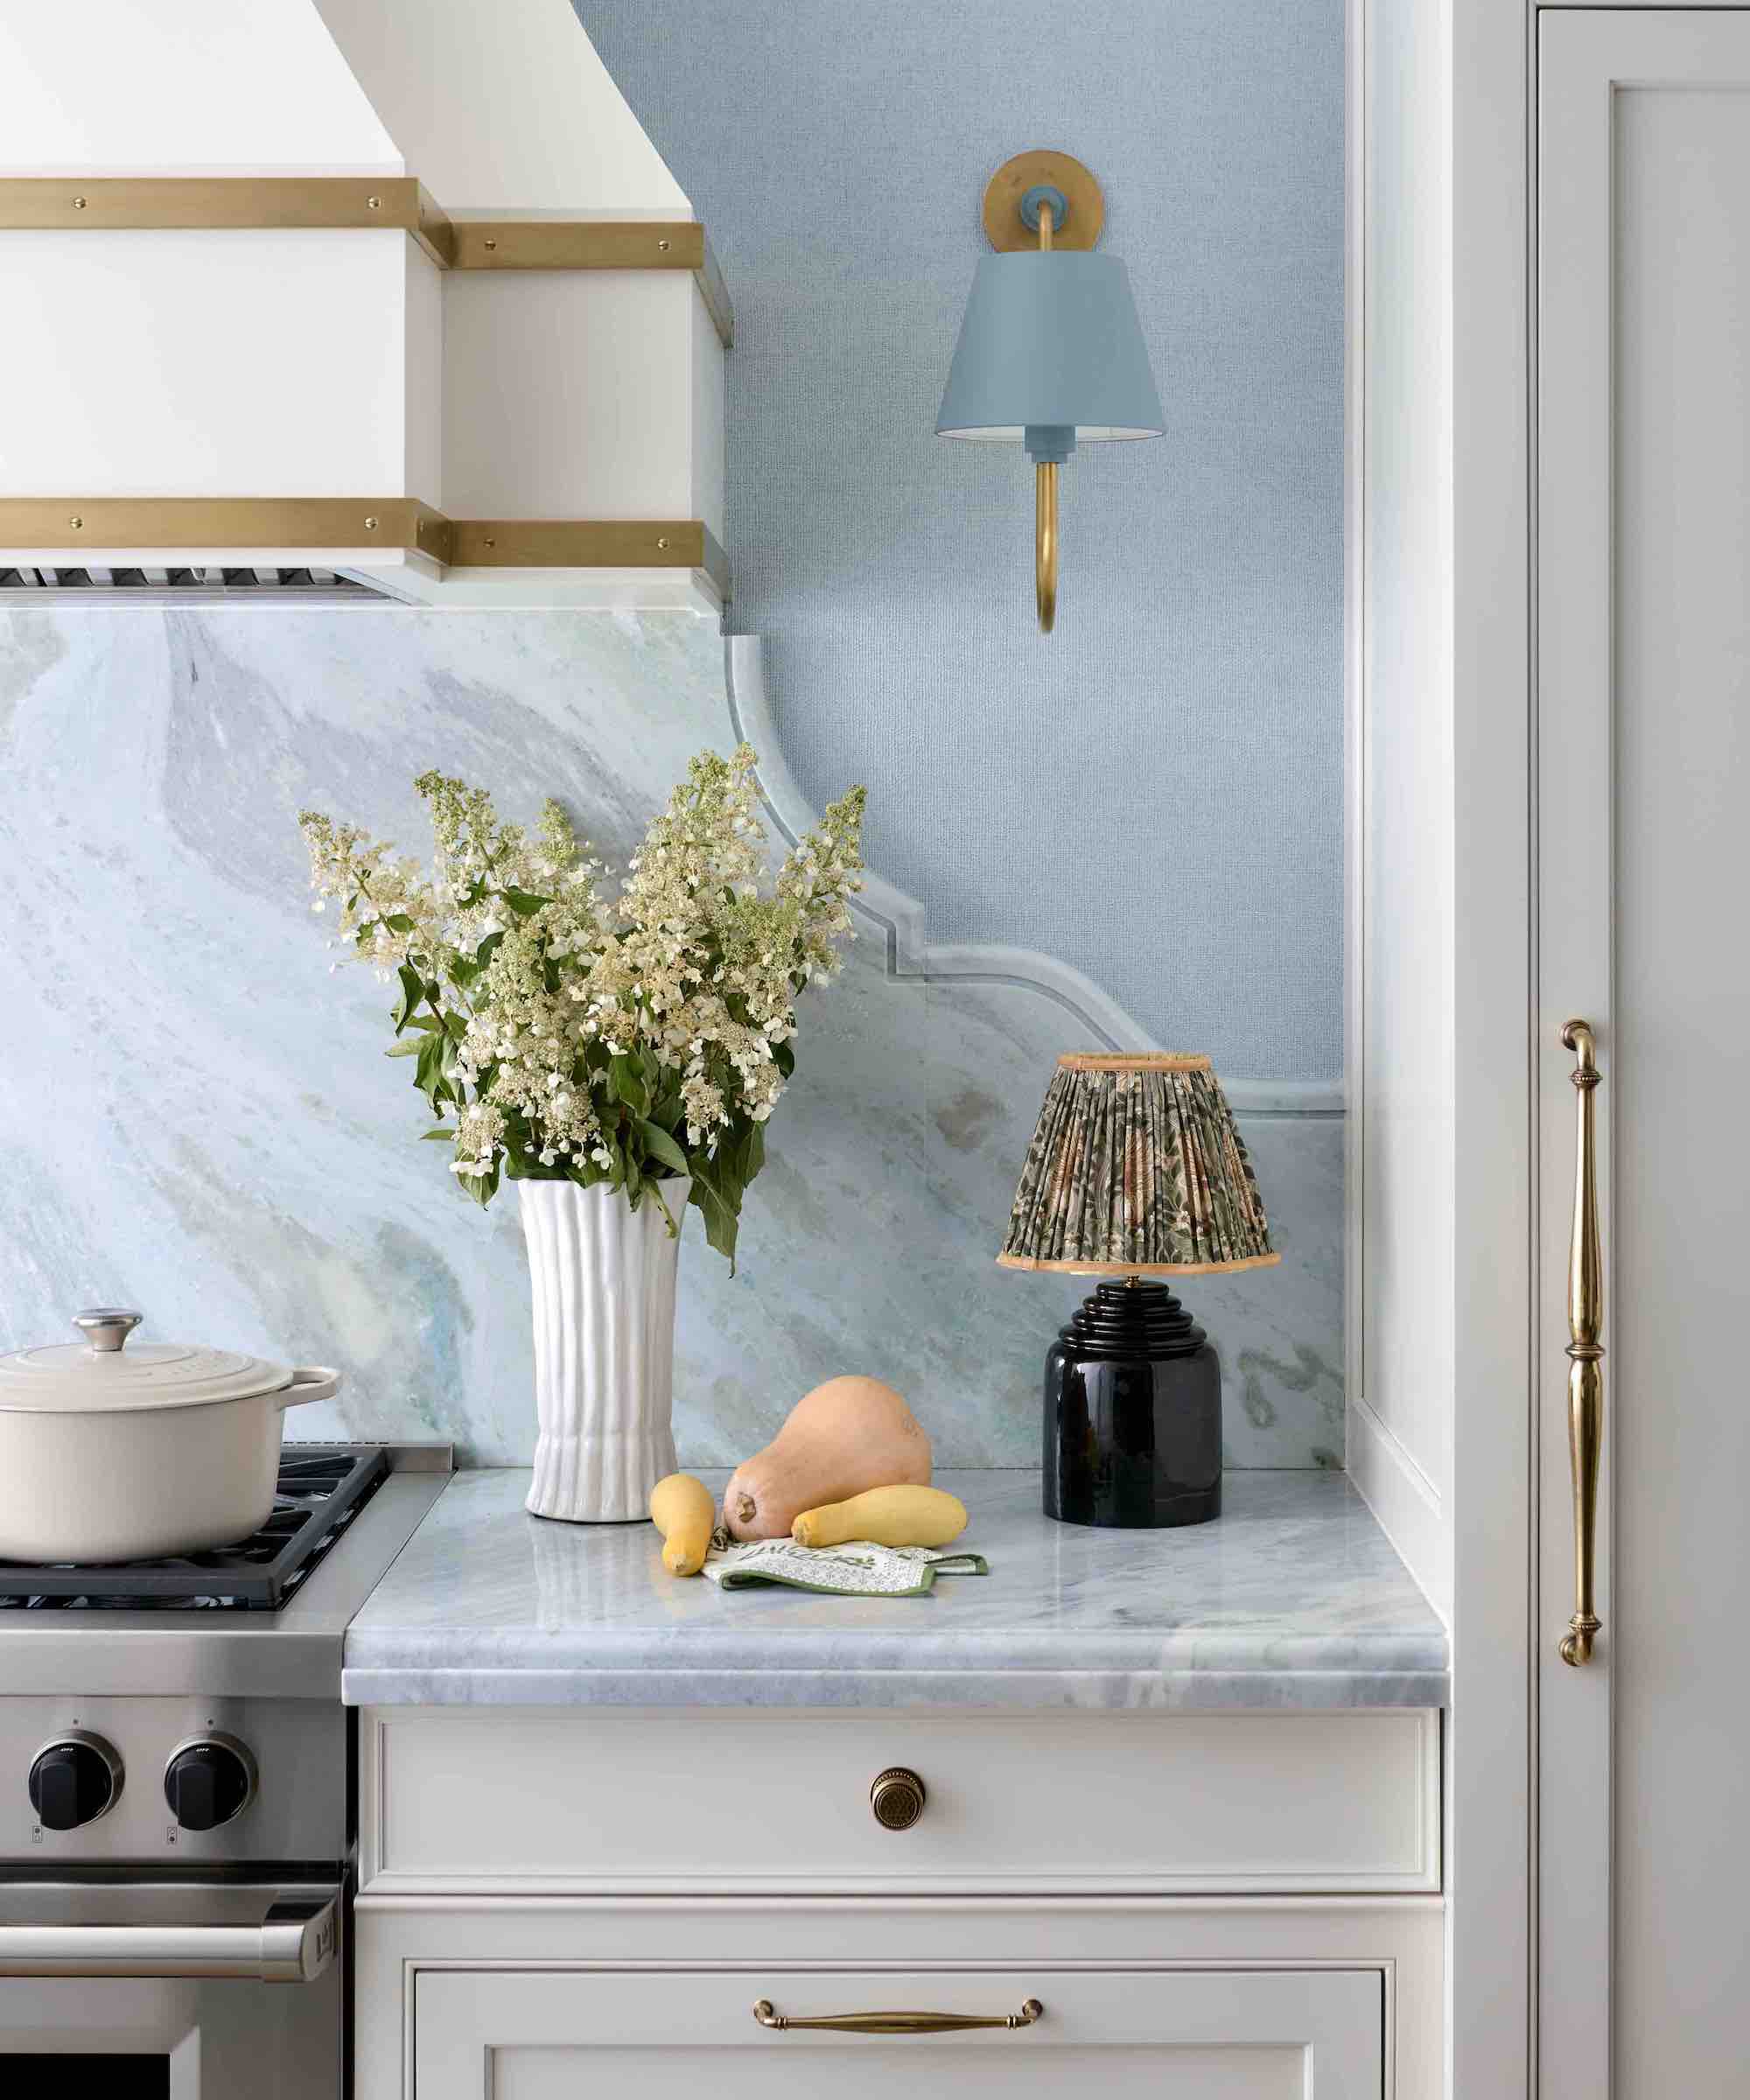
Work out exactly how the backsplash finishes around windows, corners and adjoining materials. A smooth connection where the backsplash edge is hidden underneath a windowsill or wall cabinet is the dream. Unavoidable exposed edges need a bit more thought. Some tile ranges offer bullnose or matching border trims; metal tile profiles give a crisp finish, while stone and slab can often be fabricated with finished edges.
Recessed niches need particular thought because they introduce extra corners and edges. Small-format tile or mosaic usually handles this geometry more easily than very large tile or slab, which may need more fabrication. Whatever happens, don’t leave these junctions until installation and hope the installer can make a raw edge disappear.
10. Maintenance and Cleaning
By this point you should already know how your chosen material needs to be cleaned. The bigger question is whether that level of care feels realistic for your kitchen. A backsplash that needs little more than routine wiping is a different commitment from one that may need sealing, specialist cleaning products or more attention to grout and textured surfaces.
Find out what the material needs beyond everyday cleaning before you buy. Does it require sealing, and if so, how often? Are there cleaners you need to avoid? Will grout need periodic attention? Ask the supplier for care instructions for the exact product rather than relying on generic advice for ‘stone’ or ‘tile’. And don’t confuse sealed with stain-proof or nonporous with indestructible. Treatments can make a surface easier to live with, but they don’t remove the need to look after it.
Match the Maintenance to the Location
Maintenance also depends on where the backsplash sits and how hard that part of the kitchen works. ‘Low maintenance and no maintenance are not the same thing, and the distinction matters most directly behind a range. I always ask clients what’s going on at each section of the wall, because a natural stone or zellige tile that’s perfectly easy to live with on a quiet run can be genuinely demanding behind a high-output cooktop,’ explains Shelly Yoder. ‘Grease can penetrate unsealed stone and collect in the texture of handmade tile in ways that a smooth porcelain simply won’t. The material choice should follow the location, not the other way around.’
Plan for Repairs
Think about repairability as well as cleaning. Individual tiles and grout can usually be dealt with locally, while damage to a large slab or sheet may be more difficult to disguise or replace. If you’re using tile, keep a small quantity after installation. Glaze, color and dimensions can vary between production batches, and the exact design may disappear from the range altogether. A few spare tiles tucked away now can save a lot of hunting later.
11. Cost and Budget
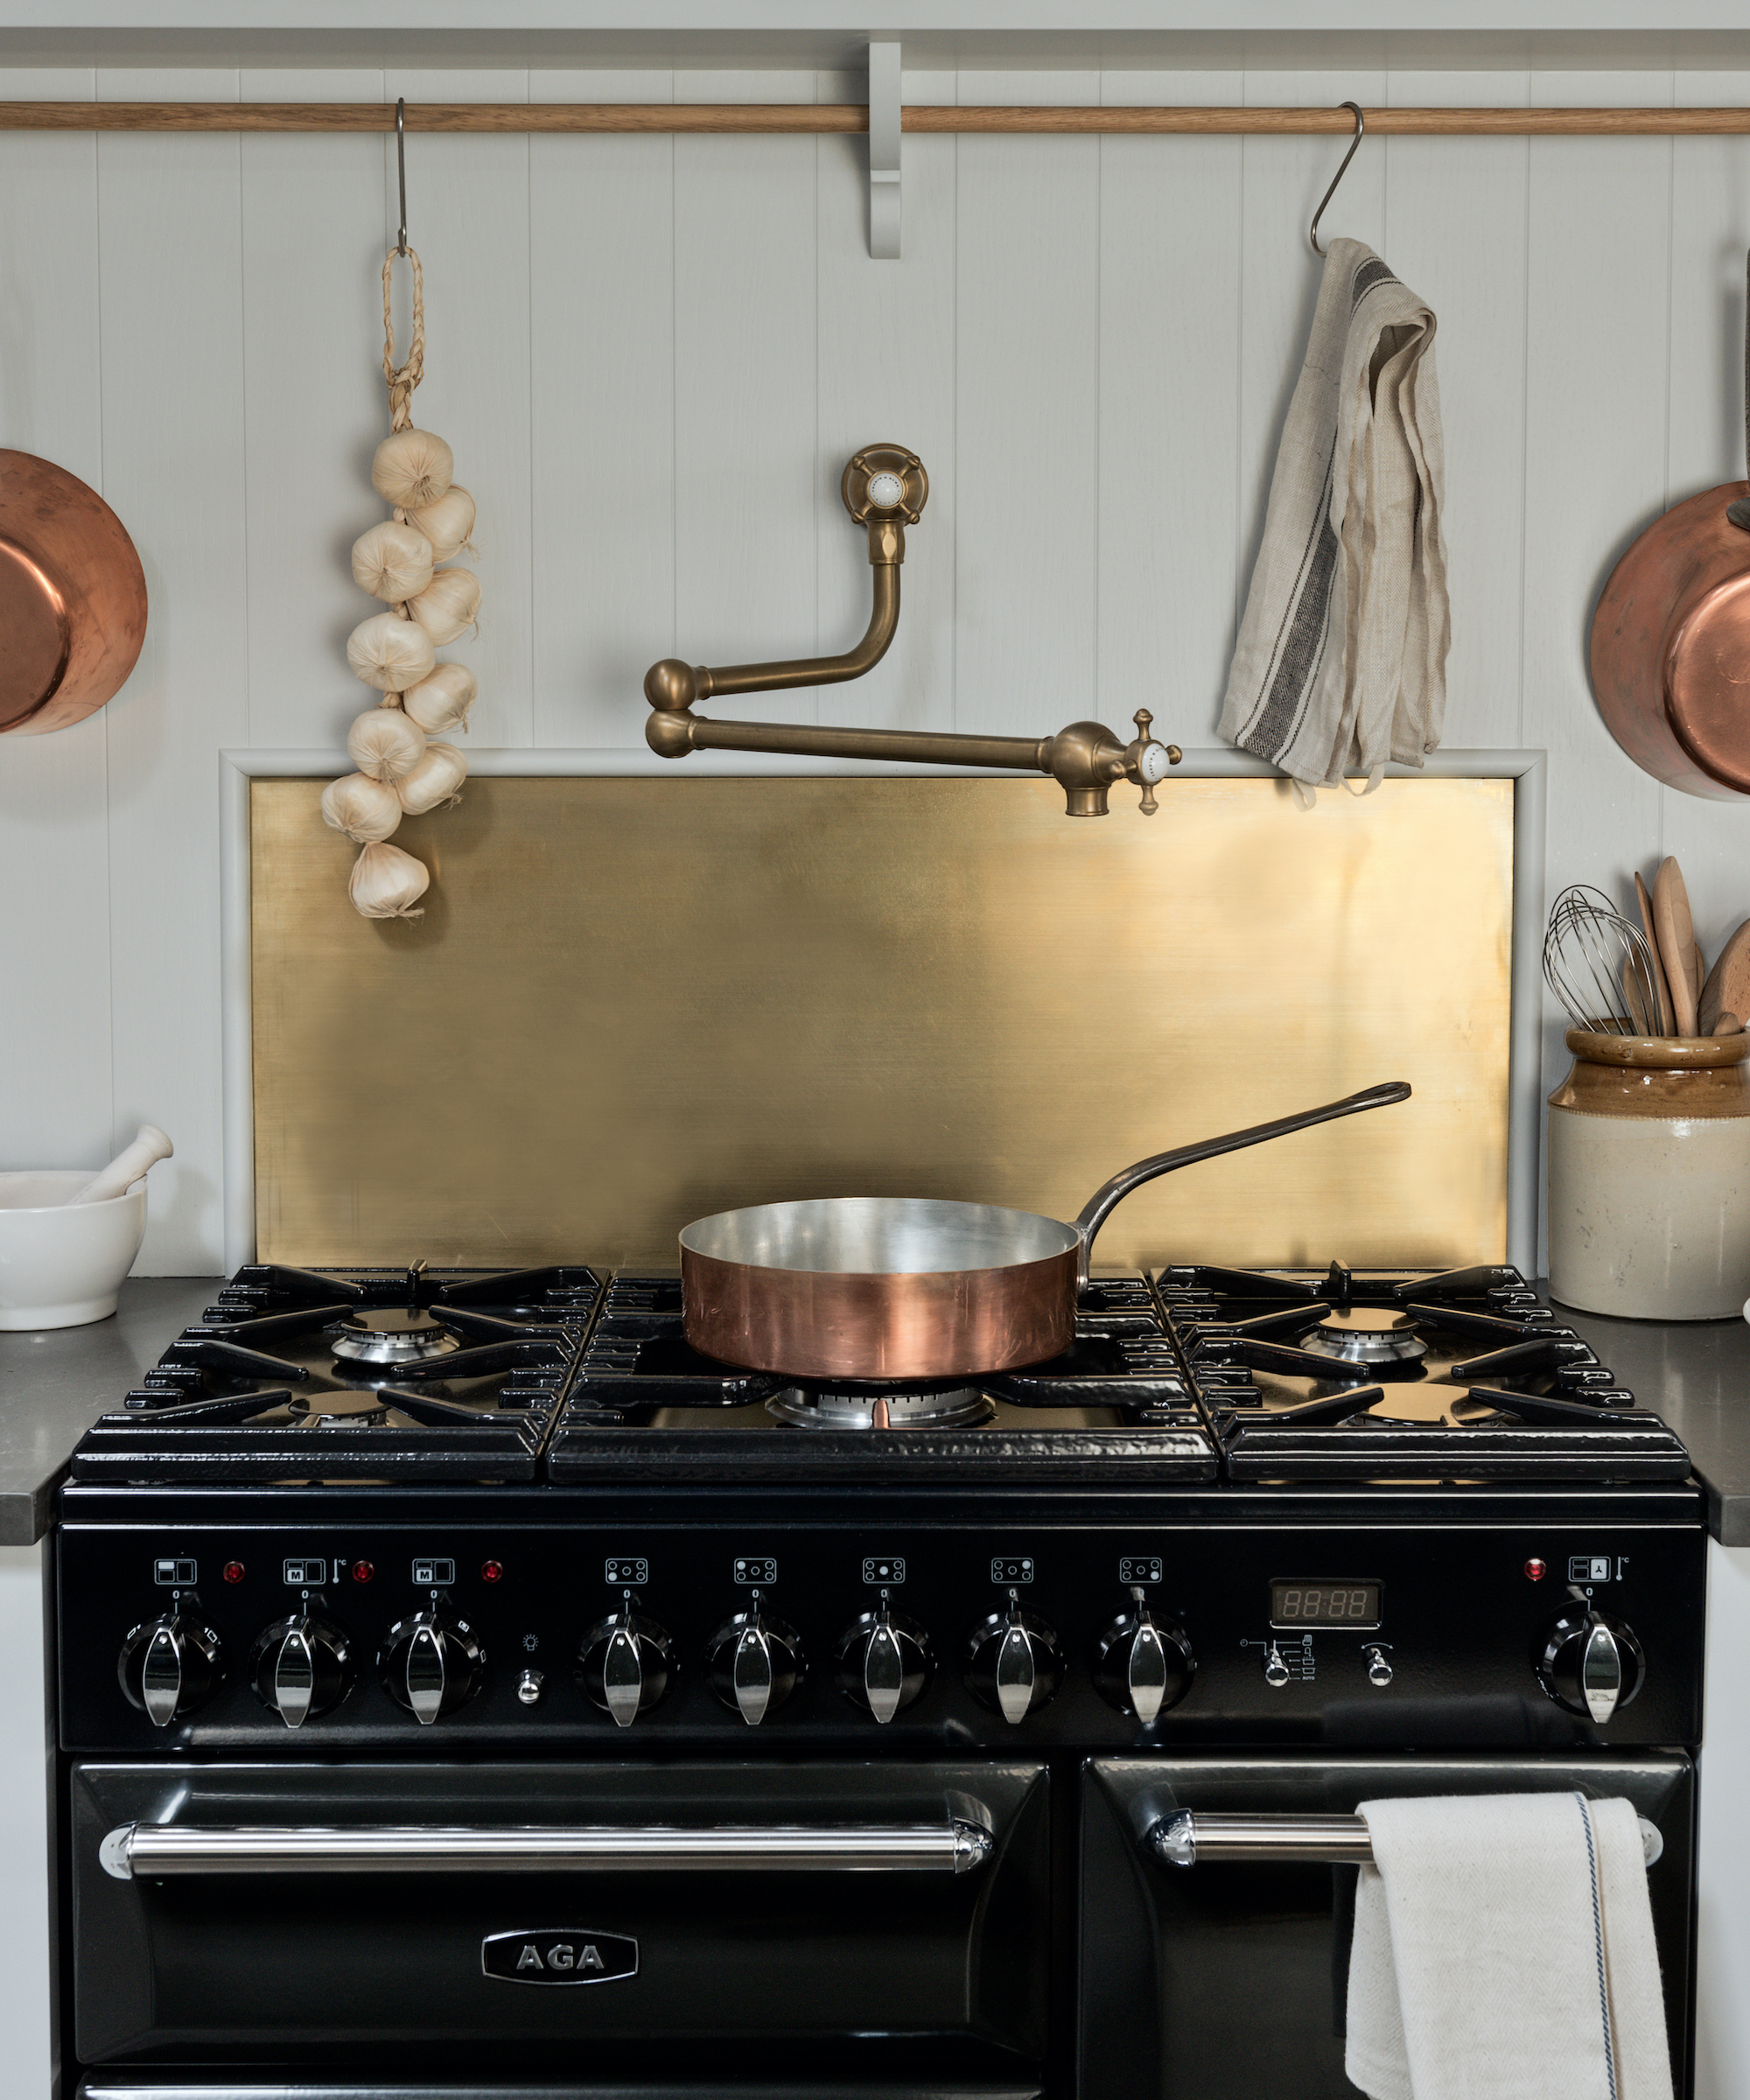
Backsplash budgets can be deceptive. Because the area involved is relatively small, a premium material may be more achievable than expected, while a seemingly inexpensive option can climb quickly once installation is factored in. Always get an installed quote before ruling anything in or out. ‘Price per square foot only tells part of the story because the material itself is often not the biggest line item once fabrication, specialty installation, and wall prep are factored in,’ explains Cathleen Gruver, Founder of Gruver Cooley.
‘Large-format stone slabs, book-matched marble, or intricate mosaic patterns all require more skilled labor and longer installation timelines, which adds up quickly. Grout lines, edge profiles, and whether the wall needs leveling or waterproofing beforehand are all costs that tend to catch homeowners off guard when they're comparing materials early in the process.’
As a broad benchmark, HomeAdvisor’s 2026 US data puts a typical professionally installed backsplash at around $480 to $1,500, with an average close to $1,000, although material, layout, preparation and removal can push that figure considerably higher.
Herringbone, mosaics, borders and mixed tile sizes all require more setting out and cutting than a straightforward stacked layout. The wall itself can also complicate matters: outlets, windows, corners and short returns add labor even when the total square footage is modest. With slab and other large-format materials, much of that cost shifts into templating and fabrication. Every outlet, switch and fixture becomes a cut-out, while seams, edge finishing and vein matching may require additional work.
If the budget won’t stretch to a premium material everywhere, use it where it will have the most visual or practical impact. A striking stone might be reserved for the range wall, with a simpler surface elsewhere, or money could go toward better grout, edge detailing or wall preparation to elevate an inexpensive choice.
Simplifying the installation is another way to save. A modest tile in a straightforward layout may cost less overall than an inexpensive tile laid in an intricate pattern with lots of cutting.
12. Installation: What to Know Before You Commit
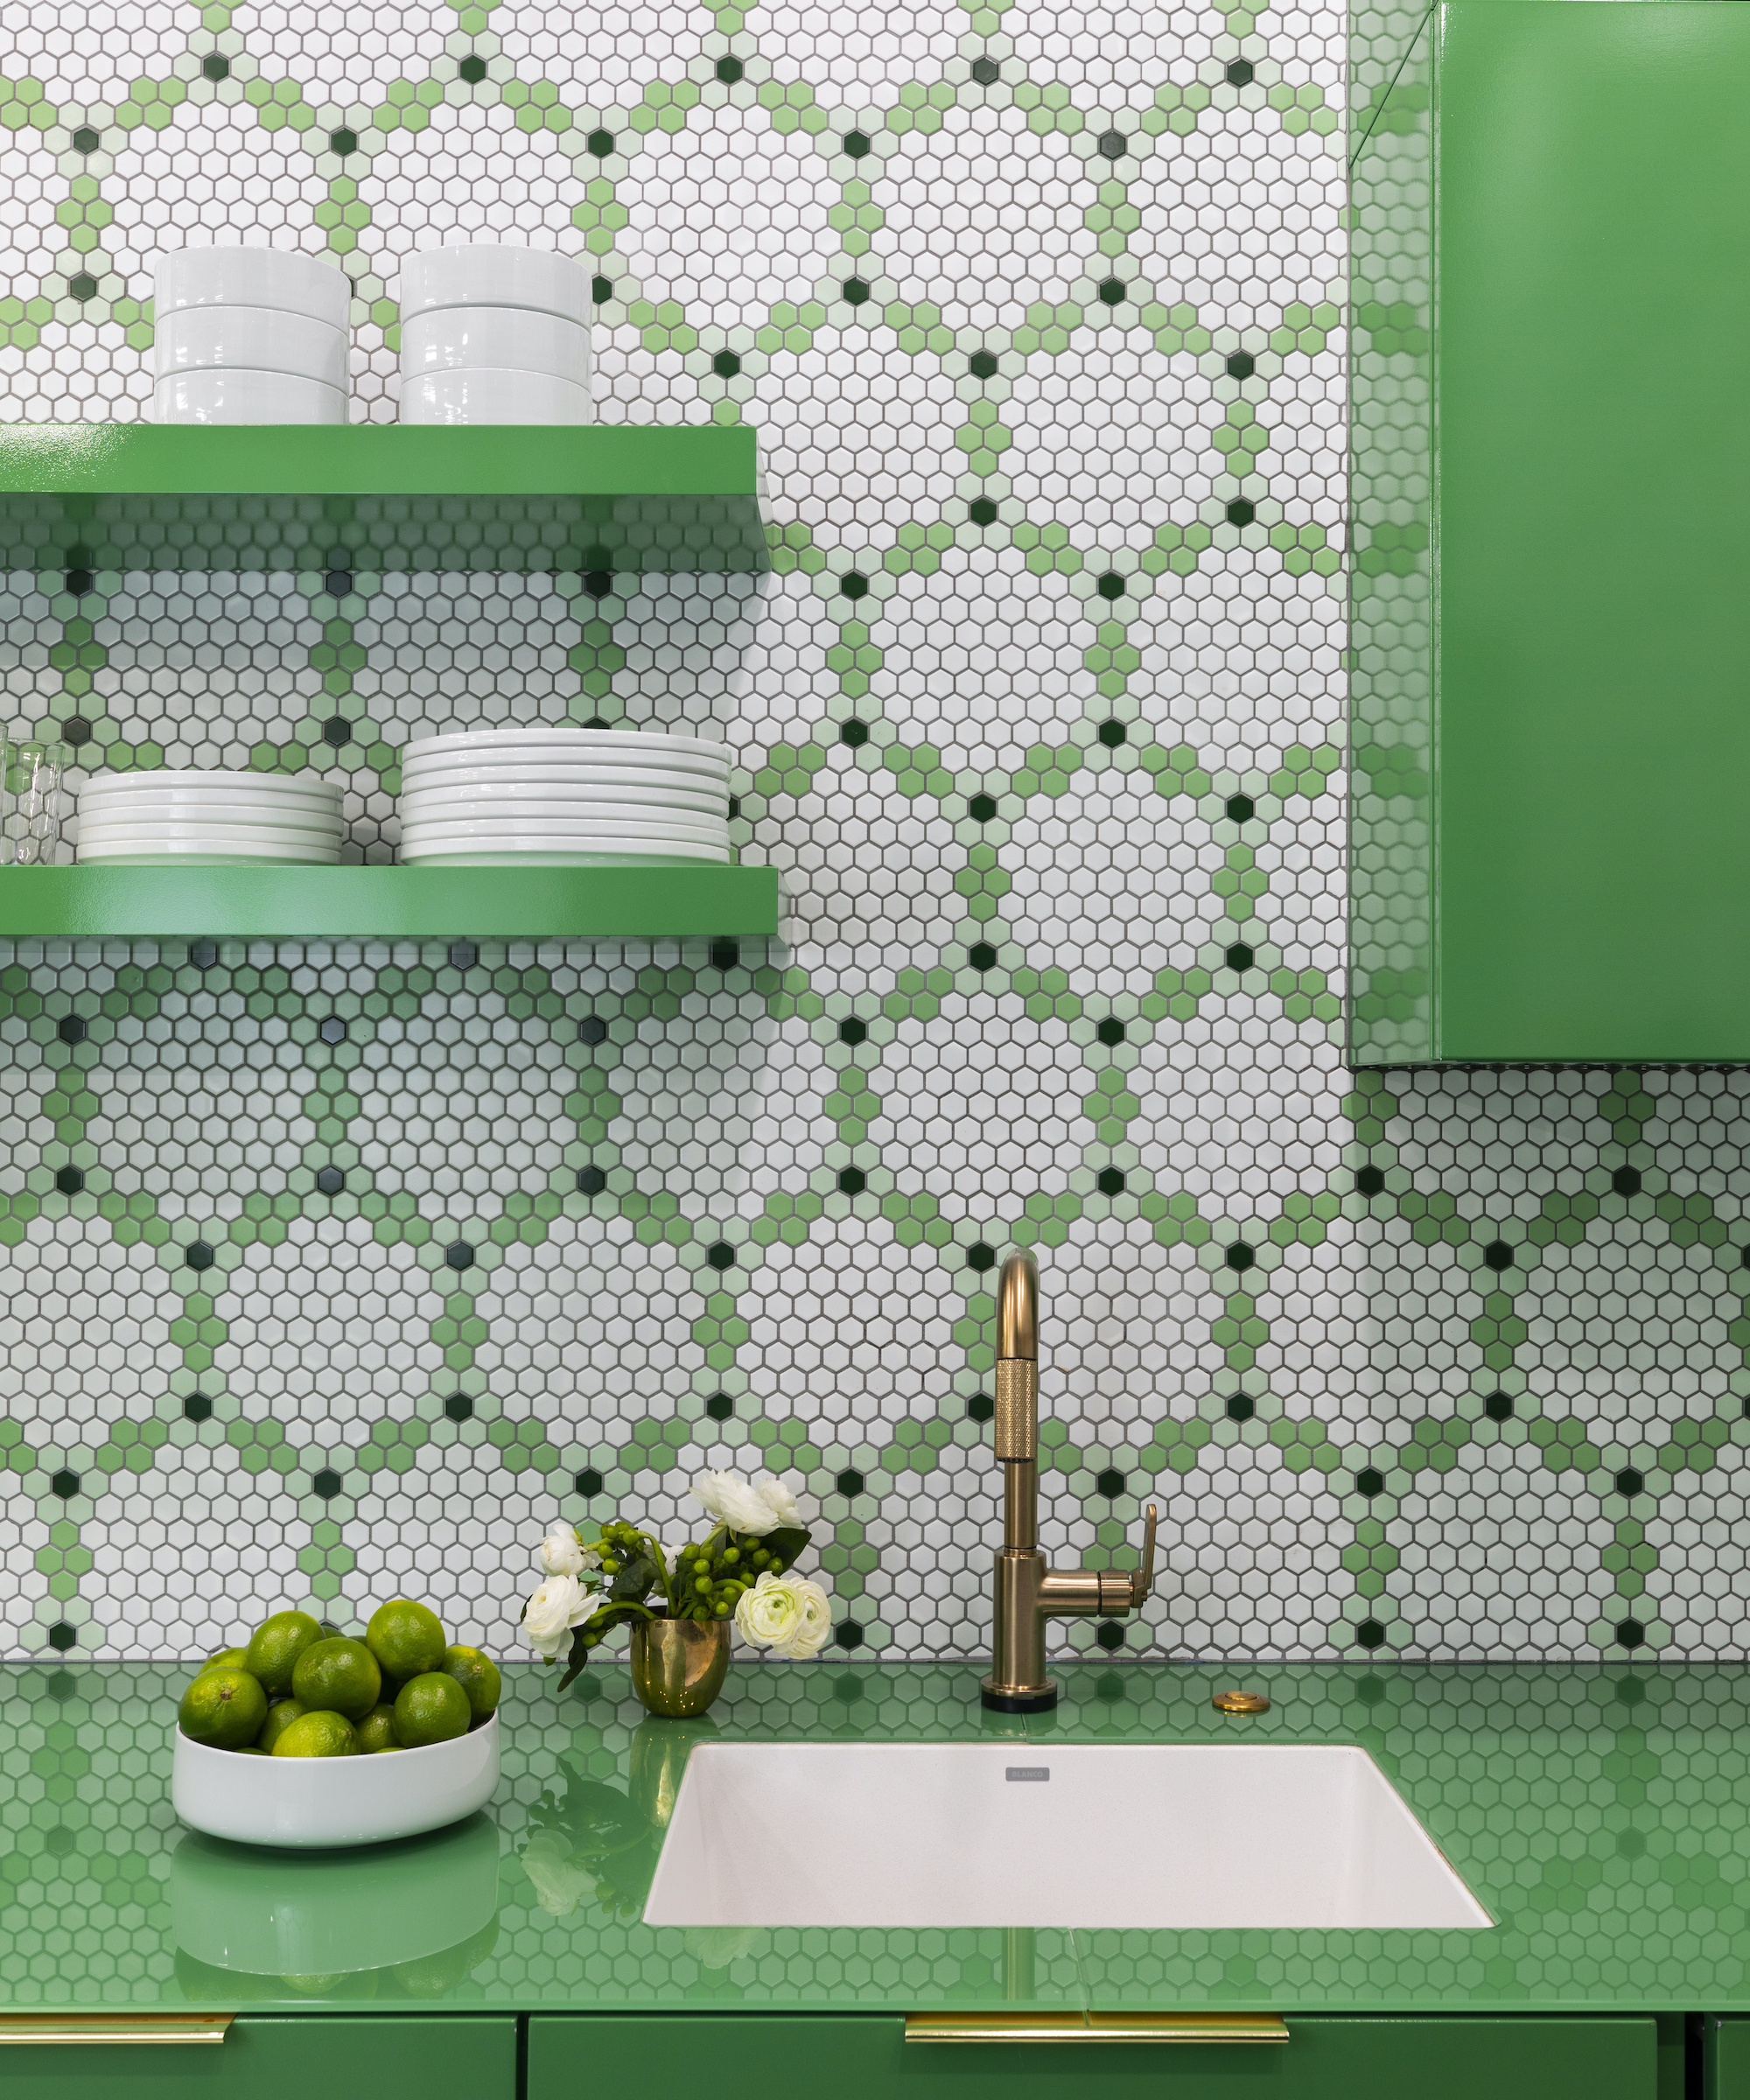
You don’t need to know how to install a backsplash yourself, but it helps to understand what needs sorting before work begins. Good installation starts well before the first tile or slab goes on the wall, particularly with large-format, handmade or patterned materials.
The finished backsplash will only be as good as the surface behind it. Walls need to be sound, stable and sufficiently flat for the chosen material; large-format tile and slab are especially unforgiving of bumps and dips. If an old backsplash is being removed, allow for the possibility that the wall will need repairing or leveling before anything new goes up.
For slab and other made-to-measure surfaces, wait until the relevant fixed elements are confirmed before final templating. Likewise, order enough tile for cuts, wastage and any natural variation. Handmade tile and stone may need extra material so the installer can blend color and pattern across the wall rather than simply working through one box at a time.
Agree the Layout Before Anything Is Fixed
Setting out determines where full tiles, grout lines and cuts will fall, so don’t leave it entirely until installation morning. Ask where the pattern will start, how it will relate to the main focal area and what sort of cuts will be left at corners, windows and cabinetry.
This matters most with directional layouts such as herringbone, decorative or handmade tiles, mosaics and large formats, where a small shift in the starting point can noticeably change the finished result.
‘Any professional tile installer knows how to locate the precise middle of your focal point before applying any adhesive. The precision in planning will ensure that you have symmetrical cut tiles on both sides of your wall,’ says Mike Belk.
The adhesive, grout and fixing system also need to suit the actual tile and substrate. Glass, stone, porcelain and ceramic are not automatically installed in the same way, and pale or translucent materials can sometimes reveal what is behind them.
Use the Right Installer
A simple ceramic tile backsplash on a sound wall may be within the scope of a confident DIYer, but large porcelain panels, slab stone, glass sheets and intricate layouts require very different tools and experience.
‘An experienced installer can often make even a modest material look custom and high-end. The wrong installer can make even an expensive backsplash look cheap,’ say Nancy Vu. ‘That’s why we always suggest that homeowners ask installers, “Where will you start the layout, and where will the cut pieces go?” A good installer should be able to explain this clearly before any work begins.’
Finally, ask how long the installation needs to cure before cleaning, sealing or exposing it to regular kitchen use. Adhesives, grout and sealants all have their own timings, and looking dry isn’t necessarily the same as being ready.
A backsplash may be a relatively small part of the kitchen, but you look at it every single day, so it’s worth choosing one that makes your heart sing. Get the practical bits right first, then let color, pattern and texture do the fun part. For more inspiration, our guide to kitchen backsplash ideas is packed with ways to make this busy bit of wall look brilliant.
The Homes & Gardens Library is your definitive guide to timeless design wisdom. From choosing the perfect sofa to mastering the fundamentals of layout, each piece in the series draws on expert insight to guide you through the key principles of interior design. Thoughtfully curated yet easy to digest, it’s the essential reference for anyone looking to create a home that is beautiful, practical, and enduring
Love beautiful design ideas, expert advice, and inspiring decor trends? Sign up for our newsletter and get the latest features delivered straight to your inbox.